
Integrating Eloqua with Workfront
This article will teach you about how to integrate Eloqua with Workfront.
Workfront is a web-based work management and project management software that features enterprise work management which is used for:
- issue tracking
- document management
- time tracking
- portfolio management
It can be integrated with Eloqua to allow you to automate certain tasks during campaign development when using Workfront for campaign delivery. For more information about Workfront please visit their website.
Before you begin your Eloqua / Workfront integration you need to build a workflow that maps how you have set up Workfront for delivering Eloqua campaign assets to certain parts of Eloqua. Once you have this map in place you can start to look at building out your Eloqua Workfront integration.
For the purposes of this tutorial we will use the Eloqua Workfront workflow below.
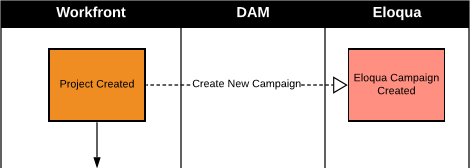
- A campaign is created in Workfront
- Add Eloqua custom form (This tells fusion an Eloqua project will be necessary)
- Once set to current, a campaign is created in Eloqua
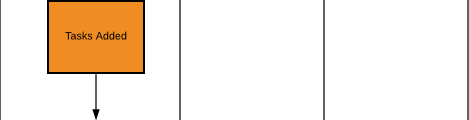
- Tasks are added to the Workfront project
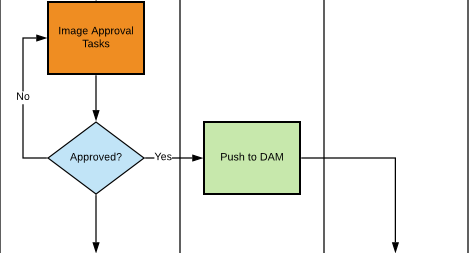
- Once complete, there are a set of tasks dedicated to proof approvals
- The proofing of the images are completed within Proof and marked as approved
- Once approved, a custom form is added by Fusion with the necessary DAM metadata needed
- User provides the required metadata
- Document Owner pushed to DAM
- Updates DAM Asset Expiration Date
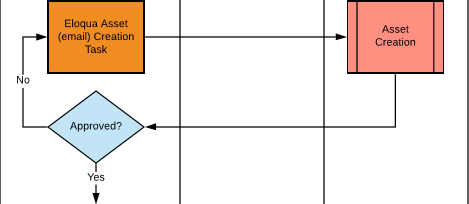
- Campaign is closed in Workfront
- Campaign metadata is updated to indicate project has been completed
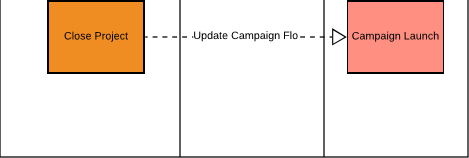
- The user now creates the asset in Eloqua, such as an email or landing page
- The proofing of the asset is completed within Proof and marked as approved (Eloqua public link is used in proofing workflow)
- Once approved, approval metadata related to each asset is added to the campaign in Eloqua indicating approved assets
The first thing you need to do to connect Workfront to Eloqua is ensure that your Eloqua dev has the right level of access to Workfront. You will need to get an account setup.
Login to Workfront Fusion (https://designer.ui.fusion.workfront.com/login) and click on settings.
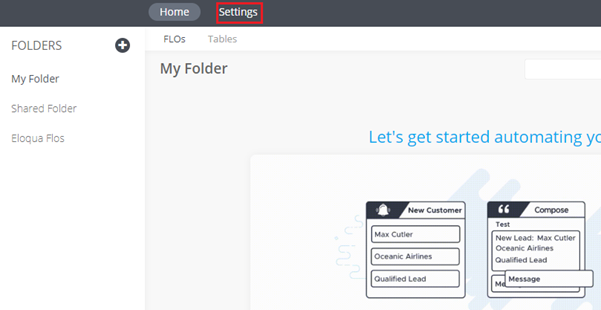
You will need to set up both the Workfront tech and your chief Eloqua dev as administrators.
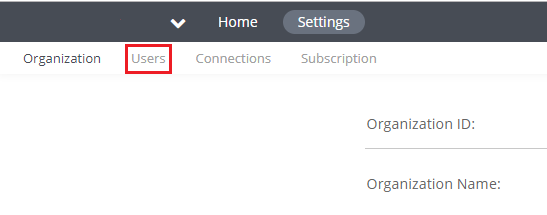
Click on Users.
Now enter the email address and type a message to the person you want to setup.
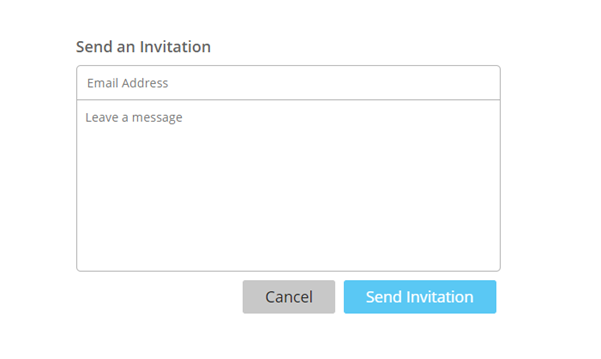
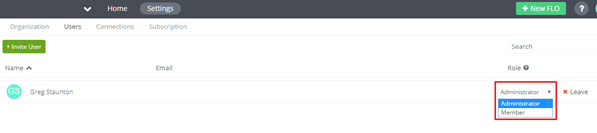
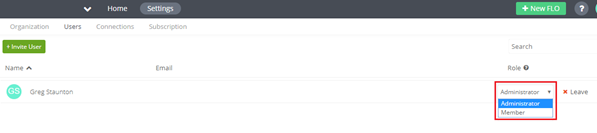
Once they have signed up you will need to drill into their user account and set up as an administrator. When you create new users they will initially be members. They need to accept so they can then be set as administrators.
Now you need to set up the Eloqua connection to Workfront.
There are two parts to this:
- Eloqua set up (If you need to do IP whitelisting)
- Set the connection in Workfront
Setting up Eloqua white listing
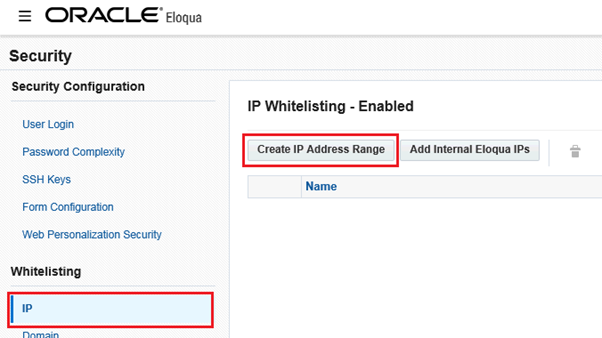
Login into Eloqua and click on Settings > Security.
Click on IP and select Create IP range.
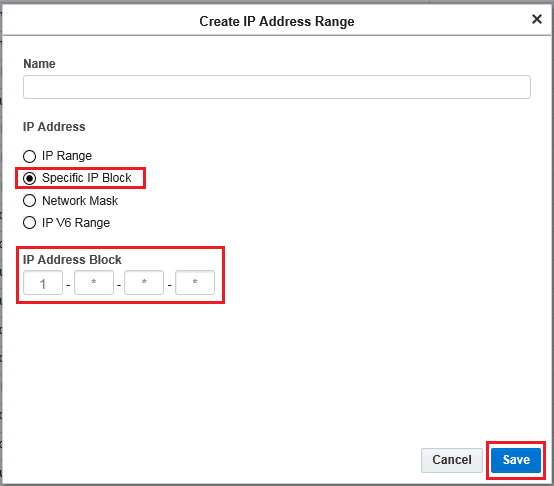
Next you need to put in the IP range for Workfront Fusion. You will need create two new IPs to have whitelisted by Eloqua.
Give them both a name and set the IP ranges of:
- 216.172.146
- 218.153.209
You need to click on specific IP block and then enter the IP block
Once this is complete you also need to make sure that your incoming ports are open in Eloqua. DO this by clicking on Add Internal Eloqua IPs.
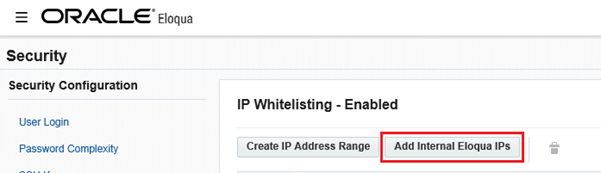
That’s the whitelisting setup in Eloqua. Next you will need to get your shared integration user account details to proceed with making the connection with Workfront.
Creating the Workfront Eloqua connection
Log back into Workfront Fusion (https://designer.ui.fusion.workfront.com/login) and click on settings.
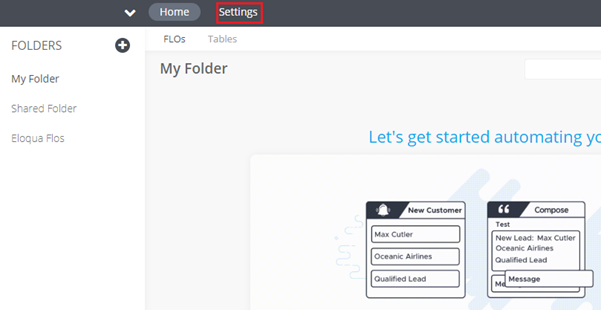
Next click on Connections.

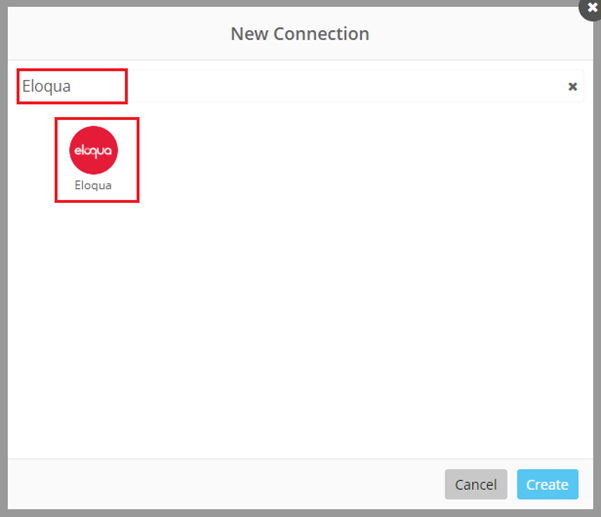
Click on New Connection.

Type Eloqua in the search bar and then click on the Eloqua icon.
Now give you connection a nickname and then set the domain to: secure.p0<put in your pod number>. Then click Create.
Tip from the top – Make sure you give your connection to Eloqua a good descriptive name about the environment you are connecting into.
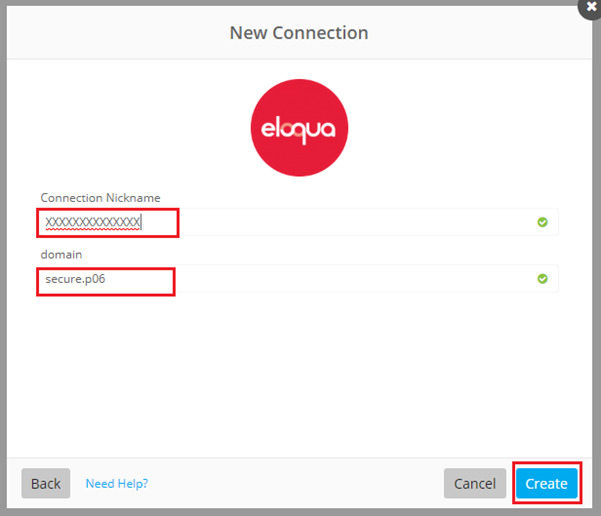
The connection will then be set and you should see a green tick which denotes that the connection is healthy.

Once you have set up your connection you can now assign it to different users. This will allow you to can create different connections with different capabilities but more on that later on. To do this click on manage permissions.
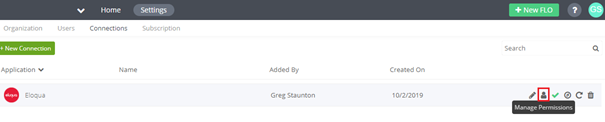
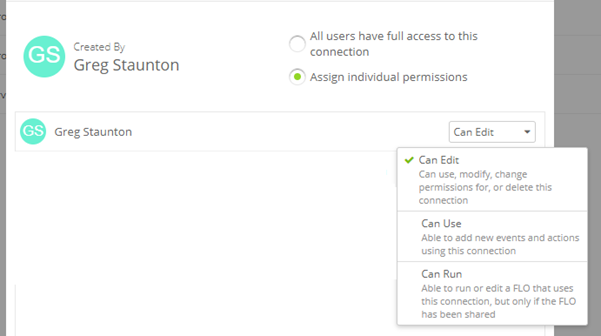
Next select the users you wish to be able to use this connection. There are different settings.
The two setting are:
- All users have full access to this connection
- Assign individual permissions
If you give full access – obviously all user swill be able to do one of the following options:
- Can edit
Can use, modify, change permissions for, or delete this connection - Can use
Able to add new events and actions using this connection - Can run
Able to run or edit a FLO that uses this connection, but only if the FLO has been shared
Errors and overcoming them
With the connection made it is time to test the different integration points.
First you need to click on New FLO in Workfront.
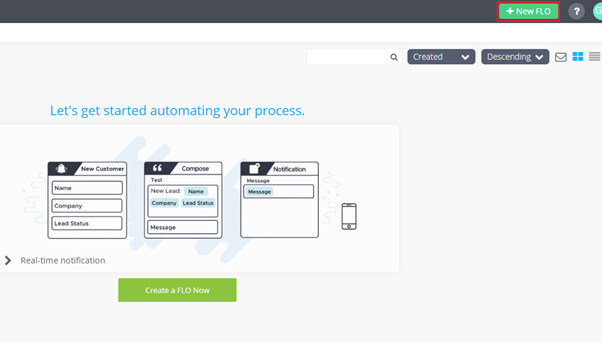
The way the integration works between Workfront and Eloqua is an event happens which in turn either fires an App Action or function.
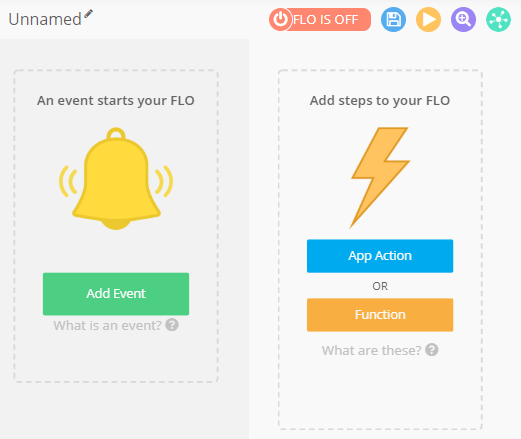
The first step in testing is to test the App Actions in Eloqua.
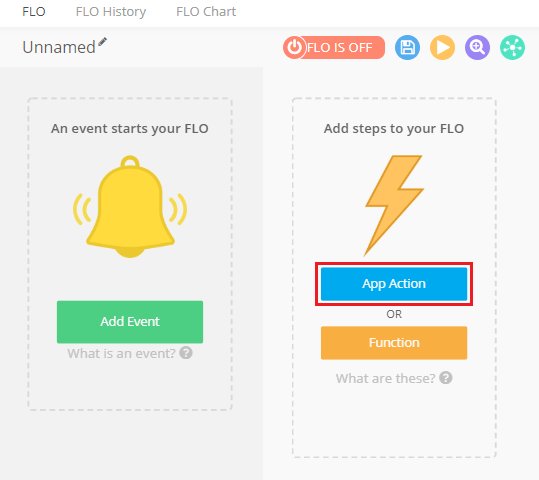
Top test an App Action, click on App Action.
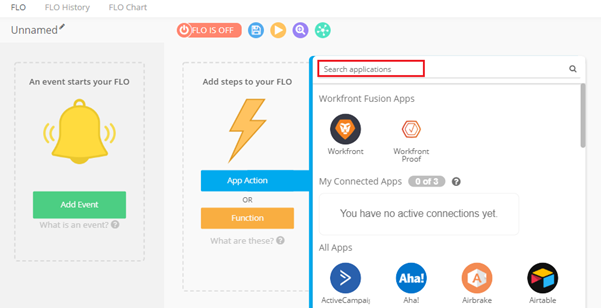
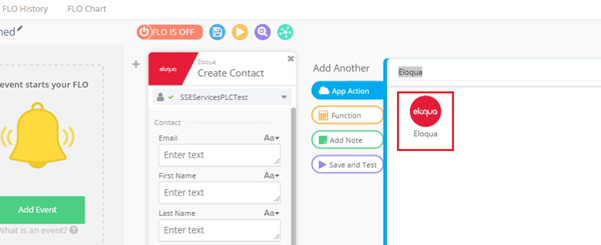
Next Type Eloqua in the search box
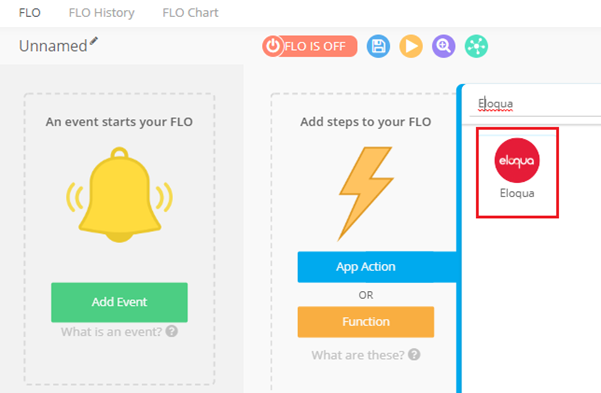
Then click on the Eloqua icon.
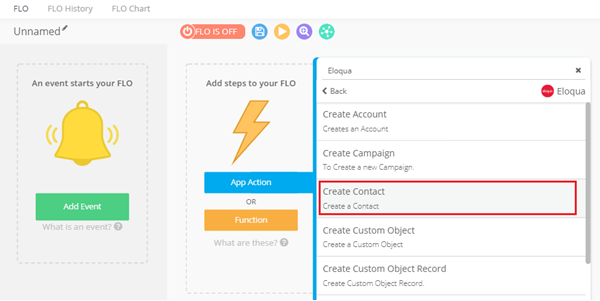
You will now see a list of App Actions available for you to do in Eloqua. You need to test them. Below is a list of the App Actions and results of testing.
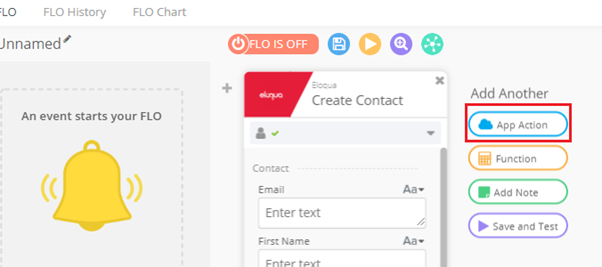
To test an App Action click on App Action, Select Eloqua and the select the action you wish to test. In this case we will go through Create Contact. Click on Create Contact.
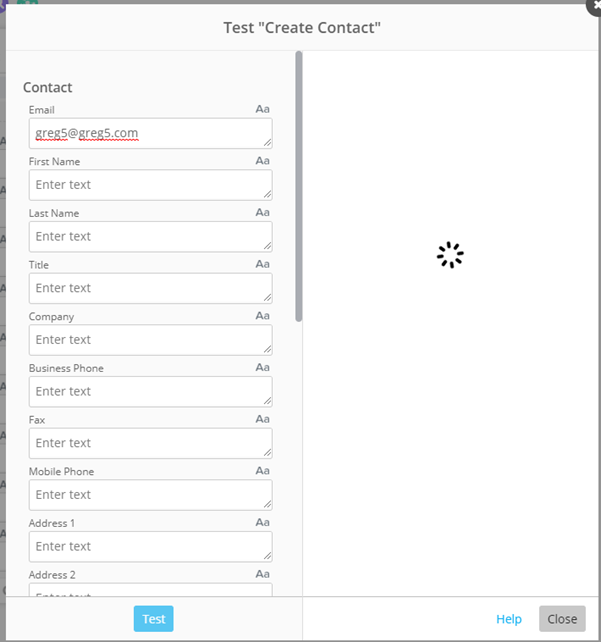
You will see a spinning wheel as Workfront calls the different fields, it can take a minute or two to make the connection. The Workfront wheel looks like this:
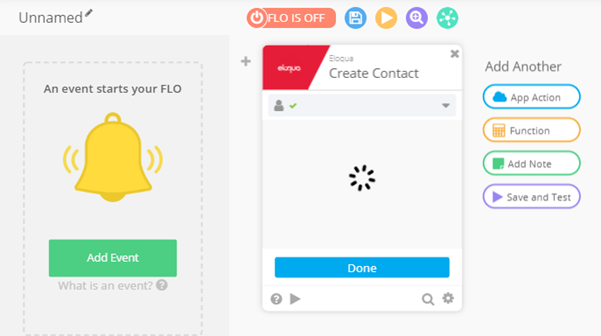
When the fields load you will see a number of contact fields. You can select or deselect different fields you wish to populate. When you have selected the fields you are interested in testing with click Done. For testing you don’t need to deselect any fields.
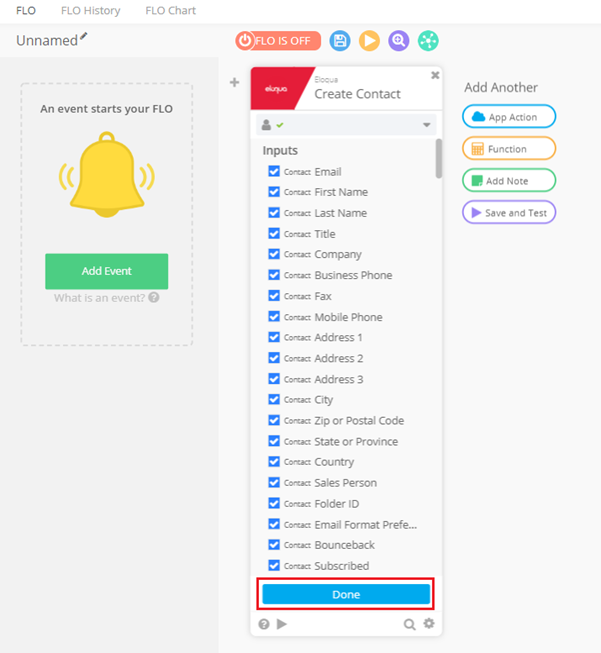
Your fields are now set for testing. Click the play button to begin your test.
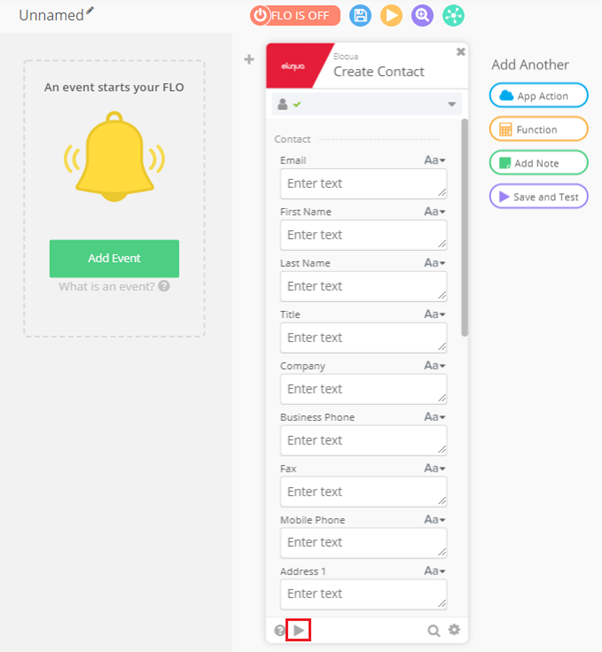
Now enter the data you wish to test. In this case we will just populate email address. Then click Test.
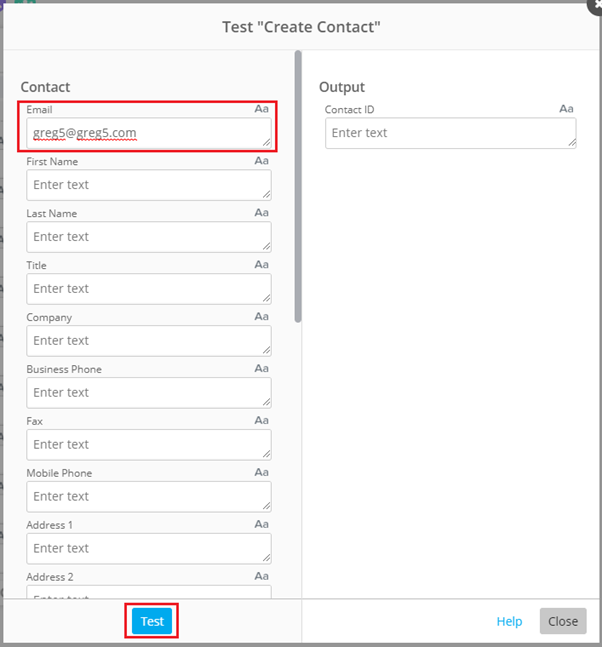
You will now see the Workfront wheel spinning as it creates the contact.
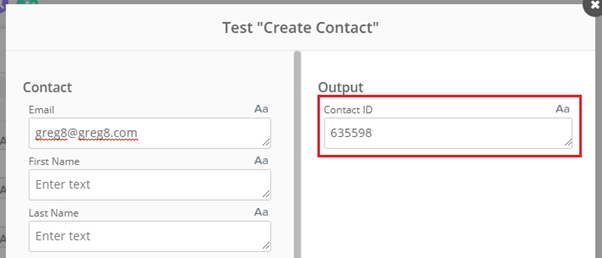
You will now get a record value back that confirms this has worked as you can see from the Eloqua contact ID. If you go into Eloqua you can also confirm that this has worked by searching in contacts.
Close down the test. To test a new App Action, click on App Action.
Then select Eloqua.
Then select the new App Action you wish to test.
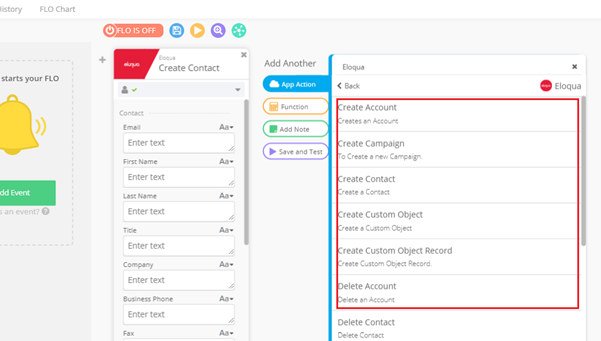
Then repeat the steps.
Testing
I tested the different API calls using the exact same credentials in postman and most of the out-of-the-box ones worked. One or two may need a slight tweak to get working.
Below this is another table. This table contains a list of additional App Actions that could be used – these are practical ones not just me looking at anything. They may or may not be suitable for a basic implementation of Workfront and subsequent integration with Eloqua.
Now on to my findings!
I would recommend testing your calls in the following sequence otherwise you will need to go back over calls after your have deleted objects:
- Create
- Update
- Read
- Delete
The first round of testing App Action in Eloqua were:
| Eloqua App Action | Result |
| Create Account | PASS |
| Create Campaign |
{ “message”: “Unauthorized”, “headers”: { “cache-control”: “private,no-cache, no-store”, “pragma”: “no-cache”, “content-length”: “0”, “content-type”: “application/json”, “expires”: “-1”, “x-request-id”: “2e6b54e246274234b561ad832a3602e6/5897474391”, “p3p”: “CP=\\\\”IDC DSP COR DEVa TAIa OUR BUS PHY ONL UNI COM NAV CNT STA\\\\”,”, “x-content-type-options”: “nosniff”, “strict-transport-security”: “max-age=31536000; includeSubDomains”, “date”: “Wed, 09 Oct 2019 14:49:54 GMT”, “connection”: “close” }, “statusCode”: 401, “body”: “”, “method”: “2Wqm9uc-“, “flo”: “testing”, “execution”: “40546366-a071-4ff8-a695-e15157d30a43” } |
| Create Contact | PASS |
| Create Custom Object | PASS |
| Create Custom Object Record | PASS |
| Delete Account | PASS |
| Delete Contact | PASS |
| Delete Custom Object | PASS |
| Delete Custom Object Record | PASS |
| Download Image | PASS |
| Read Account | PASS |
| Read All Campaigns |
{ “message”: “Unauthorized”, “headers”: { “cache-control”: “private,no-cache, no-store”, “pragma”: “no-cache”, “content-length”: “0”, “content-type”: “application/json”, “expires”: “-1”, “x-request-id”: “200b95ad199447b496d981fcb5a0e1f7/5897684923”, “p3p”: “CP=\\\\”IDC DSP COR DEVa TAIa OUR BUS PHY ONL UNI COM NAV CNT STA\\\\”,”, “x-content-type-options”: “nosniff”, “strict-transport-security”: “max-age=31536000; includeSubDomains”, “date”: “Wed, 09 Oct 2019 15:05:39 GMT”, “connection”: “close” }, “statusCode”: 401, “body”: “”, “method”: “Gax3xs2b”, “flo”: “testing”, “execution”: “12c24e65-e73b-4c1c-af04-aead95554fa2” } |
| Read Campaign |
{ “message”: “Unauthorized”, “headers”: { “cache-control”: “private,no-cache, no-store”, “pragma”: “no-cache”, “content-length”: “0”, “content-type”: “application/json”, “expires”: “-1”, “x-request-id”: “c5ac320c1f734a1e8491192bcb98bec7/5897763044”, “p3p”: “CP=\\\\”IDC DSP COR DEVa TAIa OUR BUS PHY ONL UNI COM NAV CNT STA\\\\”,”, “x-content-type-options”: “nosniff”, “strict-transport-security”: “max-age=31536000; includeSubDomains”, “date”: “Wed, 09 Oct 2019 15:11:28 GMT”, “connection”: “close” }, “statusCode”: 401, “body”: “”, “method”: “mJq8XhNo”, “flo”: “testing”, “execution”: “403969cd-e17e-445a-b7b4-bcd4335ff784” }
https://secure.p06.eloqua.com/api/REST/ |
| Read Contact | PASS |
| Read Custom Object Record | PASS |
| Search Accounts | PASS |
| Search Contacts | PASS |
| Search Custom Objects | PASS |
| Search Users | PASS |
| Update Account | PASS |
| Update Campaign | PASS |
| Update Contact | PASS |
| Update Custom Object | PASS |
In looking at possibilities for Workfront moving forward I anticipated the following addional calls that would be of interest. It is worth noting that all API calls should have the precursor URL: (https://secure.p06.eloqua.com) REST API end points documentation can be found here: https://docs.oracle.com/cloud/latest/marketingcs_gs/OMCAC/
|
App Action |
API call |
|
Activate Campaign |
POST /api/REST/2.0/assets/campaign/active/{id} |
|
Create an email |
POST /api/REST/2.0/assets/email |
|
Retrieve an Email |
GET /api/REST/2.0/assets/email/{id} |
|
Update an Email |
PUT /api/REST/2.0/assets/email/{id} |
|
Delete an Email |
DELETE /api/REST/2.0/assets/email/{id} |
|
Create a content section |
POST /api/REST/1.0/assets/contentSection |
|
Retrieve an Email |
GET /api/REST/1.0/assets/contentSection/{id} |
|
Update a contact section |
PUT /api/REST/1.0/assets/contentSection/{id} |
|
Delete a content section |
DELETE /api/REST/1.0/assets/contentSection/{id} |
|
Create a Form |
POST /api/REST/1.0/assets/form |
|
Retrieve a Form |
GET /api/REST/1.0/assets/form/{id} |
|
Update a Form |
PUT /api/REST/1.0/assets/form/{id} |
|
Delete a Form |
DELETE /api/REST/1.0/assets/form/{id} |
|
Create a Segment |
POST /api/REST/2.0/assets/contact/segment |
|
Retrieve a Segment |
GET /api/REST/2.0/assets/contact/segment/{id} |
|
Update a Segment |
PUT /api/REST/2.0/assets/contact/segment/{id} |
|
Delete a Segment |
DELETE /api/REST/2.0/assets/contact/segment/{id} |
|
Create a Landing Page |
POST /api/REST/1.0/assets/landingPage |
|
Retrieve a Landing Page |
GET /api/REST/1.0/assets/landingPage/{id} |
|
Update a Landing Page |
PUT /api/REST/1.0/assets/landingPage/{id} |
|
Delete a Landing Page |
DELETE /api/REST/1.0/assets/landingPage/{id} |