
Eloqua App Review: Form Submit & How to Stop It Breaking!
One of the most useful apps in the Eloqua ecosystem is the Form Submit Action. It works on both the Campaign Canvas and Program Canvas, and essentially lets you package up data about a contact and submit it through any Eloqua form behind the scenes.
Why would you want to do this? Personally, the biggest reason is to create or update Custom Objects (CDOs) on the fly. But beyond that, you also gain access to the full power of Eloqua’s form processing engine, which includes:
- Notifications
- Updating contacts with custom data
- Reposts to external systems
- Writing activities
- Triggering update rules
- Creating or updating Custom Objects
In short, it gives you functionality you simply do not get on the standard campaign or program canvas alone.
Before we begin - a big warning
Here is a tip that will save you (and Sales) a lot of pain:
do not use form submit actions everywhere.
In the early days almost everyone did, including me, and it causes
mayhem.
Each time a contact passes through a form submit app, Eloqua logs it as a real form submission. This means:
- Prospect Profiler fills up with “fake” submissions
- Sales sees dozens of form submissions and assumes something is wrong
- Your lead scoring model inflates unless you exclude these events
Used sparingly, Form Submit is powerful. Used everywhere, it becomes destructive.
Installing the Form Submit Action app
If you have not installed it yet, here is how:
- Go to this link
- Click Get App
- Log in with your Eloqua credentials
- Click Accept and Install
- Click Save
- Click Sign In and grant permission
- Click Accept
The app is now installed.
Using the app in Eloqua
The same rules apply for both Campaign Canvas and Program Canvas.
First create your form in Eloqua with all the fields and processing steps. Save the form and return to your canvas.
Tip: if you are only submitting Email Address, add a blank field called spare. The app often breaks if the form contains only one field.
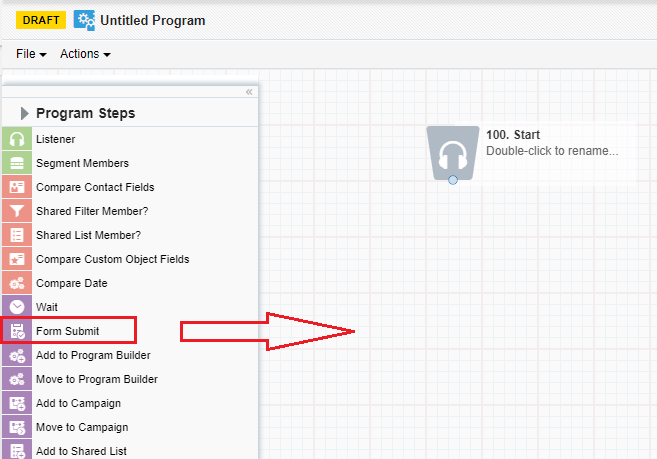
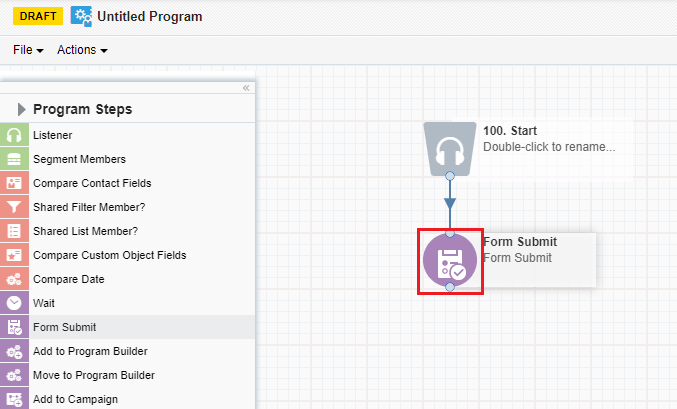
Open your campaign or program canvas and drag the Form Submit Action onto it.
Double click into the app.
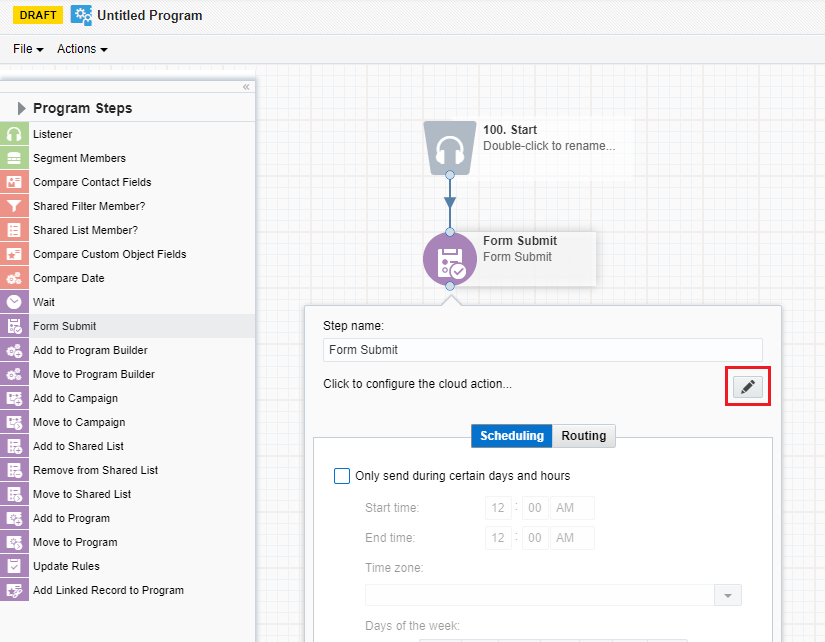
Click the pencil icon to configure the form.
Select your form from the dropdown.
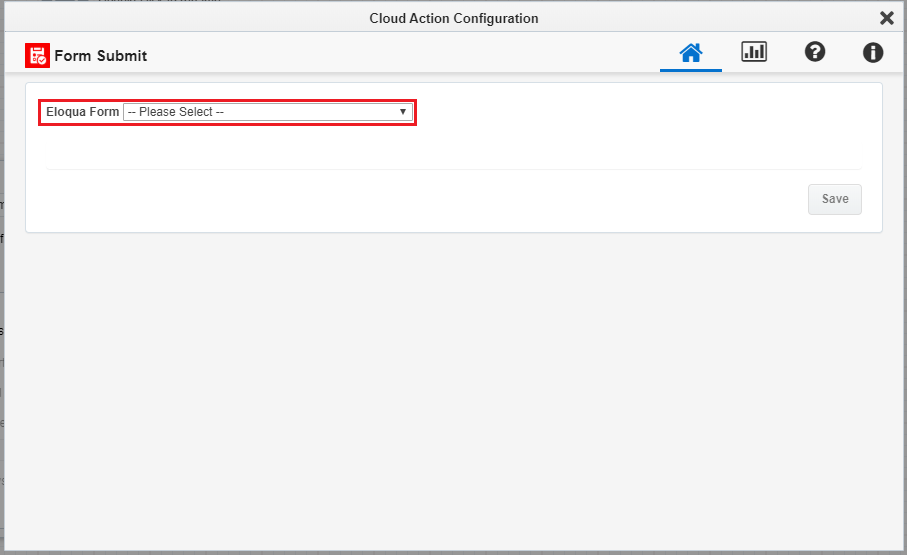
The form fields will load. Map each to the correct contact field.
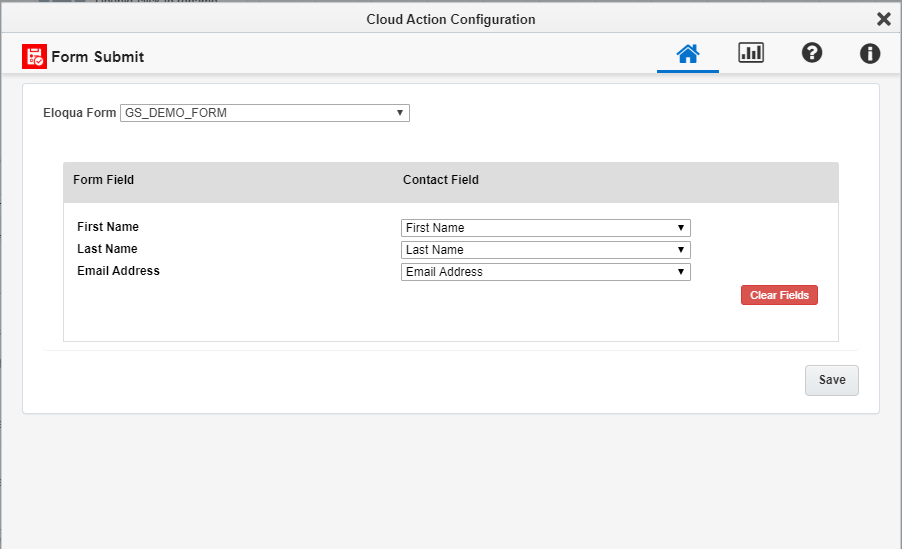
You may also choose:
- None - send nothing
- Static - send a custom value
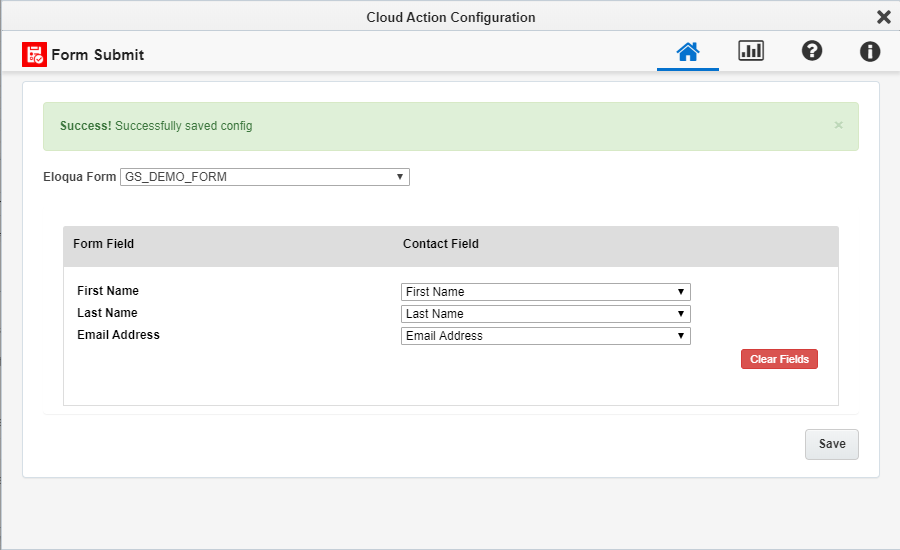
Click Save.
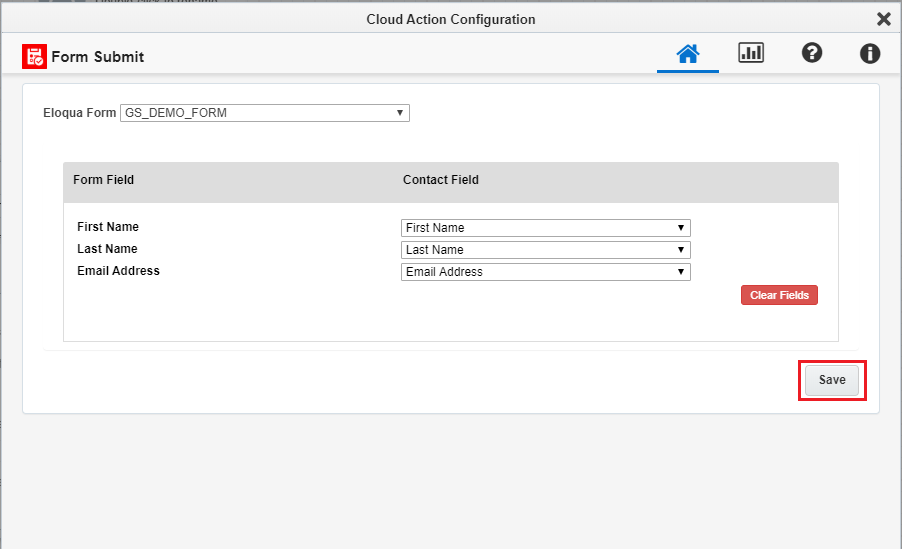
And that is it, or so you thought…
Why the Form Submit connector breaks
Sadly, this connector has a habit of breaking whenever you need it most.
On one implementation without an SFDC integration, Form Submit was used heavily for sales notifications. Several weeks in, all Form submits broke and contacts were stuck.
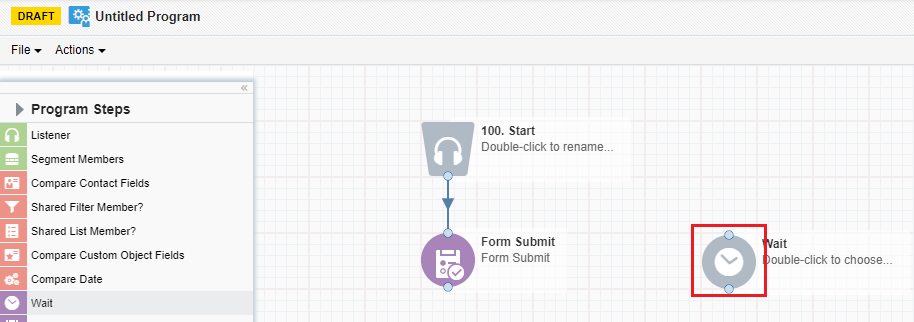
The fix is simple: add a wait step.
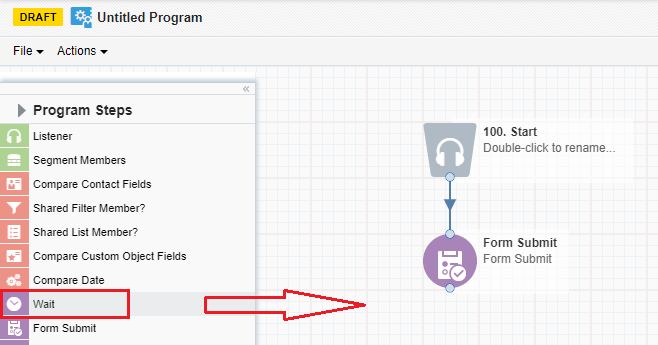
Double click the wait step.
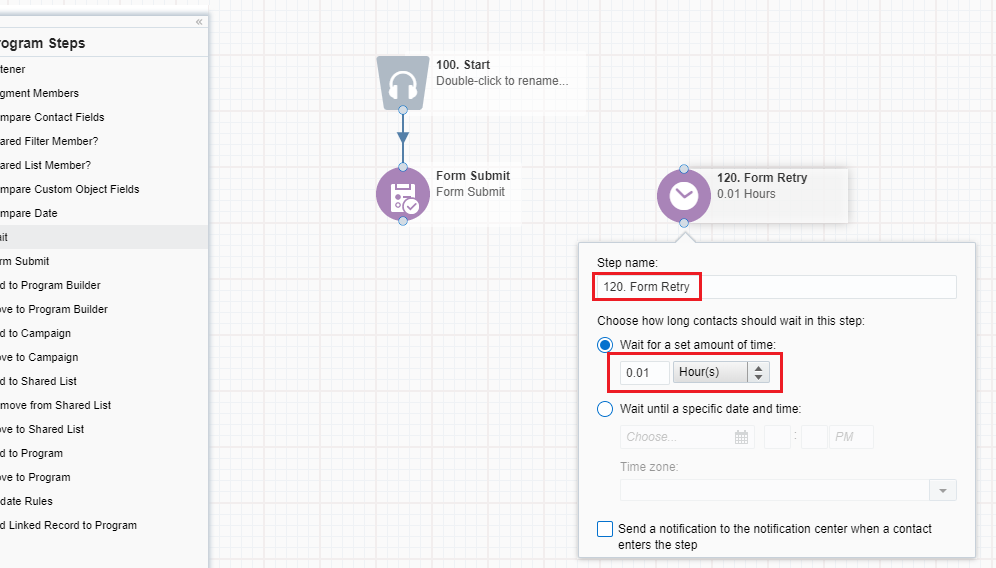
Name the step and set the wait time to 0.01 hours.
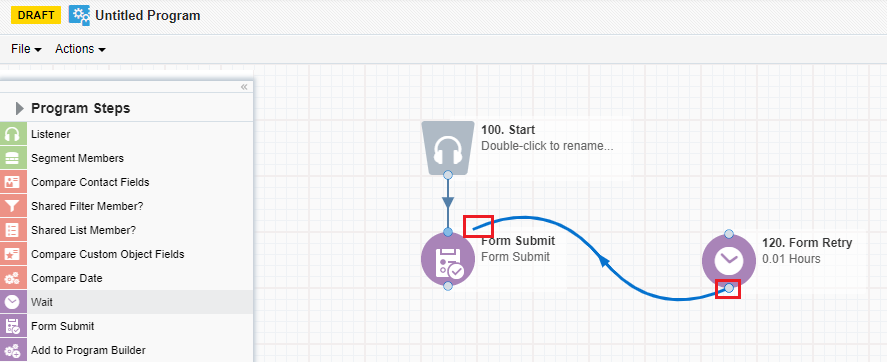
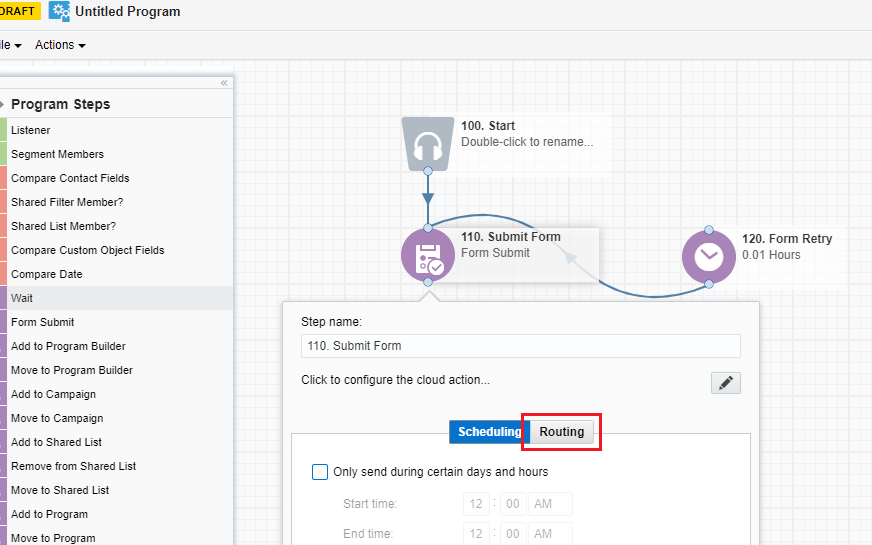
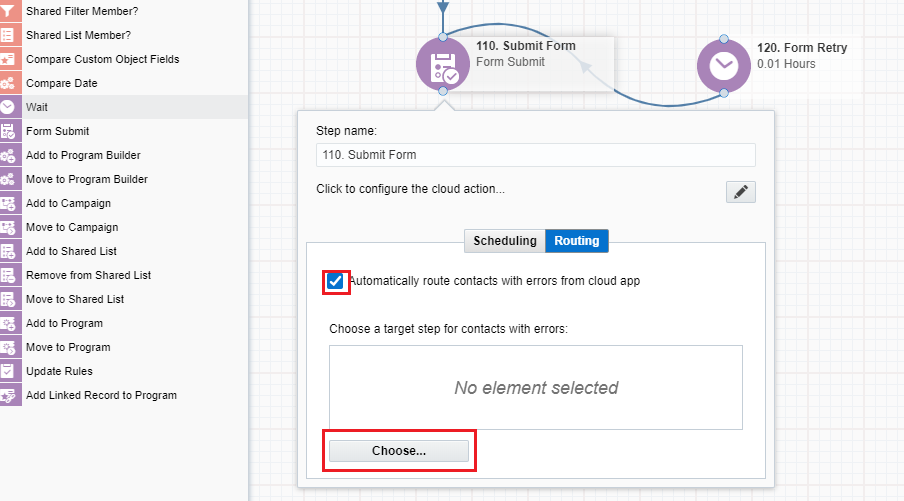
Connect the bottom error routing from the Form Submit action to this wait.
Open the wait step again.
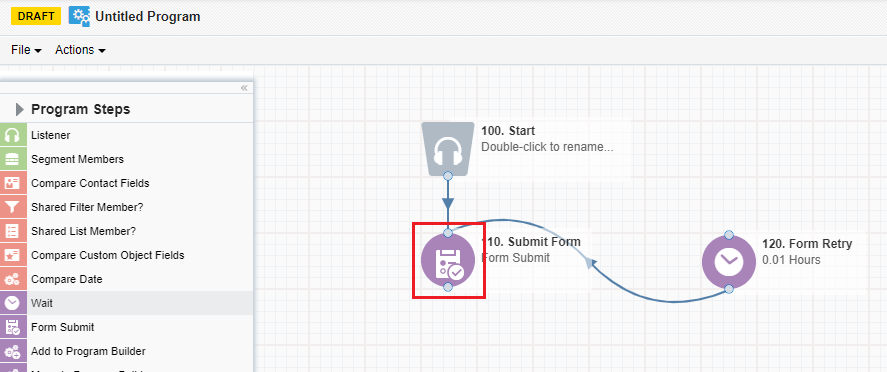
Click Routing.
Click Automatically route contacts with errors from the cloud app.
Final thoughts
Now you know what the Form Submit Action app is for, how to install it, how to configure it and, most importantly, how to keep it from breaking and blocking contact flow.
This tiny wait step trick is one of the most useful stabilisation techniques you can apply inside Eloqua.
Need help hardening Eloqua apps and canvases?
I help teams design resilient Eloqua architectures that do not fall over when cloud apps misbehave. If you want a second set of eyes on your canvases, routing and error handling, I am happy to review your setup.