Eloqua Training: 106 Eloqua Simple Email Send Playbook
106 Eloqua Simple Email Send Playbook
Introduction
A simple email send is a way that you can send out a one-off email without the use of campaign canvas. You can also use A/B split testing as well using this module very easily.
A newsletter is a perfect example of why you would use the simple email send. In the case of a newsletter you would only just send it out, there would be no follow up action so there is no need to use campaigns canvas for this.
Using the Eloqua Simple Email Send Module
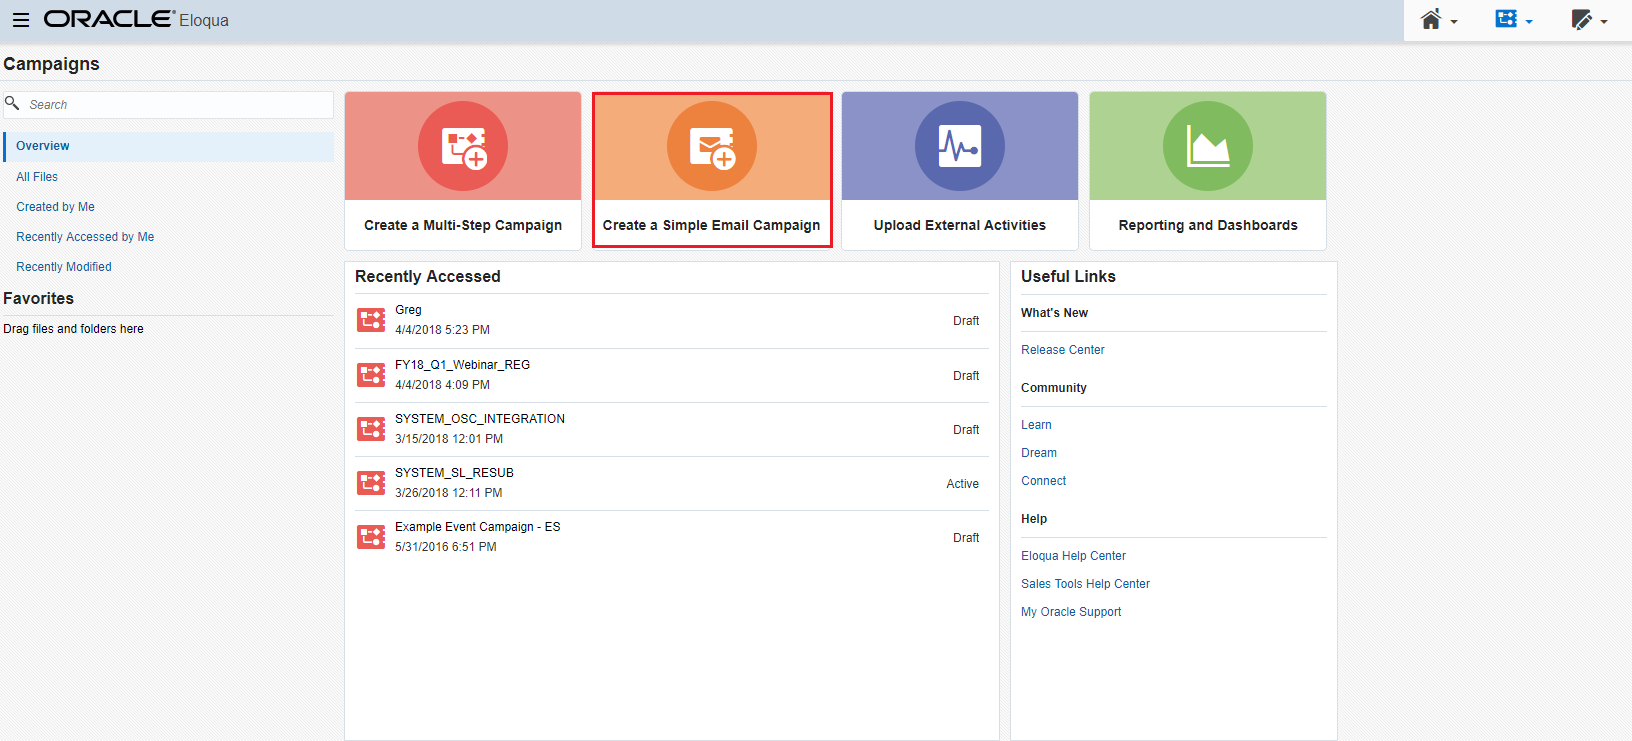
Navigate to Create a Simple Email Campaign: Orchestration > Campaigns
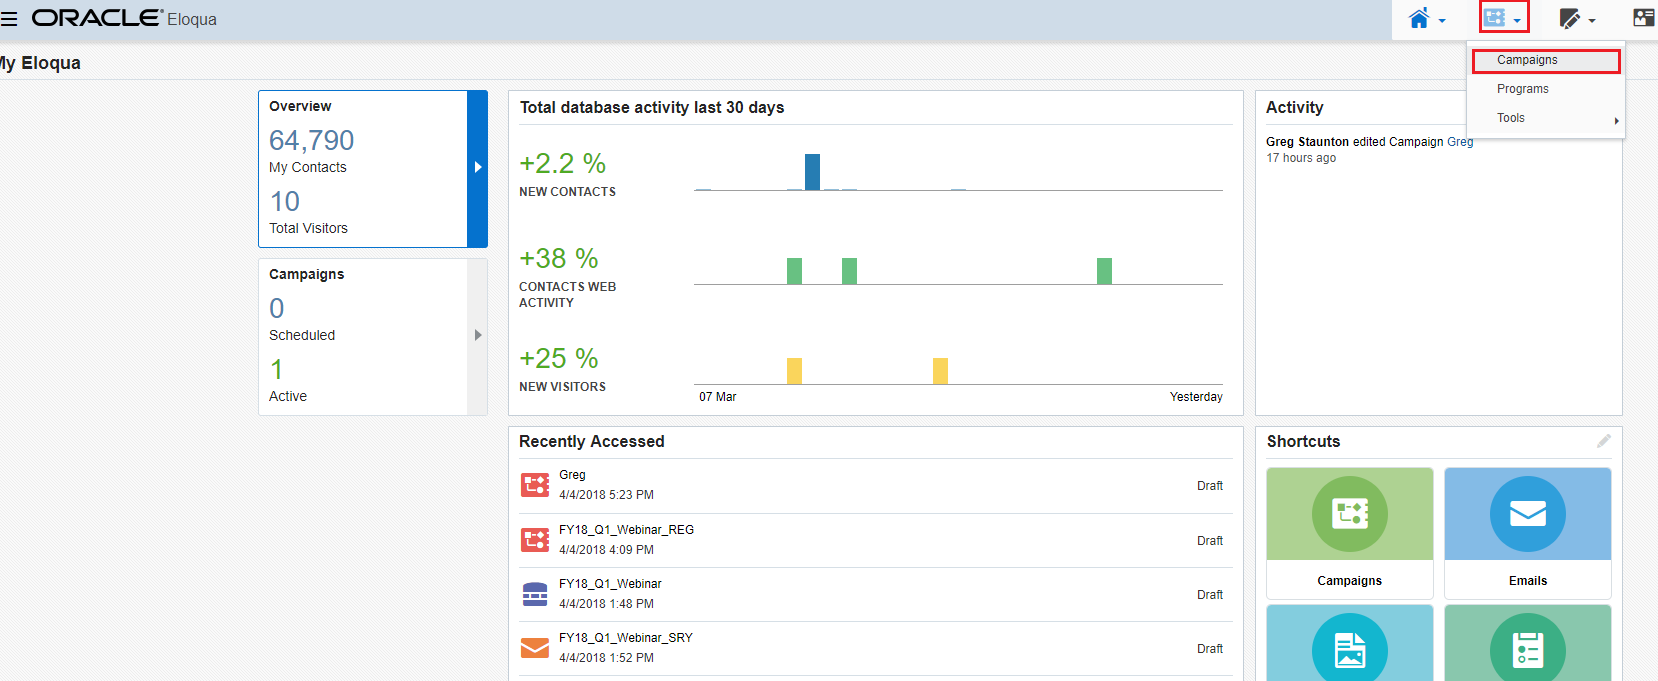
Select Create a Simple Email Campaign
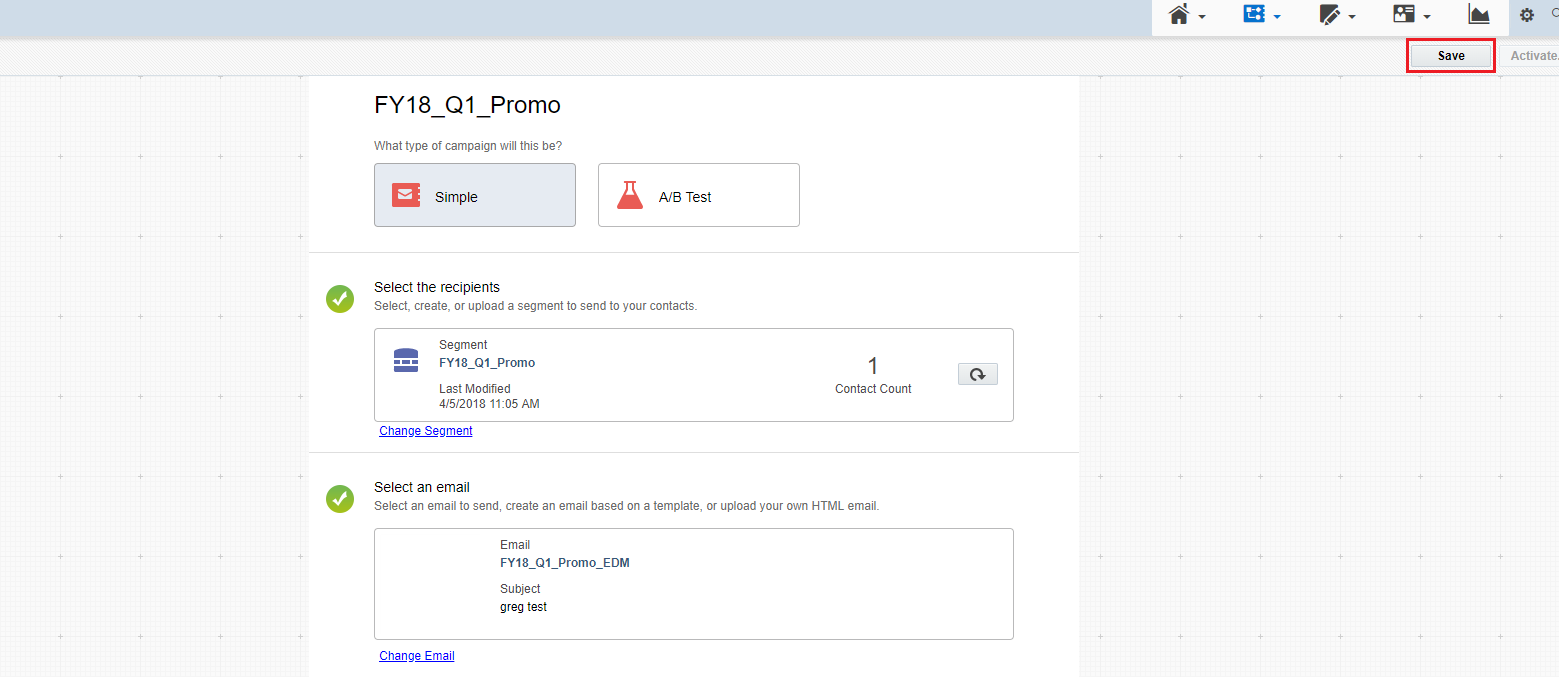
The first step you must take is to give your campaign a name.
Double click on the area which says “Double-Click to edit…”
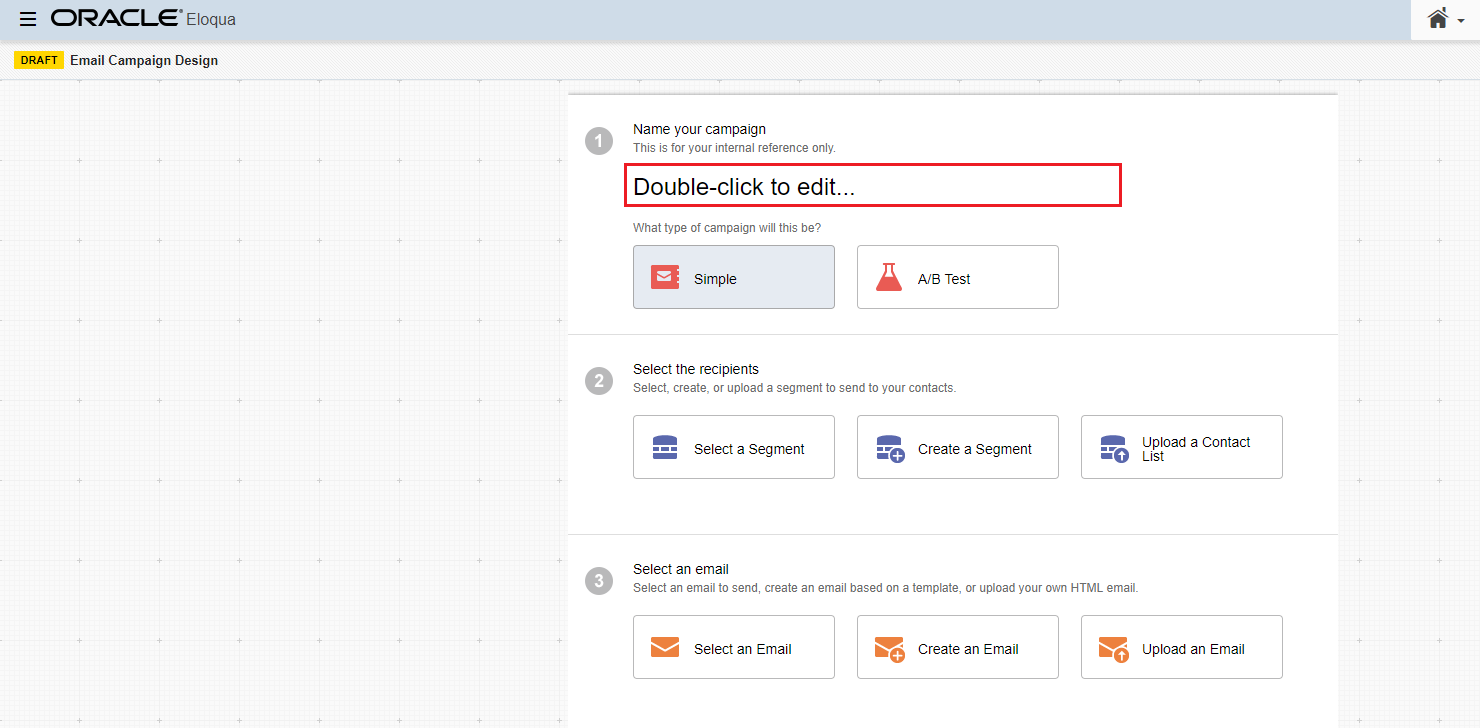
Now give your Simple Campaign a name in accordance with the Naming Convention.
The first decision you need to make is if you want this Simple email to be sent to a segment of contacts or if varieties are to be produced and it is to be an A/B split test.
Simple Email Send
If you click on Simple then you will only see one set of options under part 3 “Select an email”.
Next you need to set the data that you wish to send to. You have three options:
- Select a Segment
- Create a Segment
- Upload a Contact List
Select a Segment
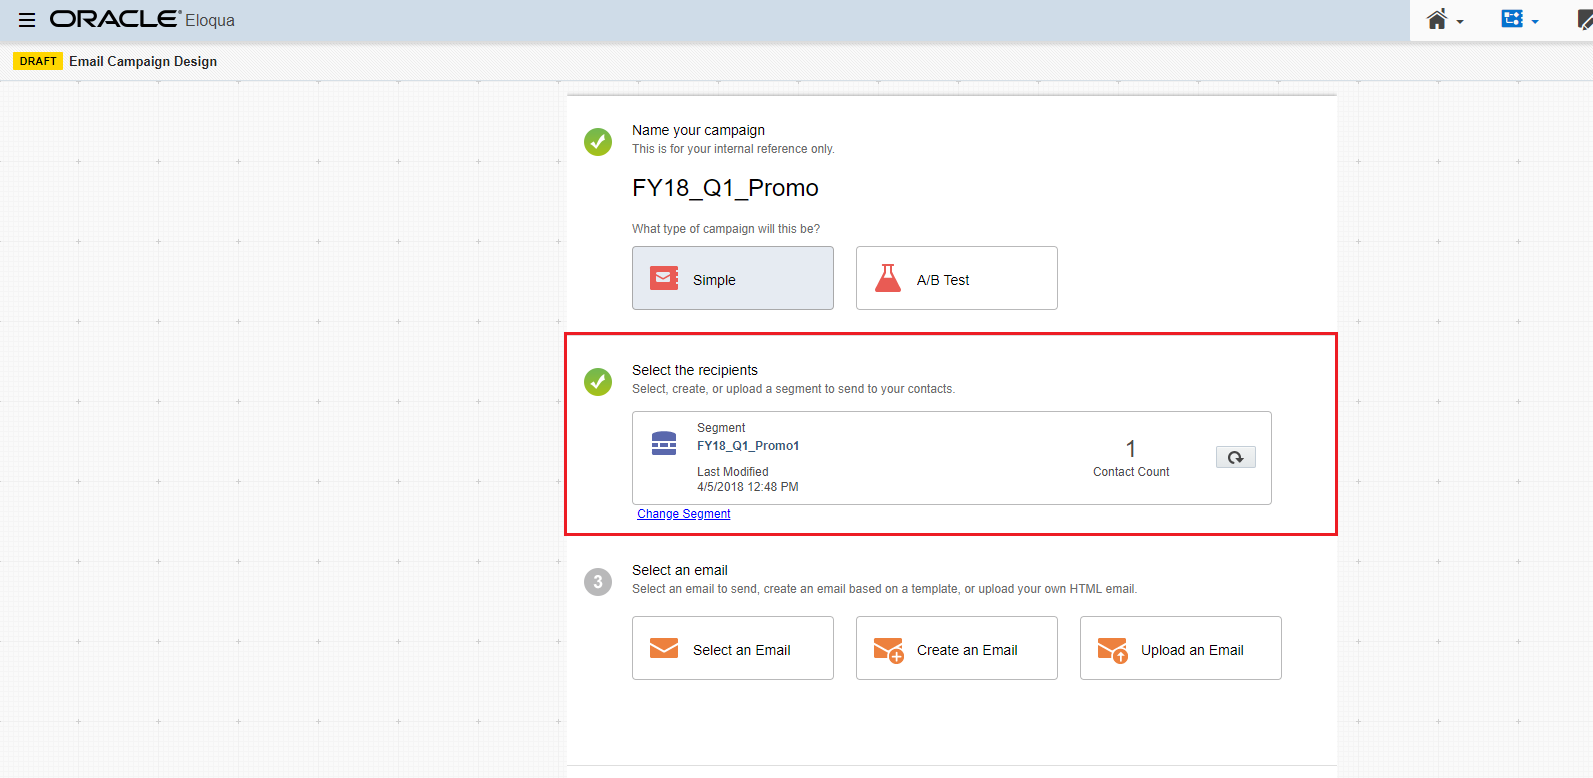
To Select a Segment, click on Select a Segment.
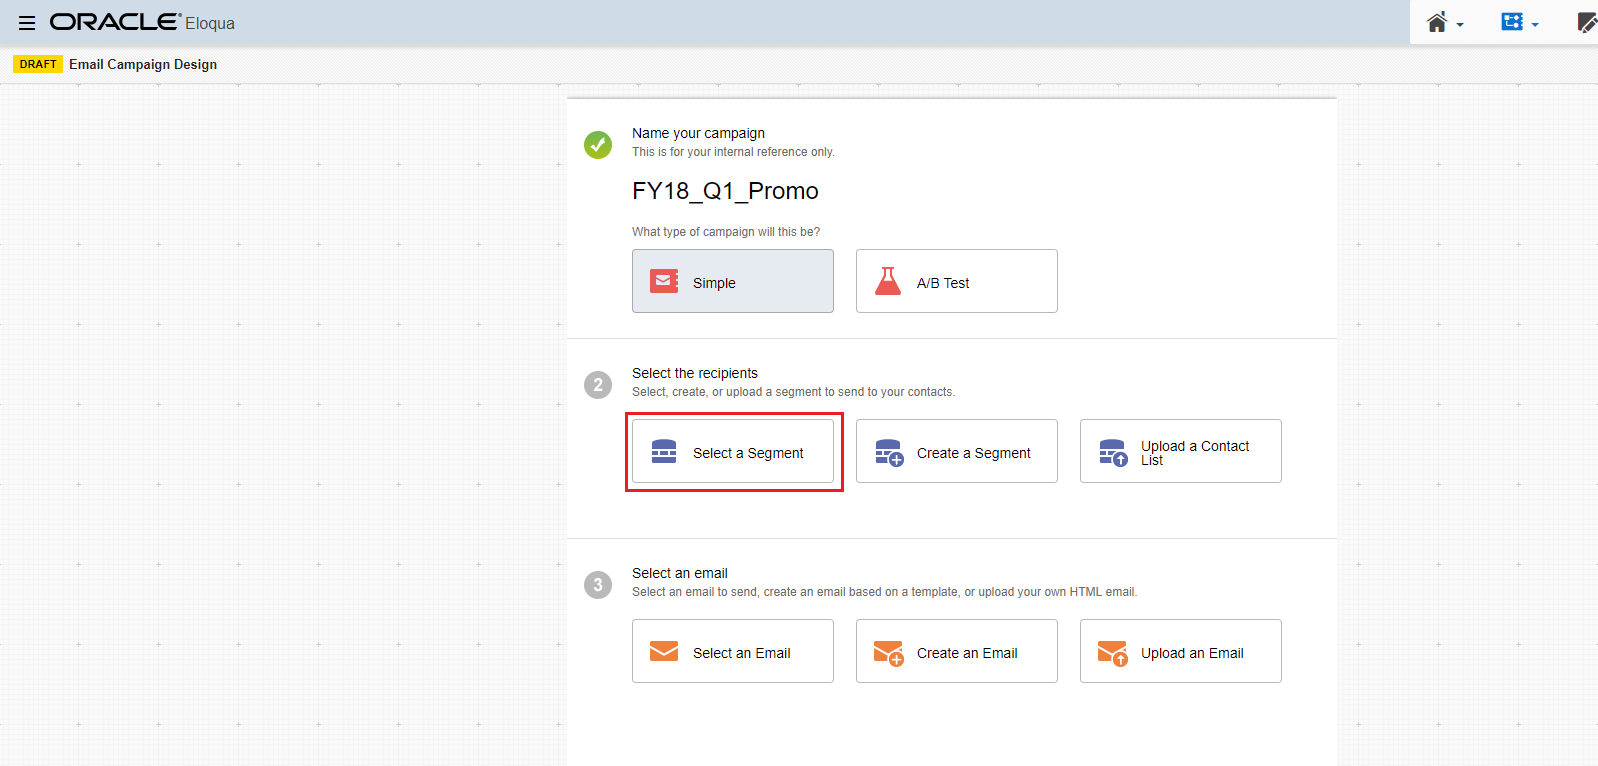
Navigate to your pre-built segment to select it, then click Choose.
The Segment contact count will be re-run. Now you need to select the email that you wish to send.
Create a Segment
The next option you have is to create a segment. Click on Change segment and then select Create a Segment.
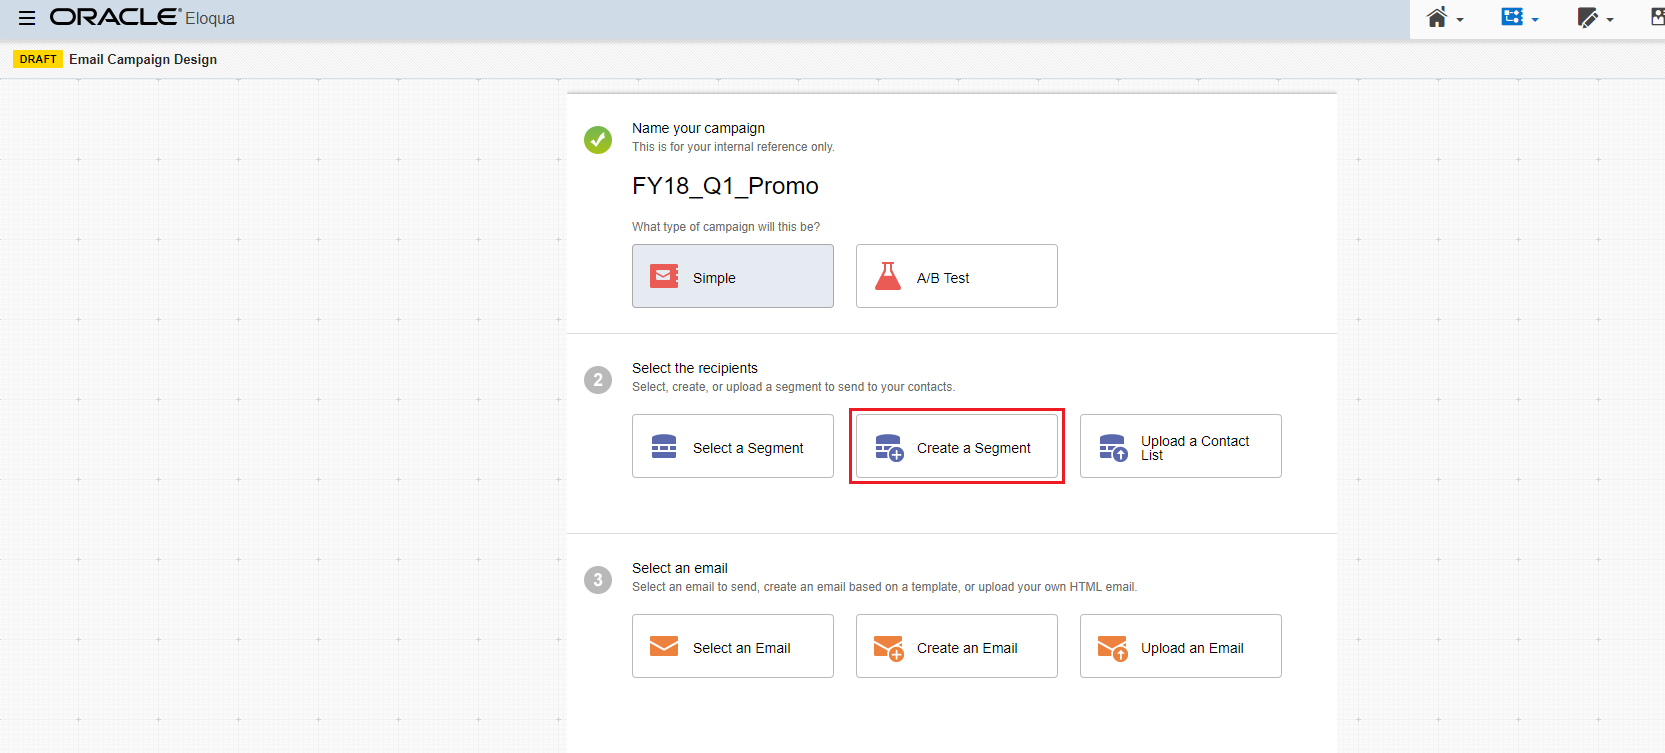
You must now name the segment
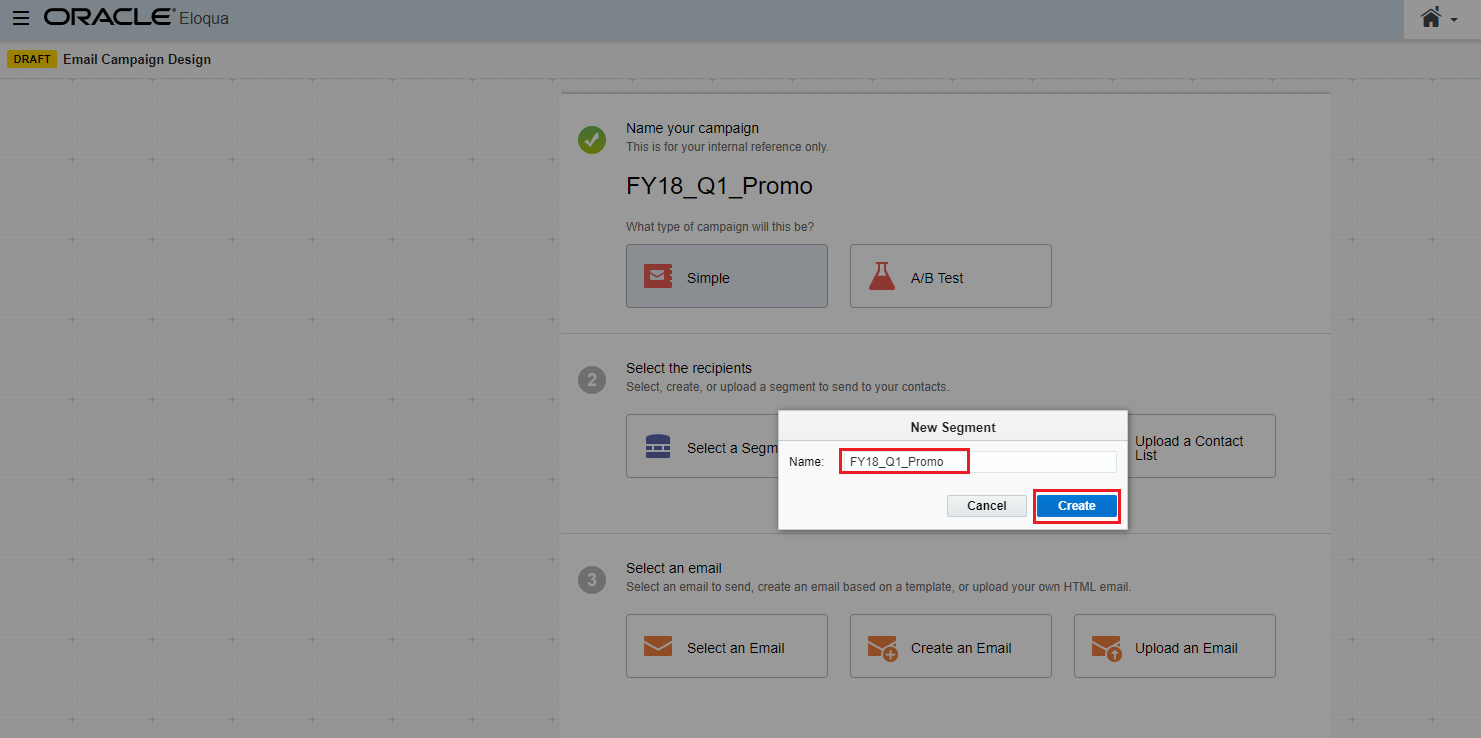
You will need to create your segment as per the Segment Creation Playbook.
Once you have created your segment you must click Save.
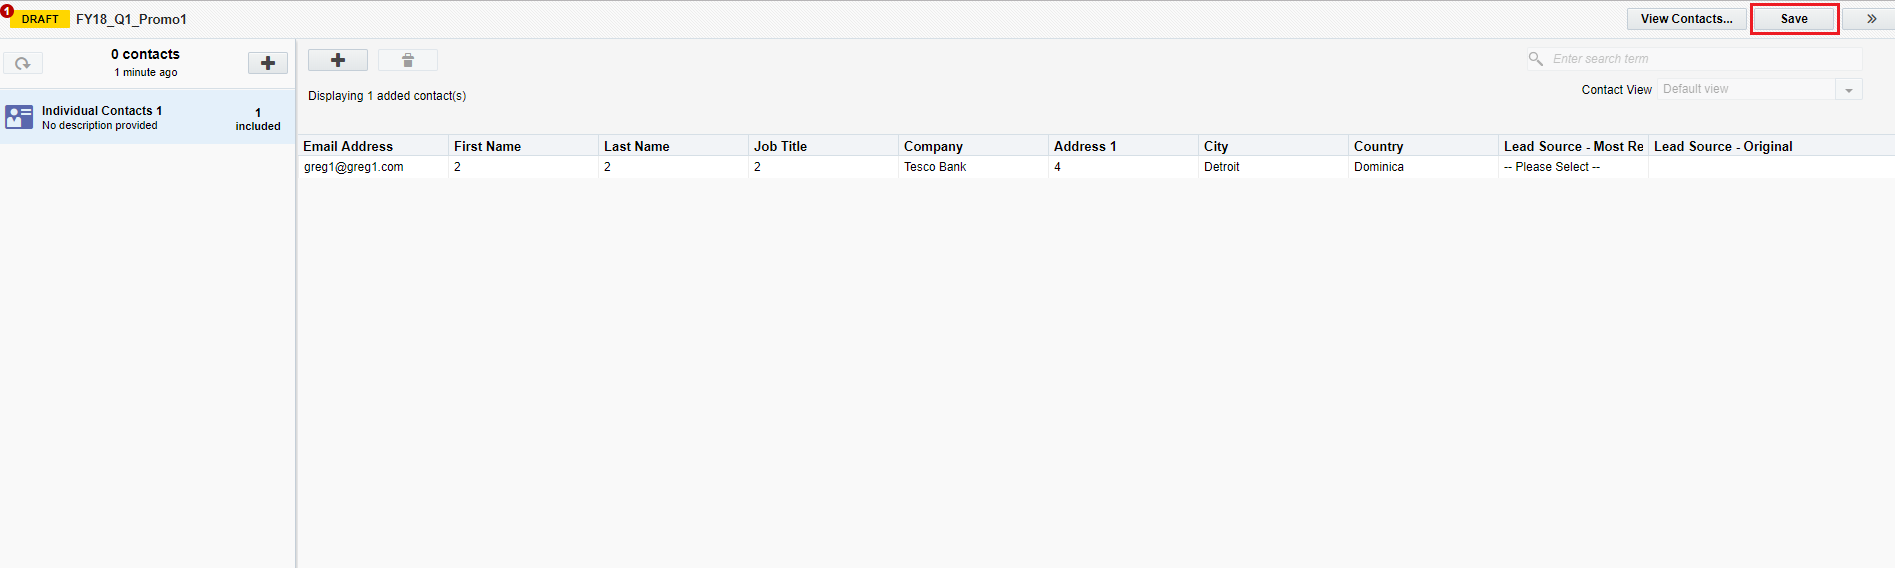
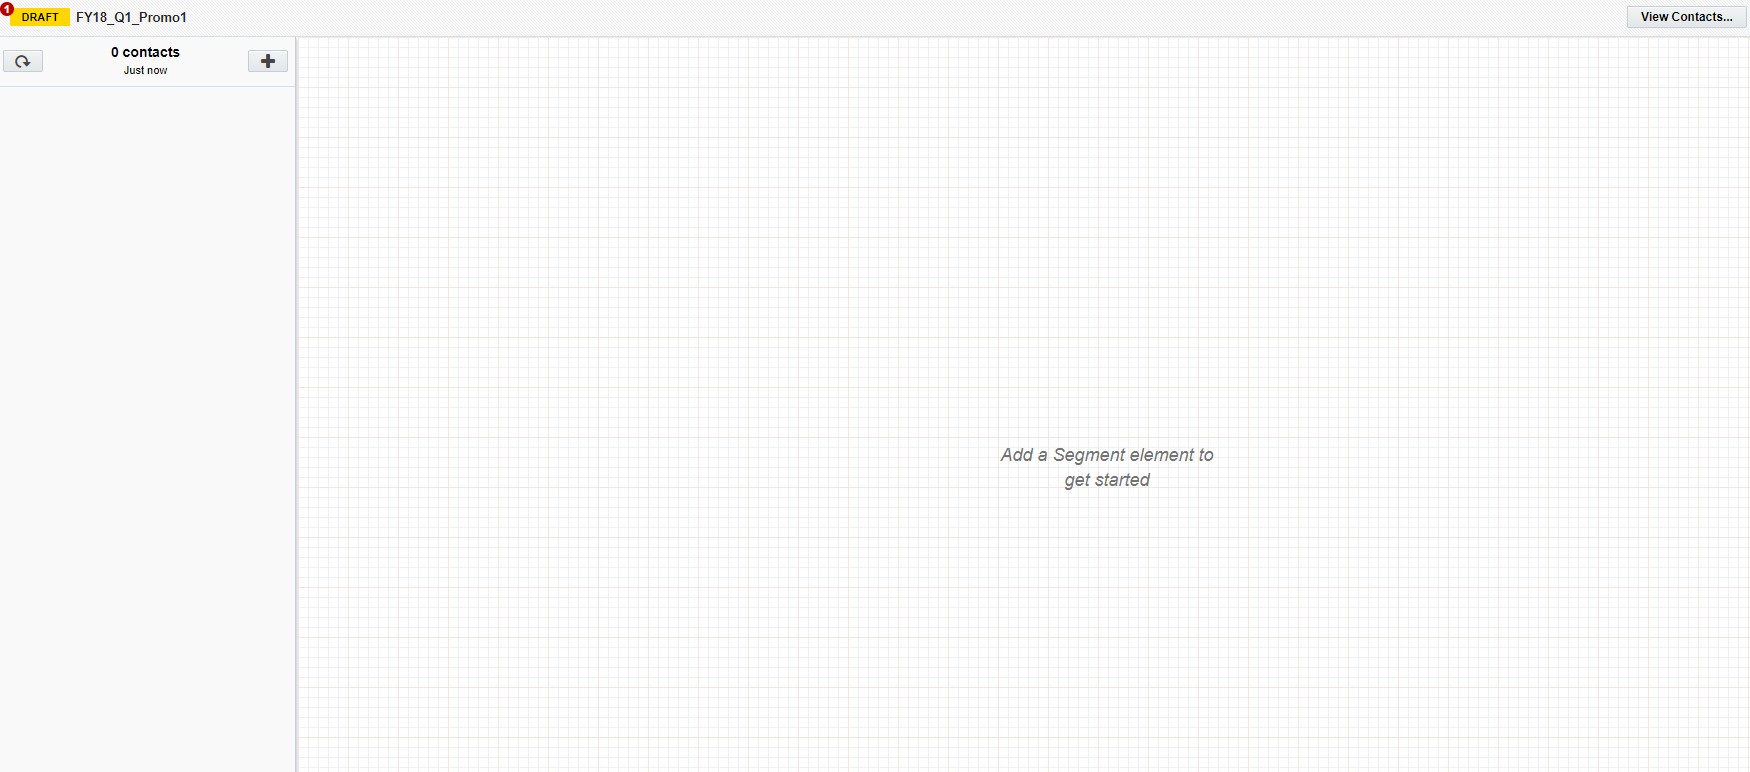
The segment will re-run and you will get your data count. Close this window.
You will see that the contact count has been re-run.
Upload a Contact List
Finally, you have the option to just import a contact list. (SERIOUSLY NOT RECOMMENDED)
To do this you need to click on Upload a Contact List.

Click on Upload a Contact List. You will need to have your contact list close by to hand.
Double click on the cloud icon to upload you contact list.
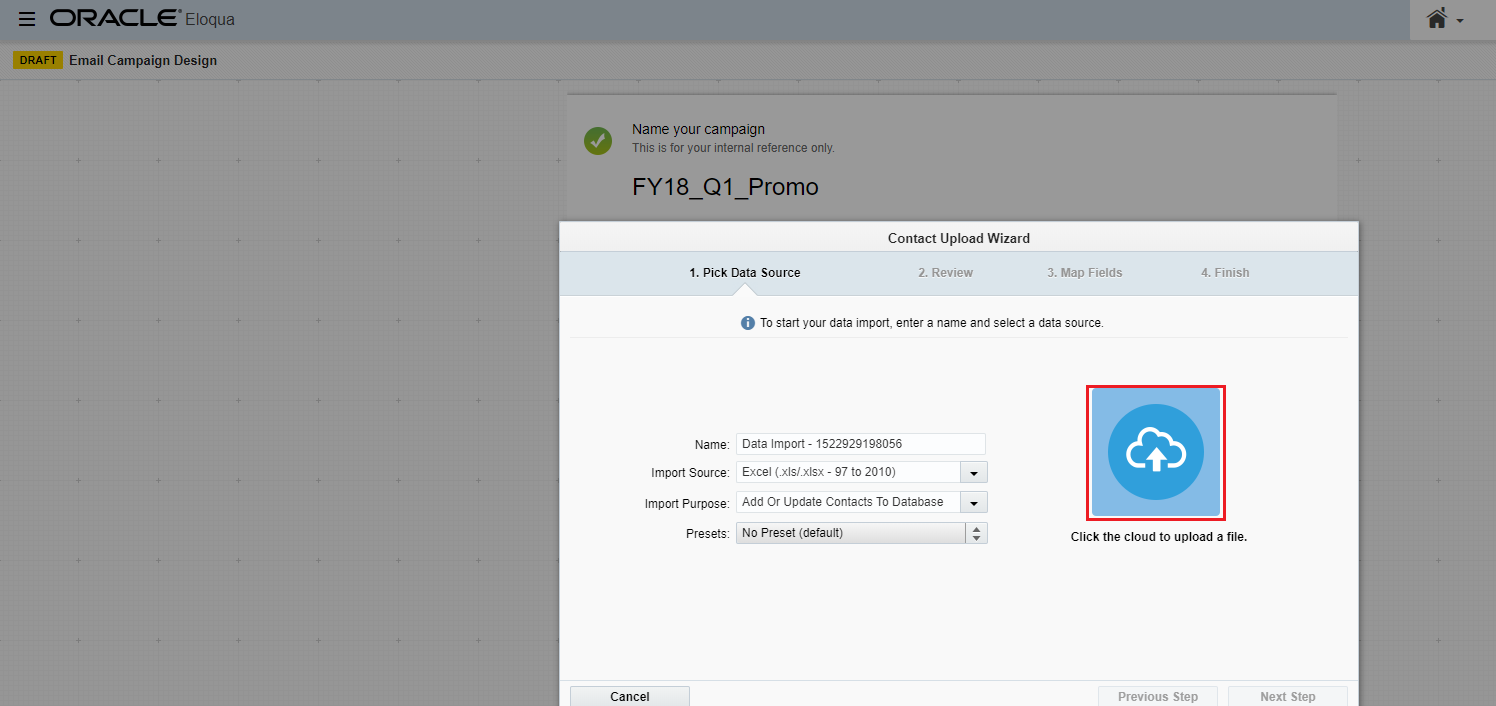
Find the list from your computer that you wish to upload and double click on it.
This will start to import your contact list.
Now click Next Step.

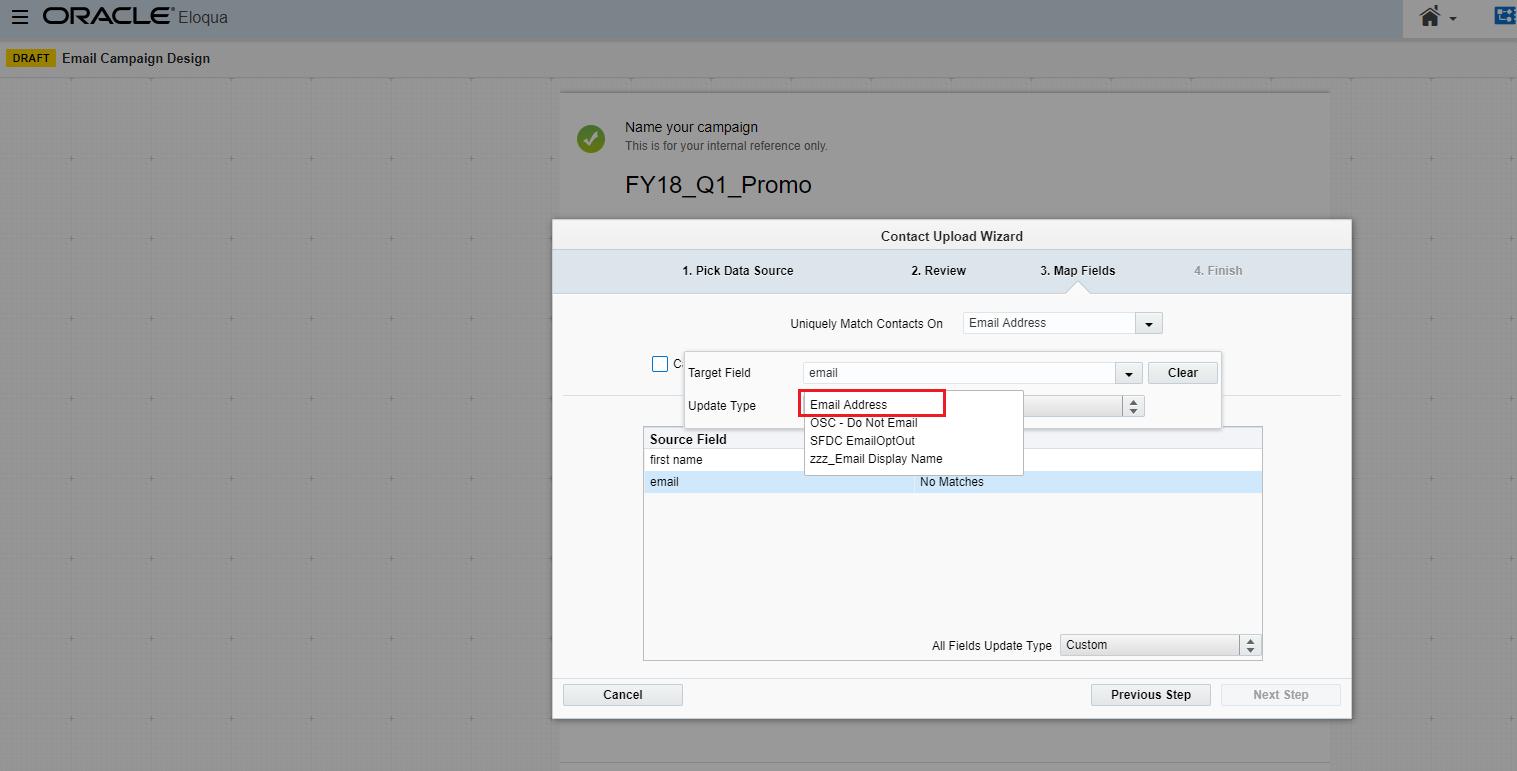
Match up any Source Fields that you want to upload into a target field in the contact database.
Do this by double clicking on the field.
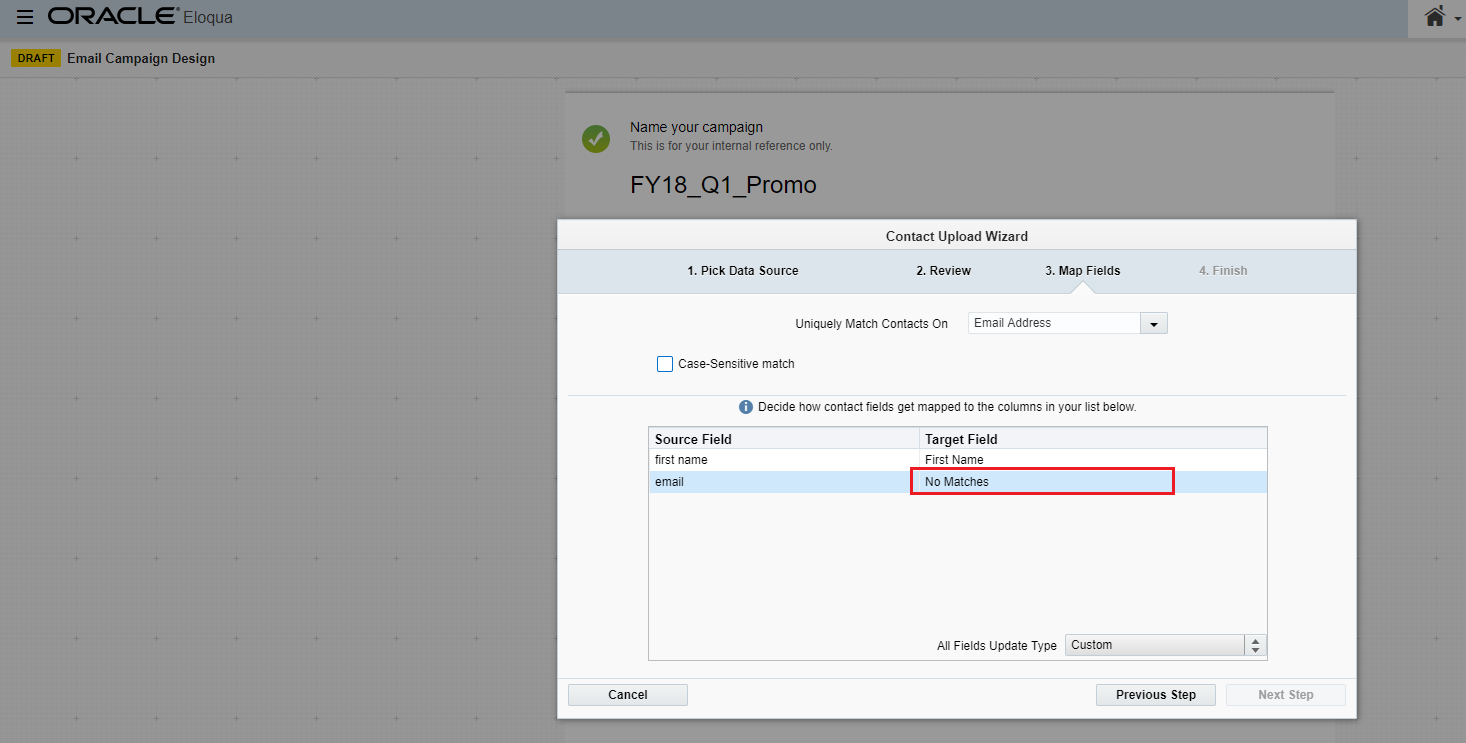
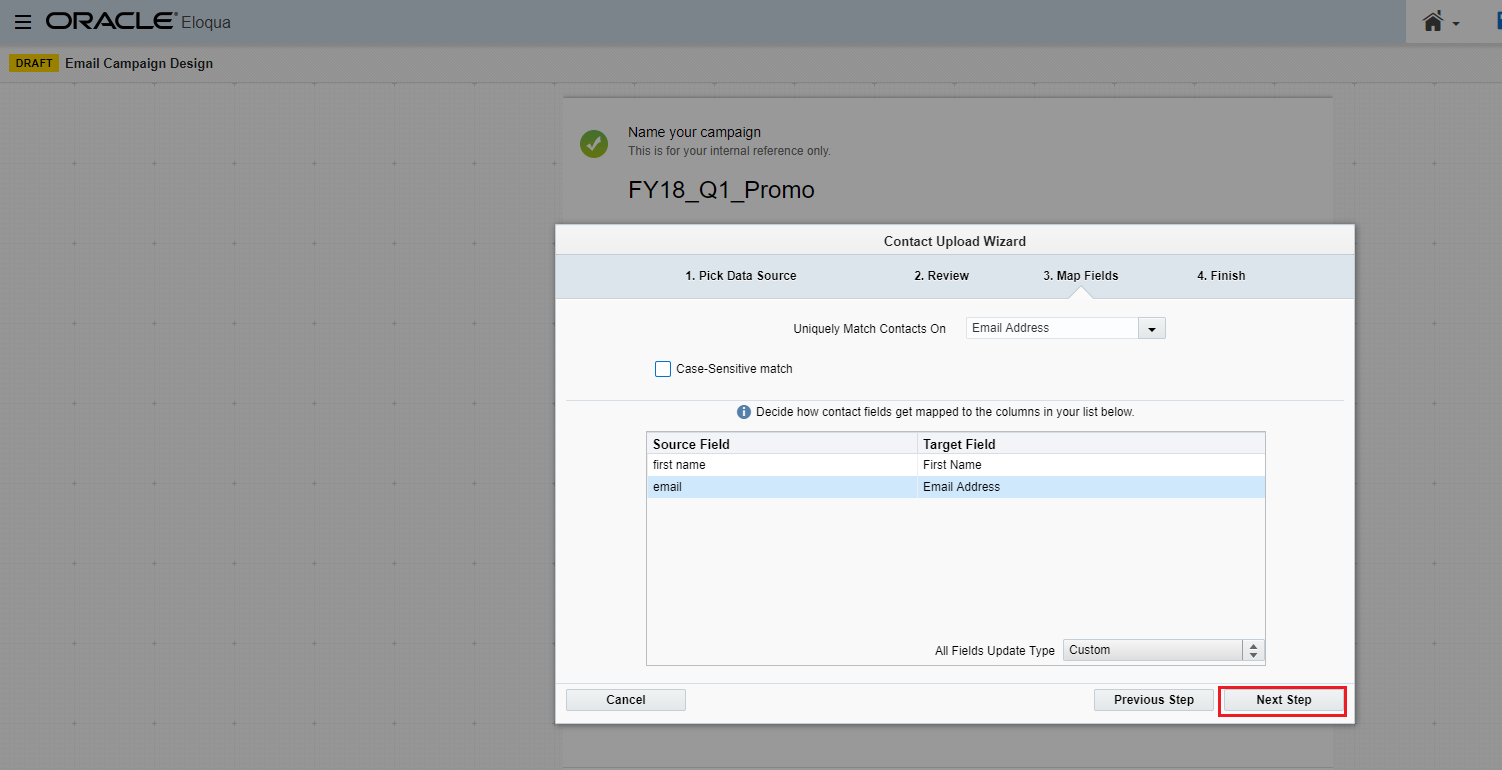
Then select the contact field that you wish to upload to, when you have selected the correct fields that you wish to save to, click on Next Step.
Click Next Step
Click Finish
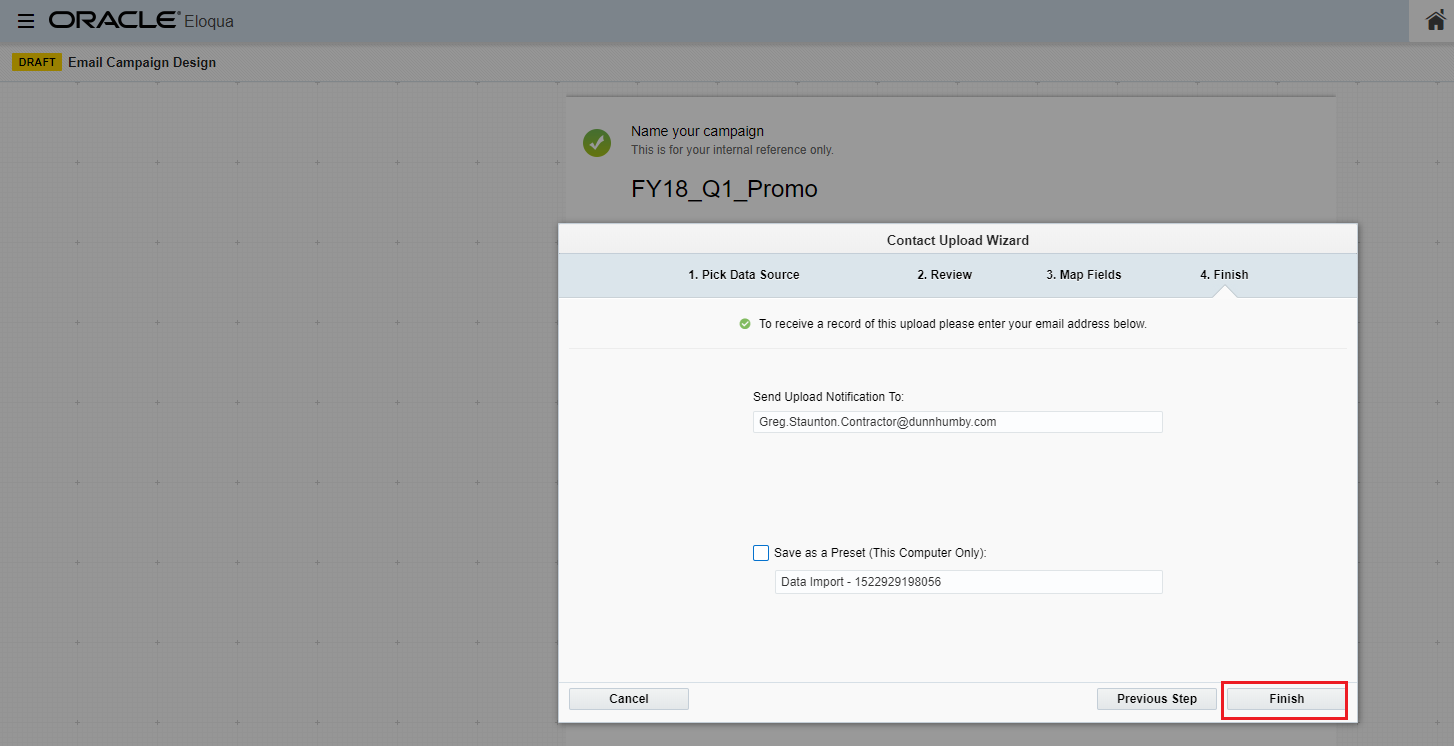
Your list will import and the data count will run
Finally select Finish. You contact list will be uploaded.
This will take you back to the simple email screen so you can commence the next step.
Set Email
You must now select an email. You have three options
- Select an Email
- Create an Email
- Upload an Email
Click on Select an Email

Now navigate to your pre-built email and click on Choose.
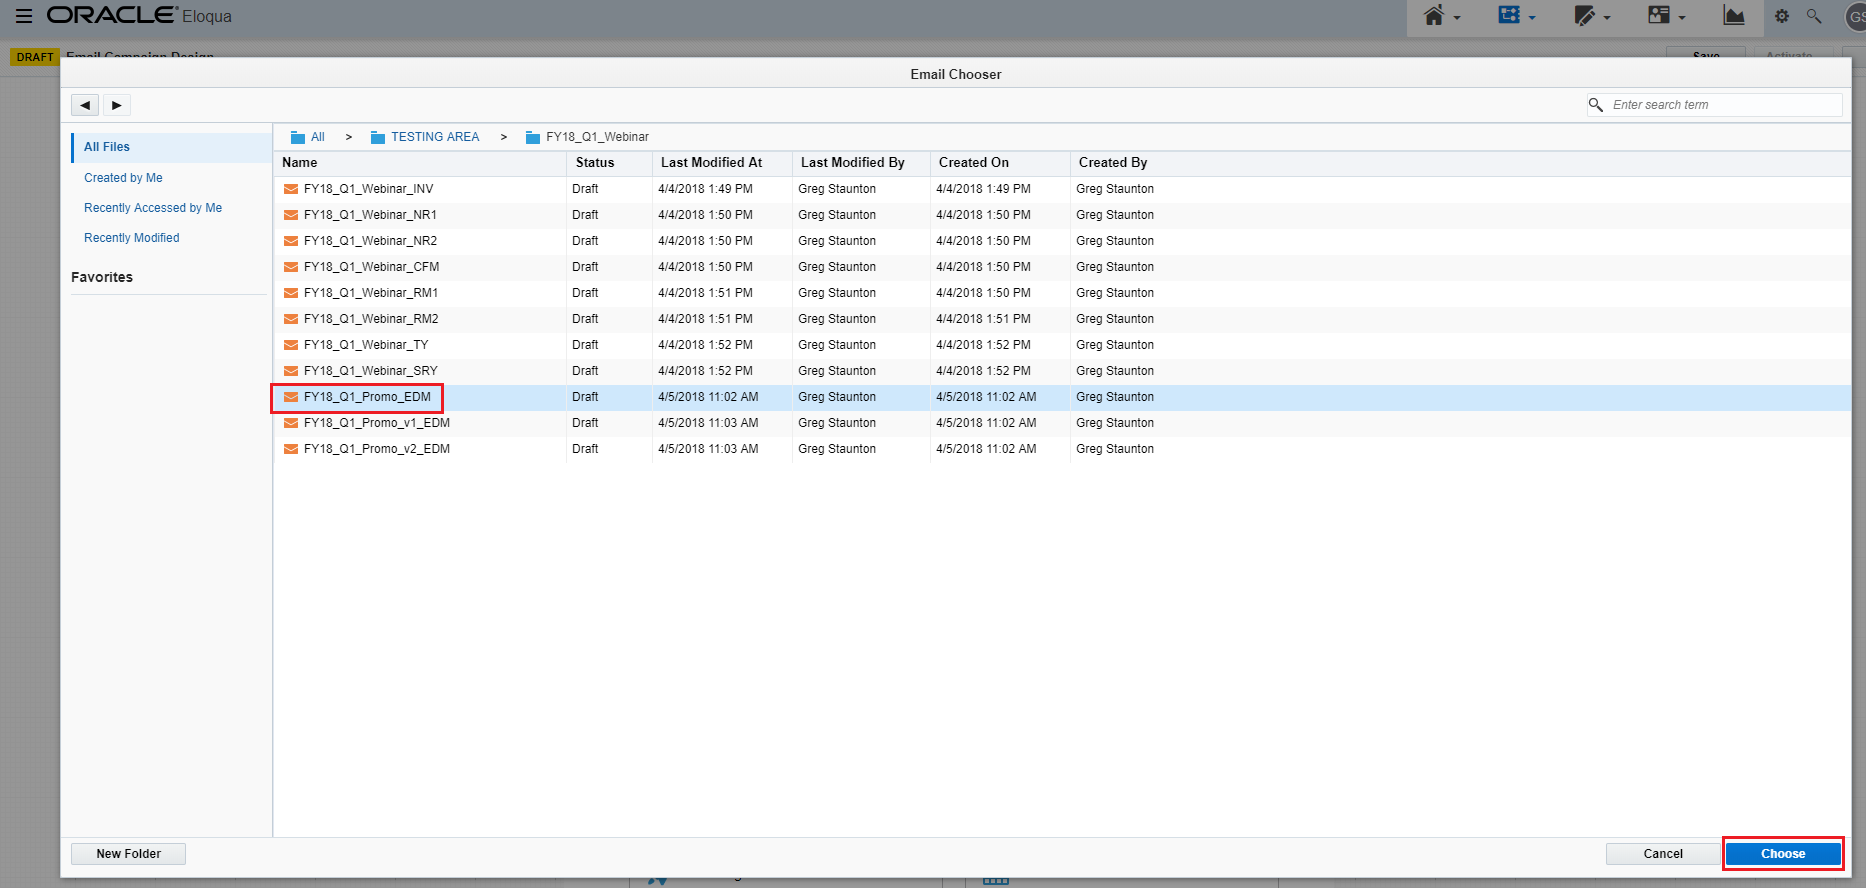
This will now set the email.

There are another two options. You will not use either of these. Use the email creation playbook to create you email or upload an email. This is because they will not have been through the email approval process.
Email Sending
You now have two options. You can Send right now or Schedule for a later time.
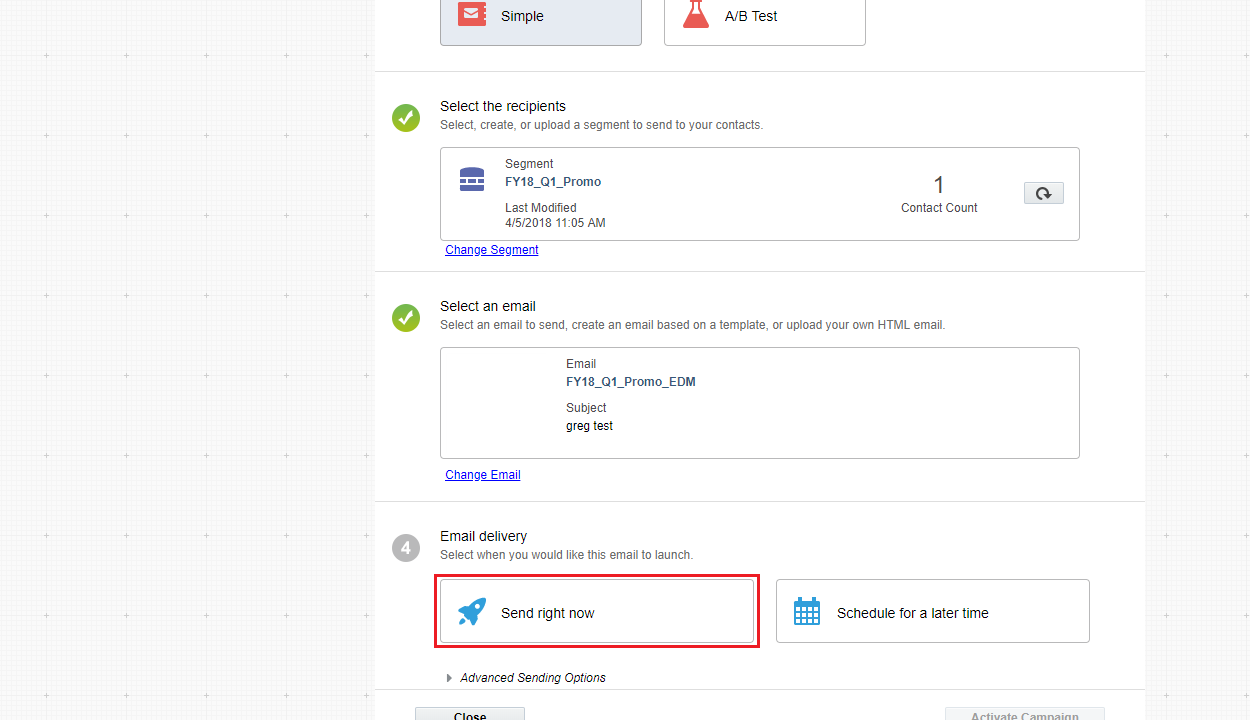
Or Schedule for a later time

Send Right Now
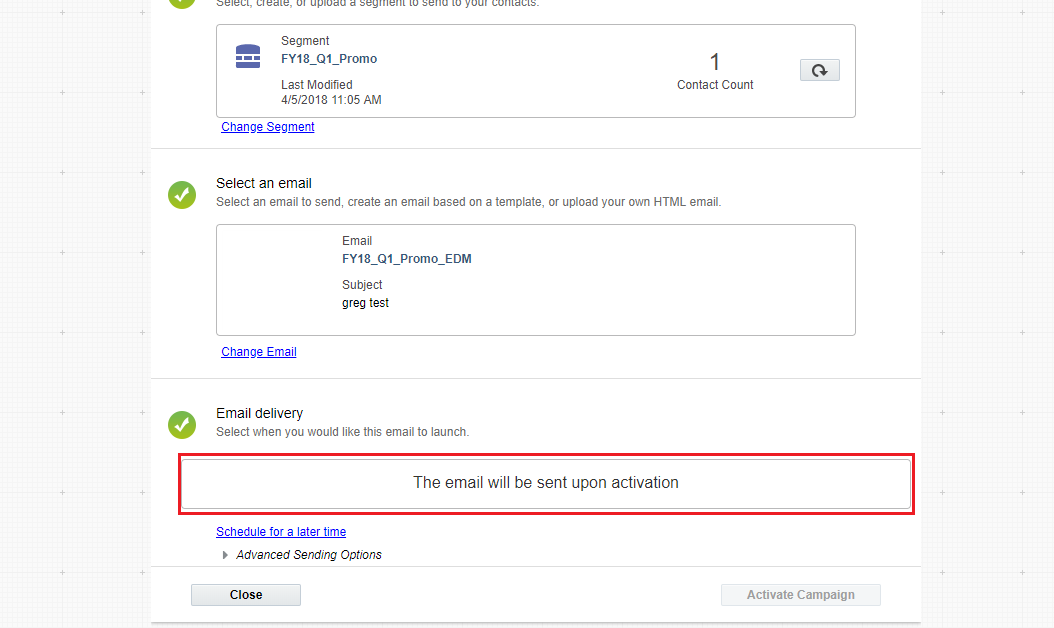
If you click to send it right now (SERIOUSLY NOT RECOMMENDED) then you will see this message:
You must now click save

Navigate to the correct folder for your campaign, give it a name and then click save.
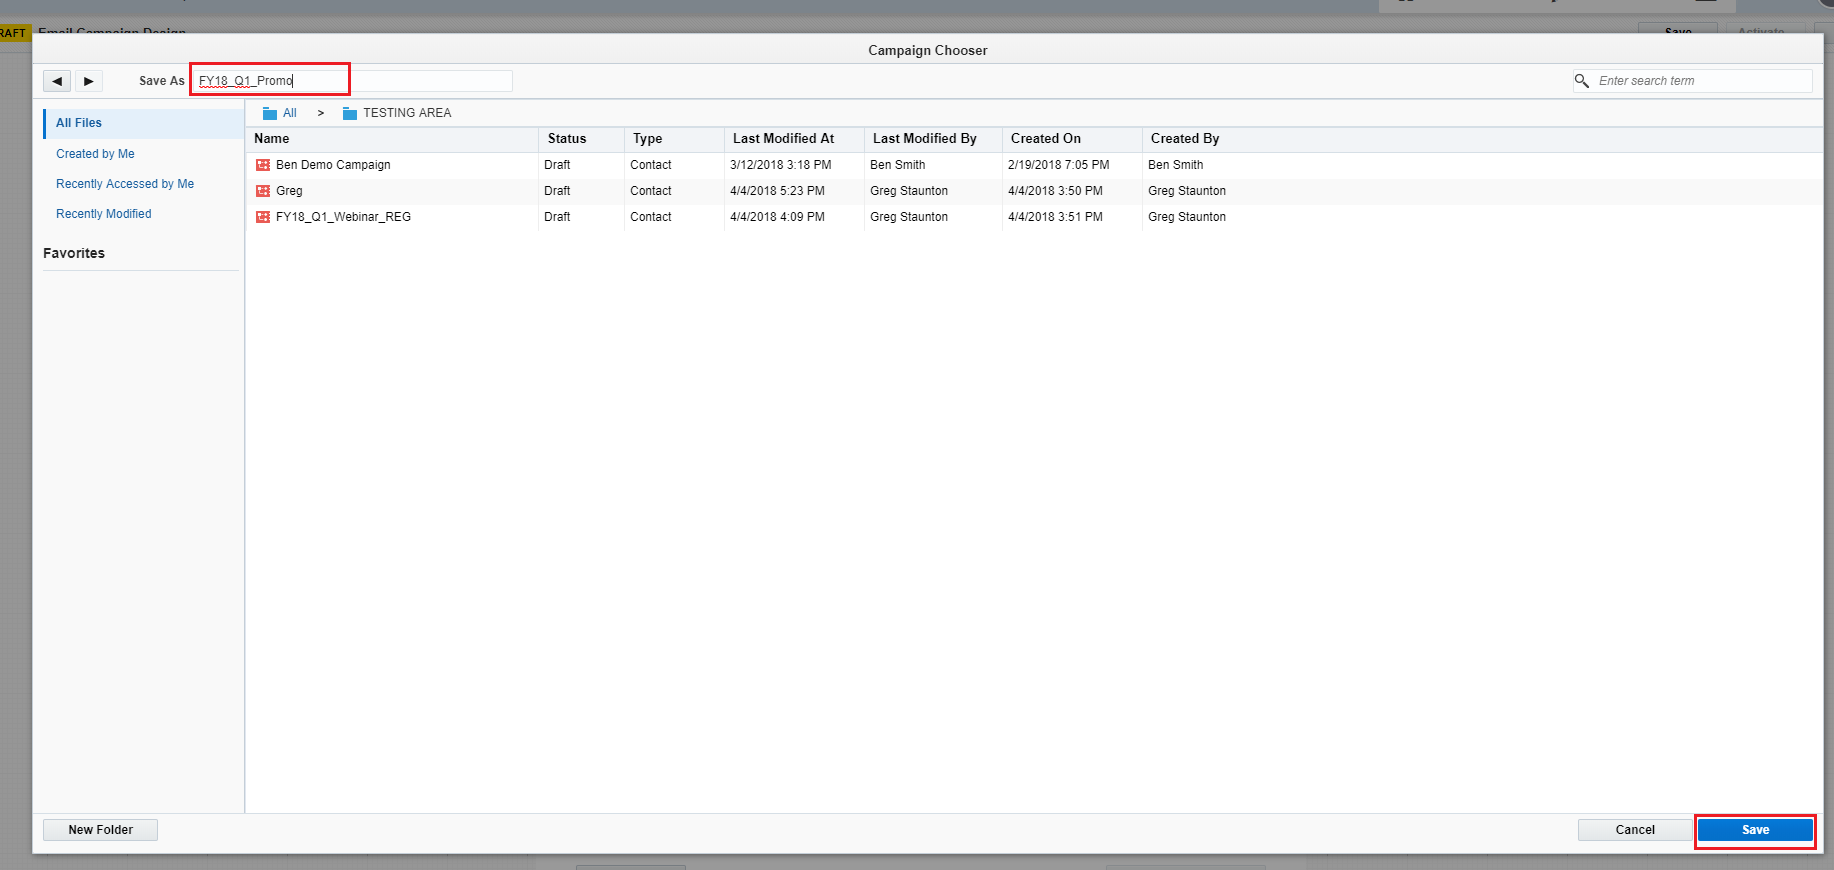
Navigate to the correct folder for your campaign, give it a name and then click save.

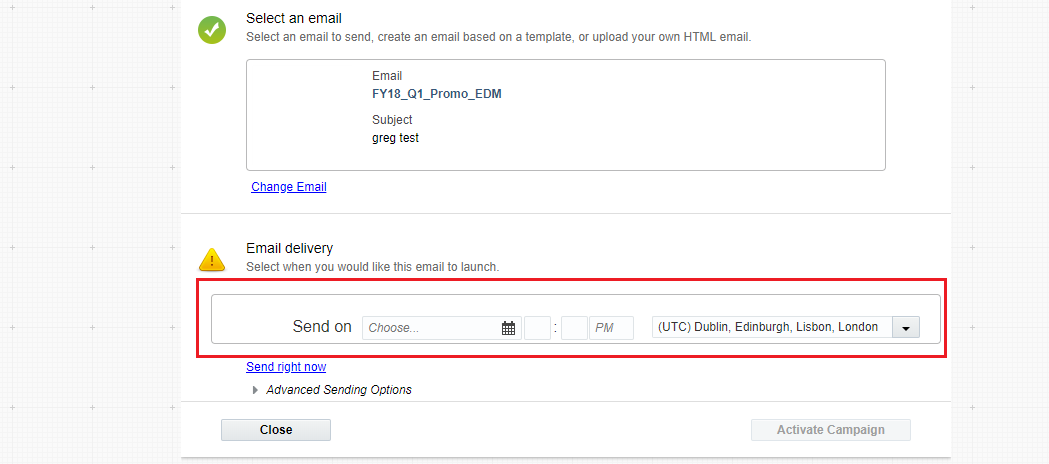
Send email at a later time
If you choose to send the email at a later time you will see some other options.
(It is recommended that you select 30 minutes so that in case you suddenly remember a mistake you have made, it can be fixed – it WILL happen one day)
Click on Schedule email for a later time.

You will need to select the time and date that you wish to send the email and the time zone this is relevant for.
Then save the campaign.
Navigate to the correct folder for your campaign, give it a name and then click save.

And finally Activate

Advanced Sending Options
You will notice some advanced sending options.
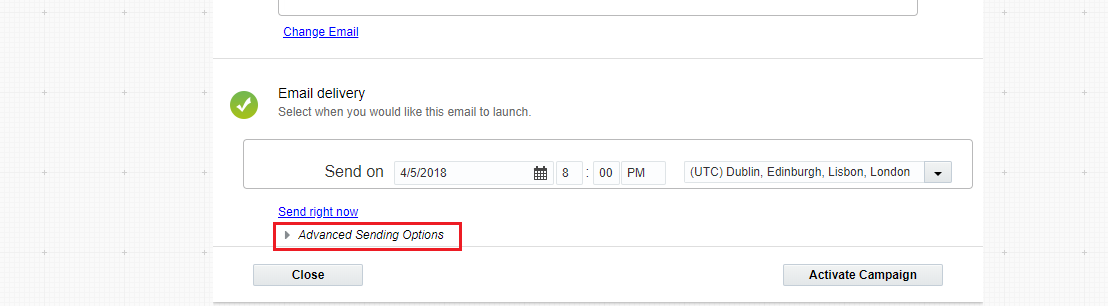
If you click on Advanced Sending Options you will see some options.

There are a number of options. It is recommended that these are not used unless you are an advanced Eloqua user so not covered in this playbook.
A/B Split Test
If you wish to run a campaign with an A/B then your options will change slightly.
Create a new Simple email campaign.
Select A/B Split Test
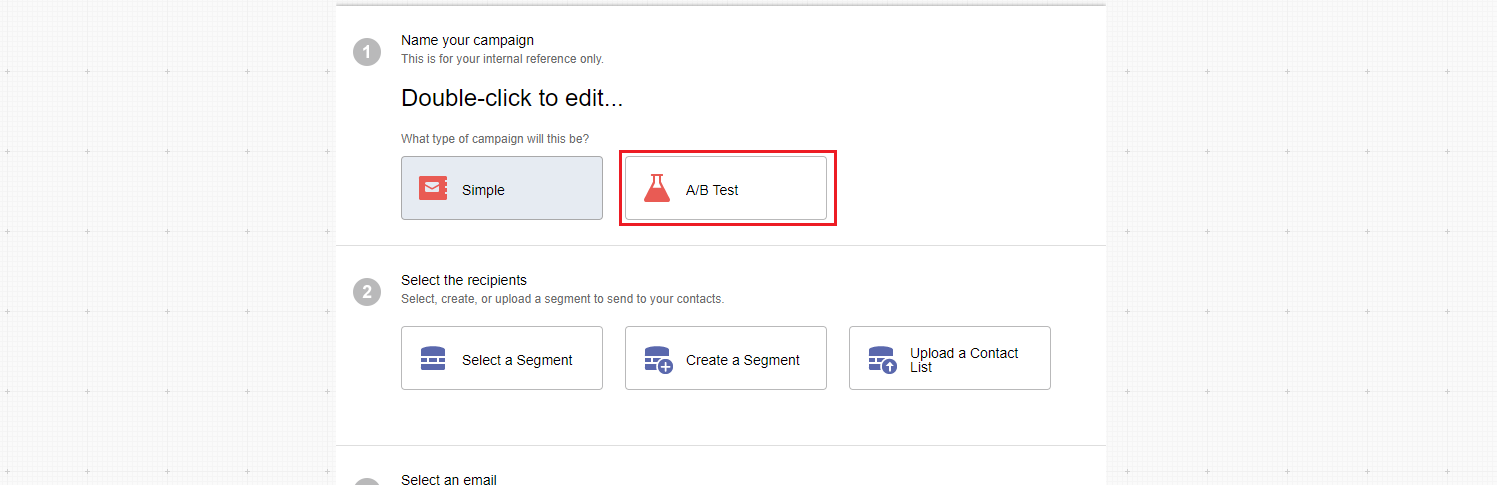
You will see that you have some new options.
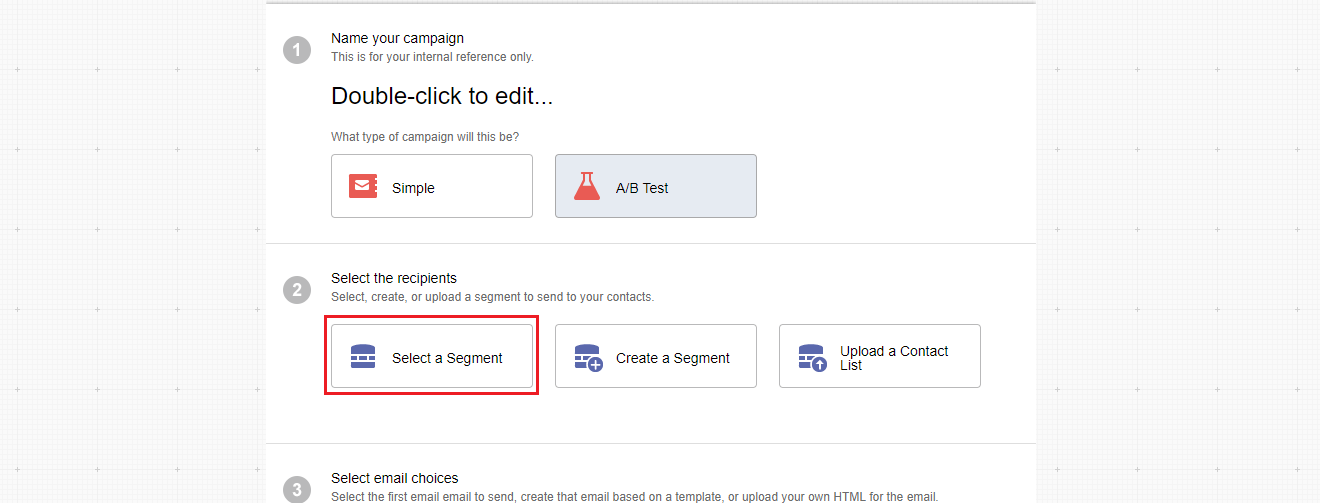
Select or Create a Segment or Upload a Contact List that you wish to send to. To do this follow the instructions that are in the Simple email send part of this playbook.
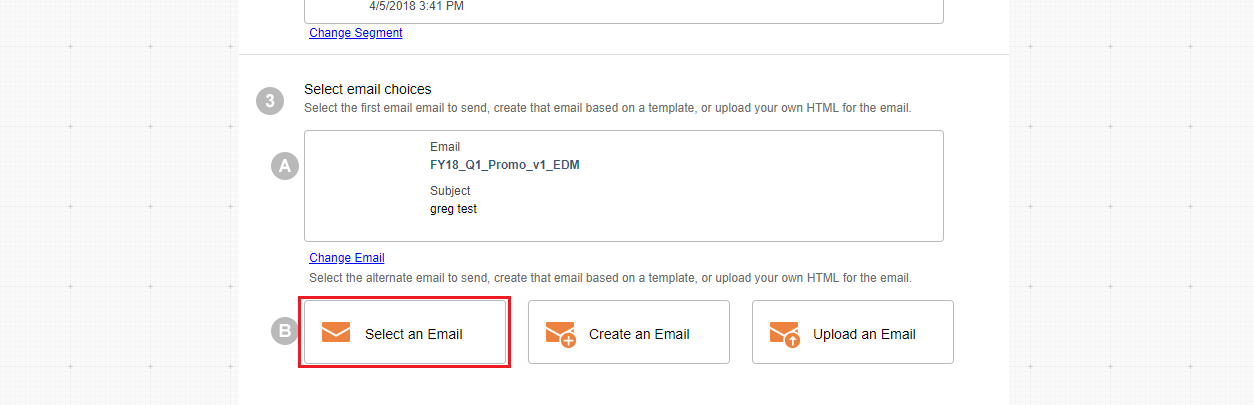
You will notice that you have two options now for Select email choices.
Select your first email variant
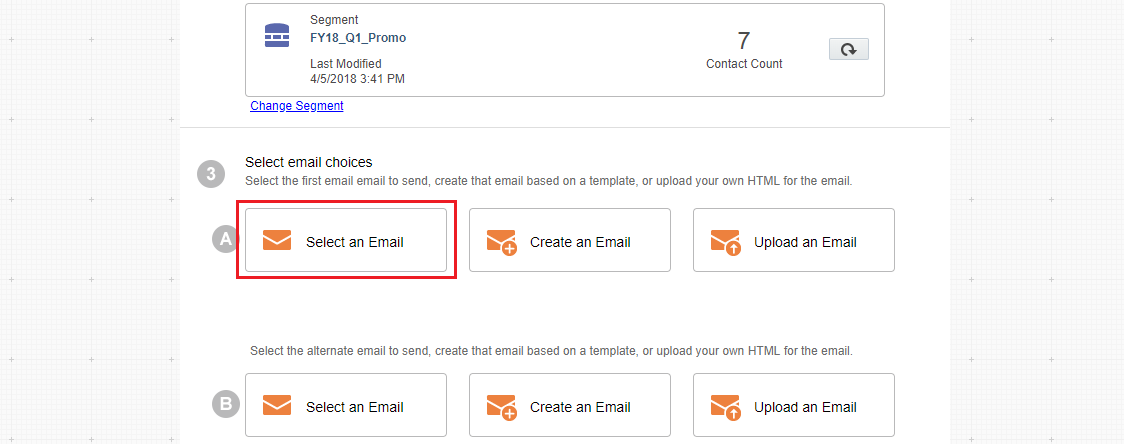
Select your first email variant and then choose.

Repeat for your second variant.
There are two main options you are going to use when it comes to a split test. You will either:
- Have the same email and use different subject lines
- Have two separate email formats and the same subject line
Either way the set up will be the same. You will need to have created two separate emails.
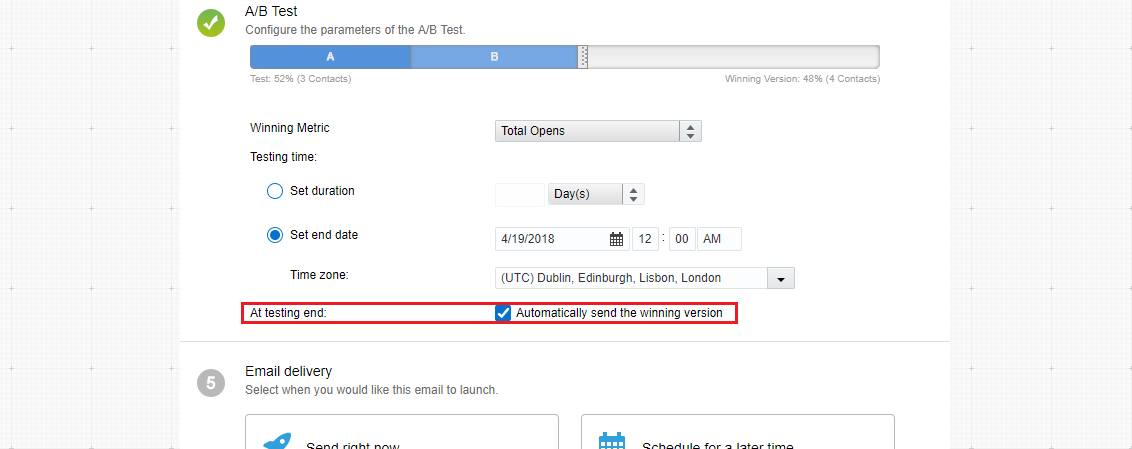
Next you will need to set up the parameters for the A/B split test.
The first thing you need to do is set the test contacts. These are the contacts that you are going to send you two variants to. The remainder are going to get sent the winning test.
To increase or decrease the number of test contacts you need to drag the slider back and forth in the middle.
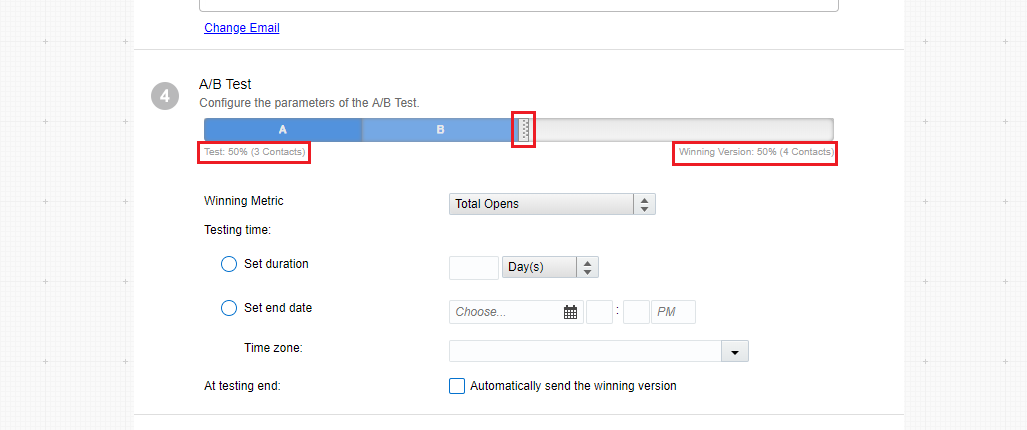
Next you need to set the winning metric. You have the following options:
|
Winning Metric |
Description |
|
Total Opens |
This is the total opens that takes place with an email. It will count multiple opens from the same contact. This can become problematic with shared, generic email addresses |
|
Unique Opens |
This is the unique number of contacts that you have emailed that have opened the email at least once. |
|
Total Clicks |
This is the total number of clicks that have been made from the email. |
|
Unique Clicks |
Unique clicks doesn’t count any other clicks apart from the first one. |
|
Total Conversions |
This means the total number of submissions that have taken place through an Eloqua integrated form that have resulted from the email being sent. |
|
Click-Through Rate |
The total number of clicked links divided by the number of delivered emails. Undelivered emails are excluded from this calculation. |
Choose the metric that aligns with your goals for the campaign.
If you’re looking for high engagement, you might want to focus on opens or clicks. If you’re focused on goal completion, the total conversion metric, which looks at the number of contacts that submit a form linked to in the email, might be more appropriate.
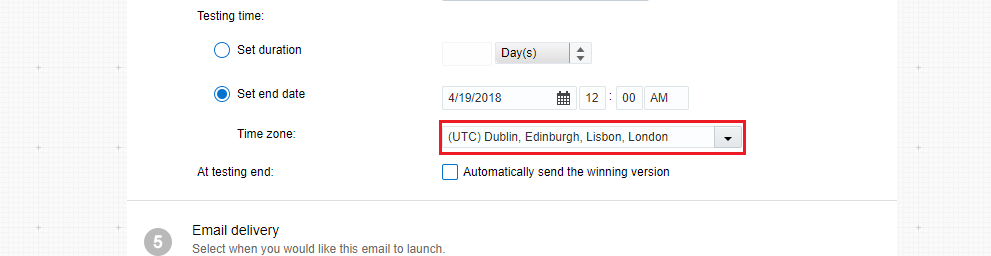
Next you need to configure the testing window. You can either set the duration of the test or the date you want to test to.
Whatever you choose you, once the testing window is over then the winning email variant will be sent to the remaining audience.
TIP: Make sure your testing window doesn’t result in you doing a main send over the weekend or a holiday.
Setting the duration for the test allows you to enter a number and then select:
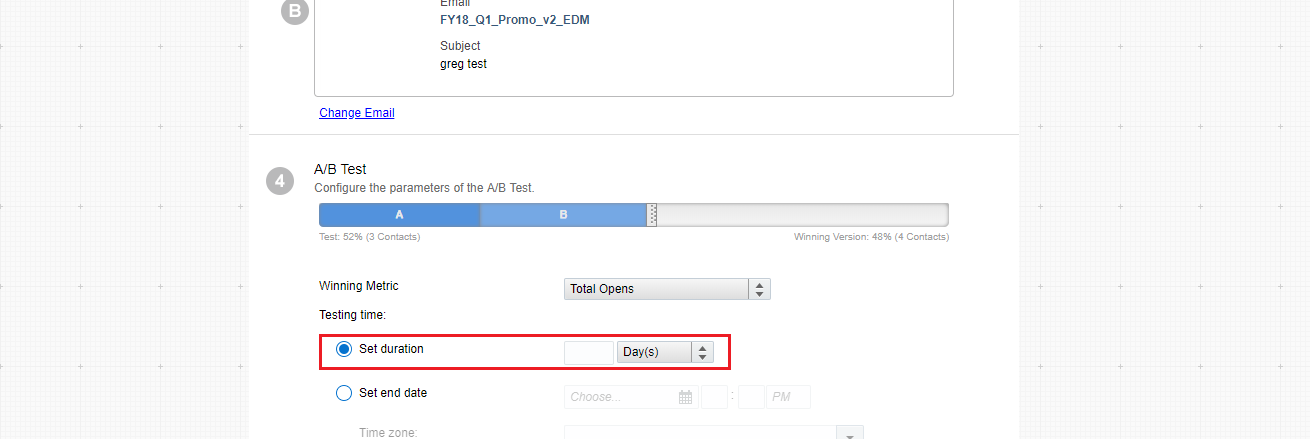
Or set the end date using the calendar
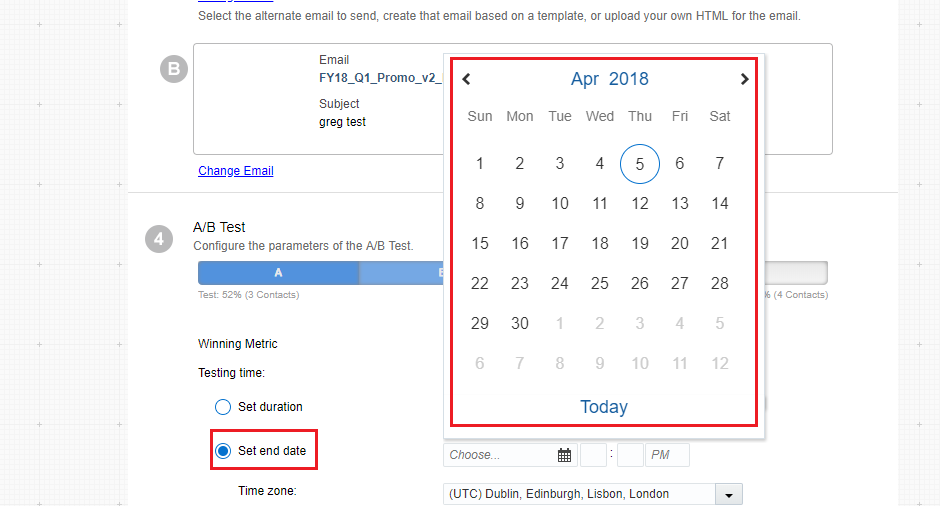
Once you have set the date and the time you will need to remember to set the time zone.
Finally set that you wish to send the winning email to the remainder of the list you are sending to by clicking on the check box.
Now you can set you’re A/B split test for send. Follow the same procedures that have been set under the simple email send.

Eloqua Training: 105 Eloqua Segmentation
105 Segmentation Playbook OVERVIEW Eloqua segments are used for sending simple emails or pushing contacts into multi-step campaigns. They are groups of contacts that are generated through filters and contact lists. CREATE A NEW SEGMENT Navigate to Audience, then click...

Eloqua Training: For beginners
Eloqua training for beginners I had a subscriber reach out to me thanking me for the training articles I have put together so far but they are a little earlier on in their Eloqua career so they asked if I could put together a basic fundamentals training package. ...

Eloqua Training: 103 Form Creation in Eloqua
Creating forms 1 Introduction Forms are an integral part of landing pages, they are the method employed through which users can transmit their data back to Eloqua and ultimately become leads for your sales team to follow up. This user guide has been developed...

Eloqua Training: 102 Email Creation Using the Template Editor
102 Email Creation Using the Template Editor 1 Official Eloqua Documentation For generic Oracle documentation on the Email editor, please see here: https://docs.oracle.com/cloud/latest/marketingcs_gs/OMCAA/index.html#Help/Emails/Emails.htm%3FTocPath%3DEmails%7C_____0 ...