
Why Eloqua picklists and ISO country codes matter
Recently I have been working on form migrations and country lists, and although this article focuses on Eloqua picklists, the same approach works for most marketing and CRM platforms.
At its core a picklist in Eloqua is simply a list with two columns:
- Name – what the user sees on the form
- Value – what is stored in the database and passed to CRM
When you add an Eloqua picklist to a form field, the visitor sees the Name. When they submit the form, Eloqua stores the Value and sends that into your database and CRM.
A simple example – days of the week
A basic Eloqua picklist for days of the week might look like this:
| Name | Value |
|---|---|
| Monday | 01 |
| Tuesday | 02 |
| Wednesday | 03 |
| Thursday | 04 |
| Friday | 05 |
| Saturday | 06 |
| Sunday | 07 |
On the form the user sees Monday through Sunday. When they submit, Eloqua stores 01 through 07. That numeric value is what will be passed into your CRM.
Why use a different backend value at all
The short answer is: because your CRM and reporting tools care far more about consistency than language.
Most CRM systems use language packs. They store a standard value, then translate that value for each user interface. For example:
- CRM stores 01 for Monday.
- A user with English sees Monday.
- A user with French language permissions sees Lundi.
The underlying value never changes. That is what you want. The moment you start pushing different names directly into CRM, your picklists become impossible to manage and reporting becomes painful.
Using ISO codes for countries is the same idea, just at global scale.
ISO country codes with EN, NL, FR, DE and ES labels
Over the years I have had to build country picklists in multiple languages more times than I can count. Rather than repeating the job yet again I created a proper reference file that includes:
- ISO Code – the backend value you store and send to CRM
- EN – country name in English
- NL – Dutch name
- FR – French name
- DE – German name
- ES – Spanish name
Here is the start of the list so you can see the structure:
| ISO Code | EN | NL | FR | DE | ES |
|---|---|---|---|---|---|
| AF | Afghanistan | Afghanistan | Afghanestan | Afghanistan | Afghanestan |
| AL | Albania | Albanië | Albanie | Albanien | Albania |
| DZ | Algeria | Algerije | Algérie | Algerien | Argelia |
| AS | American Samoa | Amerikaans-Samoa | Samoa Américaines | Amerikanisch-Samoa | Samoa Americana |
| AD | Andorra | Andorra | Andorre | Andorra | Andorra |
| AO | Angola | Angola | Angola | Angola | Angola |
| AI | Anguilla | Anguilla | Anguilla | Anguilla | Anguilla |
| AQ | Antarctica | Antarctica | Antarctique | Antarktis | Antártida |
| AG | Antigua and Barbuda | Antigua en Barbuda | Antigua-et-Barbuda | Antigua und Barbuda | Antigua y Barbuda |
| AR | Argentina | Argentinië | Argentine | Argentinien | Argentina |
If you want the full Excel file with all ISO countries and translations for EN, NL, FR, DE and ES, feel free to get in touch or connect with me on LinkedIn and I will send it over.
Creating a country picklist in Eloqua
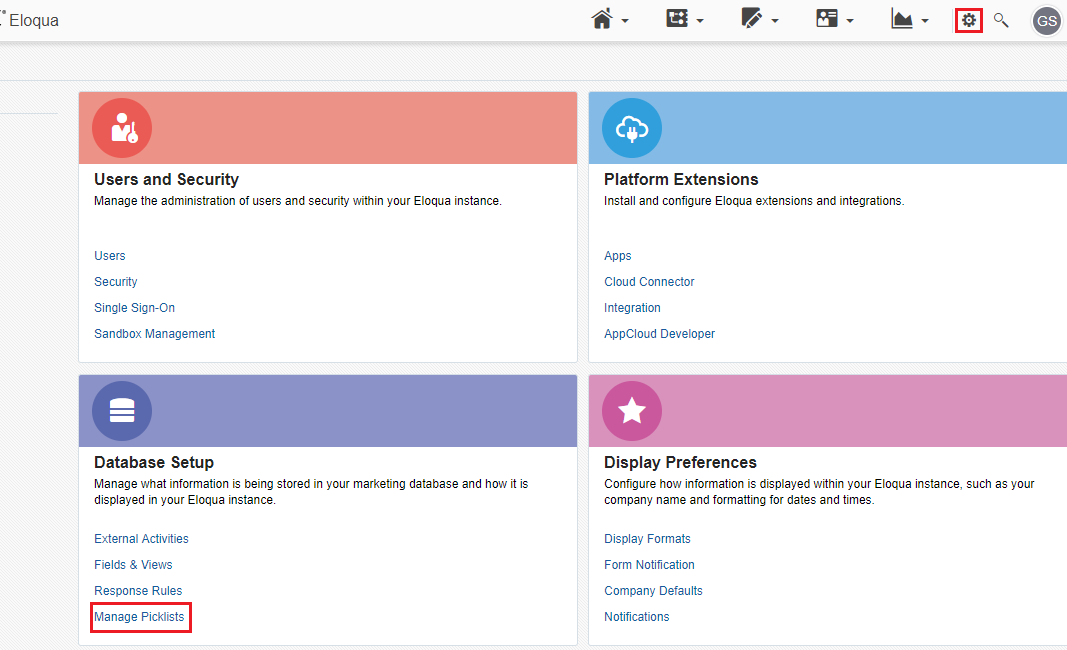
Once you have the Excel file, the rest is straightforward. In Eloqua go to:
Settings → Manage Picklists
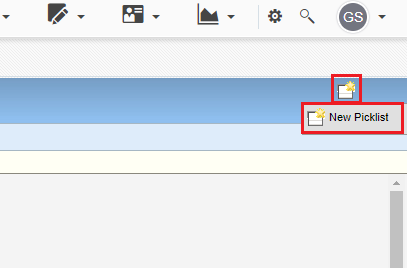
In the top right, click Picklist then select Add new picklist.
Give your picklist a clear name that your team will recognise, for example:
- Country – ISO – EN
- Country – ISO – FR
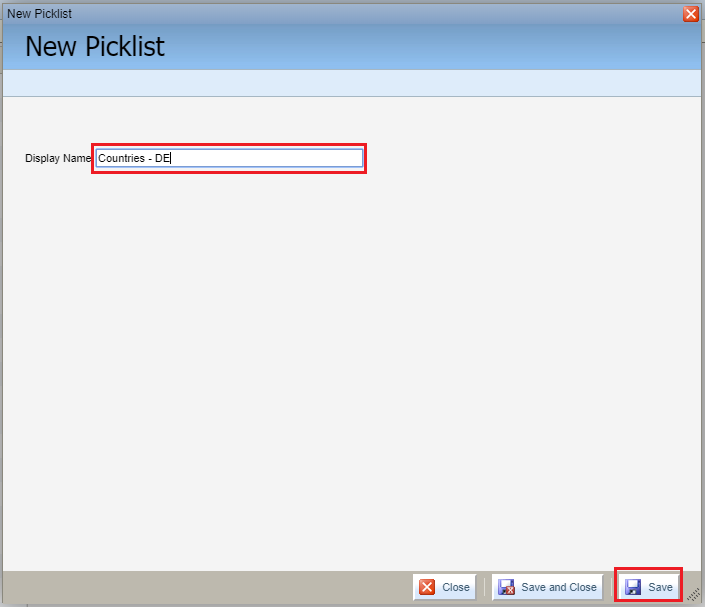
Preparing your Excel file for upload
In your country Excel file, add two new columns at the start:
- Option Value – this will hold the ISO country code
- Option Name – this will hold the country name in your chosen language
For example, for an English picklist:
- Option Value → ISO Code (AF, AL, DZ...)
- Option Name → EN (Afghanistan, Albania, Algeria...)
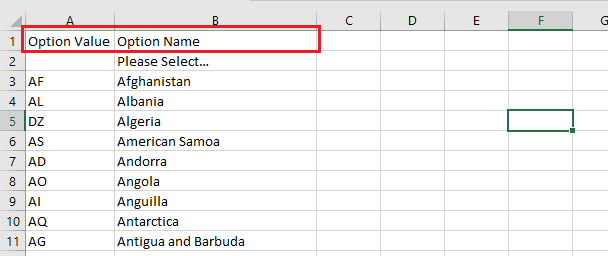
Save the file as CSV or XLSX and keep a master copy. You can easily clone this file and swap the Option Name column to use NL, FR, DE or ES when you build language specific picklists.
Uploading the picklist into Eloqua
Back in Eloqua, with your new picklist selected, click:
Picklist → Upload Picklist
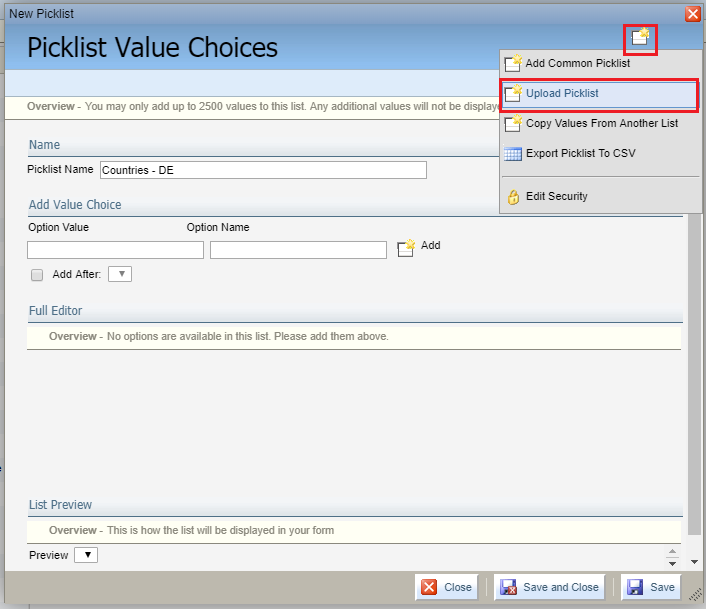
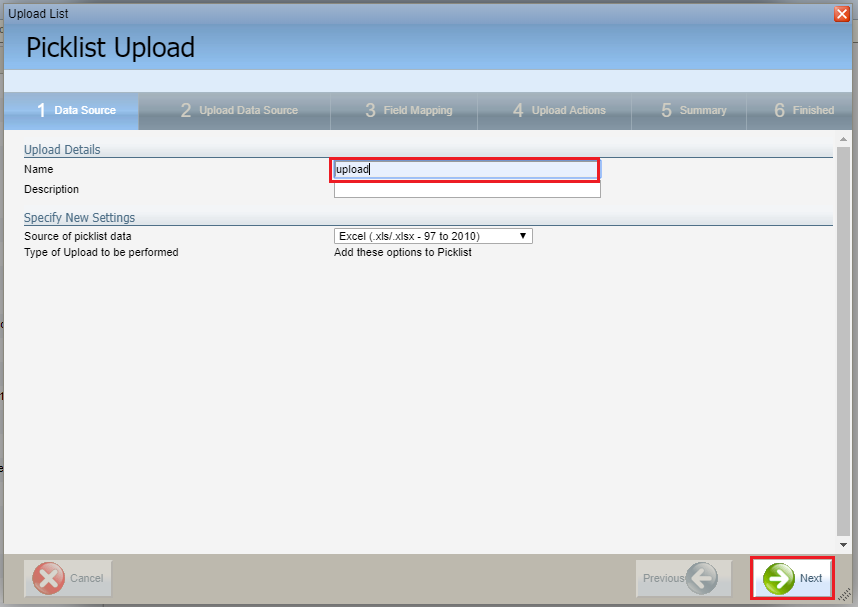
Give the upload a name. This is just for your reference so it can be something simple like:
Country – ISO – EN – Upload
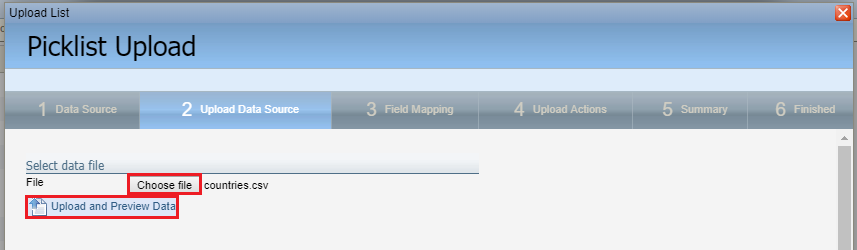
Click Choose file, select your prepared Excel or CSV file, then click Upload and Preview Data.
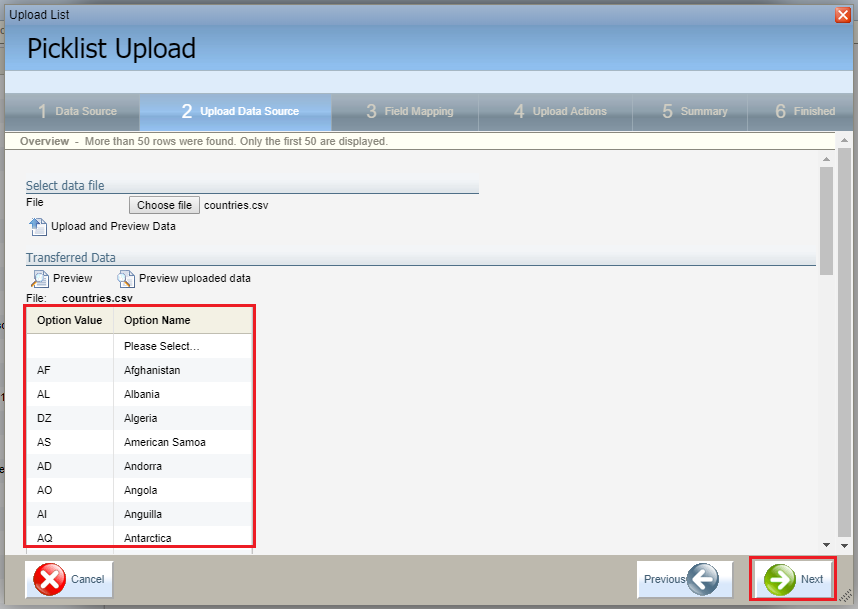
Confirm that the data looks correct, then click Next.
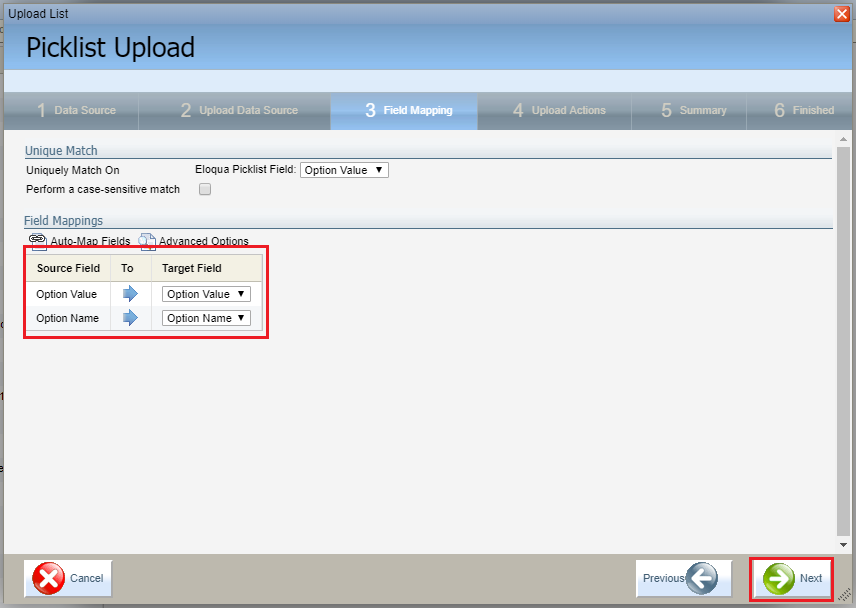
On the mapping screen, make sure:
- Option Name is mapped to your Option Name column.
- Option Value is mapped to your ISO code column.
Click Next again to run the import, then Finish to complete it.
Using your country picklist on Eloqua forms
You can now attach your new country picklist to any country field in Eloqua forms. The visitor sees the translated Option Name. Eloqua stores the ISO Option Value and passes it into CRM.
For multi language sites, you simply repeat this process for each language. All variants use the same ISO code values, which keeps your CRM and reporting stack clean while giving users the right language on the front end.
Conclusion
With a clean ISO based country picklist you avoid messy free text country fields and inconsistent translations. Eloqua sends a stable backend value that CRM can interpret correctly for every language pack.
You can reuse the same approach for other global picklists such as states, regions, business units or products. One stable backend value, multiple front end labels where needed.
If you want the full multi language country list or help standardising picklists across Eloqua and CRM, feel free to reach out.