
Introduction
Contact uploads are one of the first tasks most new Eloqua users learn. They also happen to be one of the most commonly misunderstood. A contact upload is not simply “drag in a CSV and hope for the best”. In enterprise environments, your upload affects segmentation, campaign eligibility, subscription status, CRM synchronisation and reporting.
In Eloqua, a correct contact upload has two equally important parts:
- Contact upload into the database
- Shared list association to ensure you can actually find and target those contacts later
Skip the second part and your audience disappears into the wider global database, making it extremely difficult to work out which contacts belong to which business area. This is especially painful in multi-region or multi-BU organisations.
This guide walks you through the process step by step, plus the governance rules every team should adopt.
Eloqua Contact Upload Overview
Uploading contacts into Eloqua is easy, but uploading them correctly is a different matter. A clean, governed upload protects your segmentation, dashboards, form processing, CRM syncs and everything else downstream.
There are two core parts every upload must include:
- Contact upload
- Interest list association (Shared Lists)
If you skip the second step, your contacts will still upload, but you will lose visibility of who belongs to your business area, your region or your team. This is how contacts “go missing” in Eloqua.
Step 1 - Navigate to Contacts
Go to Audience → Contacts.
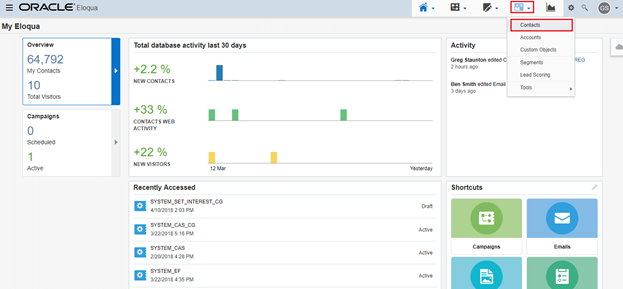 Contacts in Eloqua."
class="w-full rounded-2xl shadow-sm"
>
Contacts in Eloqua."
class="w-full rounded-2xl shadow-sm"
>
Click Upload in the top right.
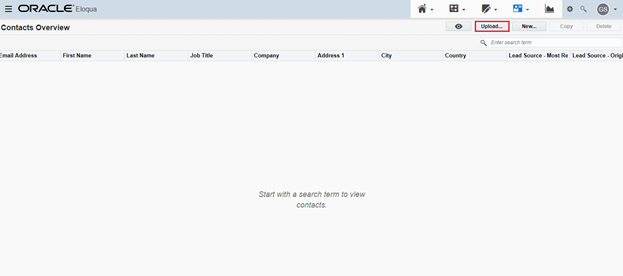
Eloqua will now prompt you to select your file.
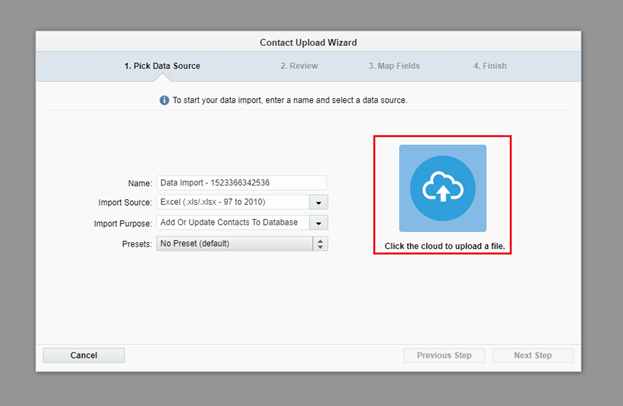
Step 2 - Select Your File
Eloqua accepts .CSV and .XLS files. If you ever have problems with special characters or accents, switch to CSV.
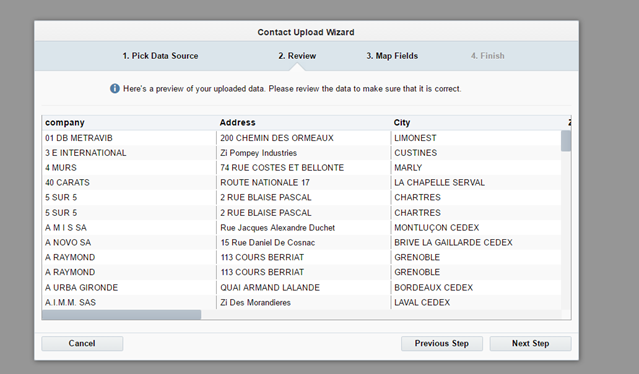
Click Next Step.
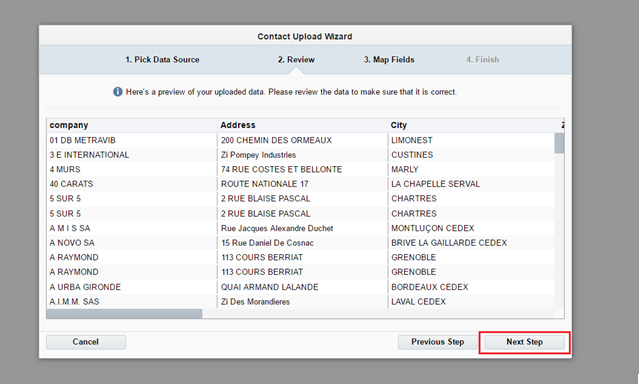
Step 3 - Map Your Fields
This is the most important part of the upload. Eloqua needs to understand which column goes into which field.
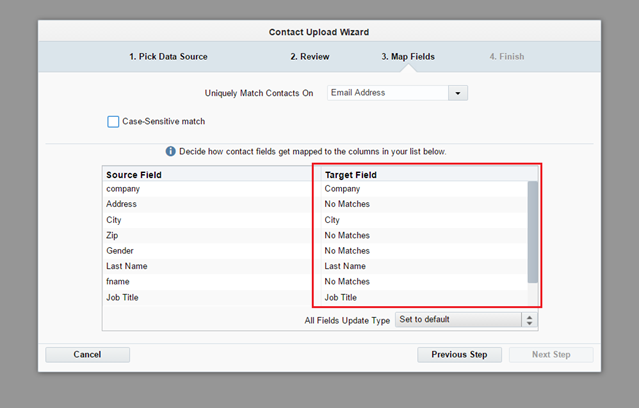
Do not change “Uniquely Match Contacts On: Email Address”. Eloqua’s unique identifier for all contacts is the email address. Changing this causes duplicates, sync failures and segmentation issues.
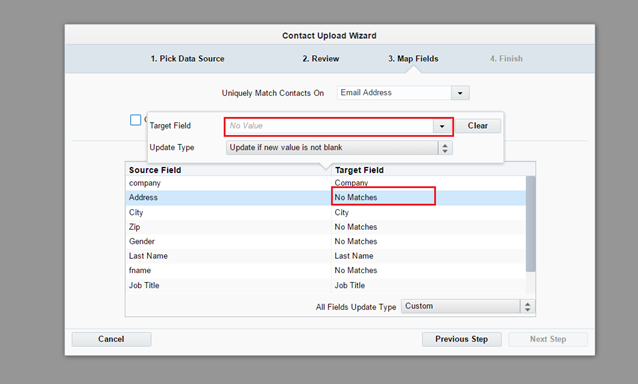
If Eloqua cannot match a column, double click the target field to map it manually.
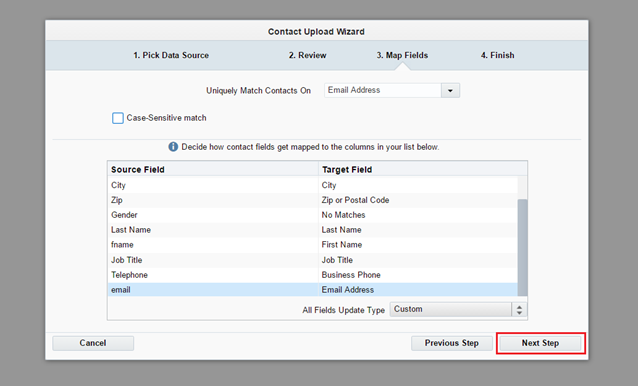
Once mapped, click Next Step.
Step 4 - Associate to an Interest Shared List
This step decides who owns the contact inside Eloqua. Without it, your team will not be able to segment, filter or locate your newly uploaded records.
Click Use Existing.
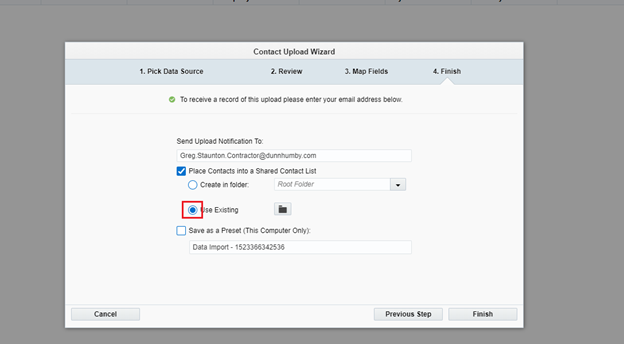
Now browse through your folder structure and find the correct shared list.
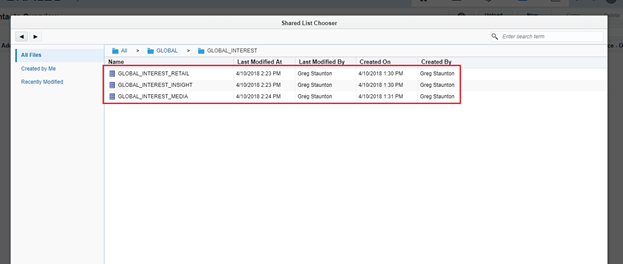
Select your list and click Choose.
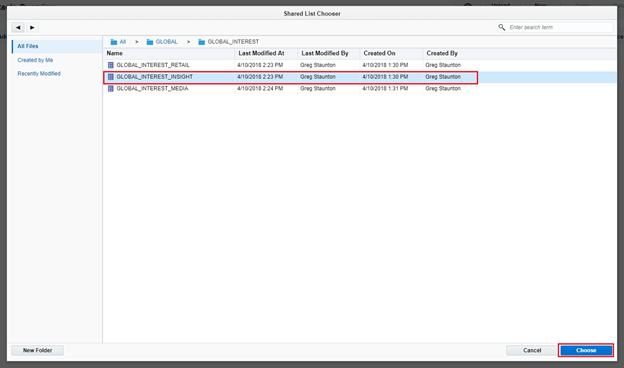
Step 5 - Finish the Upload
Review your choices and click Finish. Eloqua will process your file and confirm the number of records uploaded.
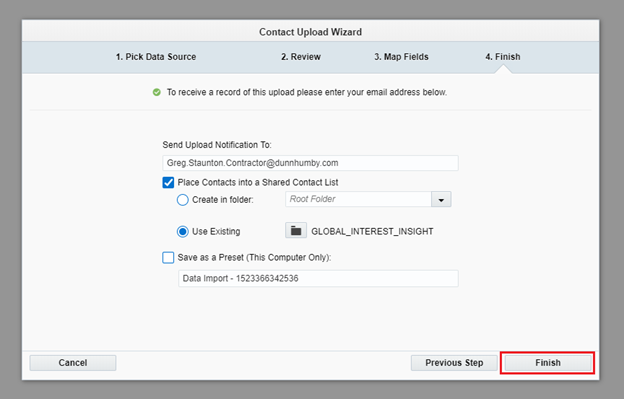
Once complete, your new records will appear in your selected shared list and can now be used for segmentation, campaigns or CRM sync.
Best Practices and Governance
Over the years, I have seen uploads go wrong in every possible way. These rules will save you.
- Always check your file for blank email addresses. Eloqua rejects these silently.
- Never bulk-upload unsubscribes manually. Use the subscription management or preference centre flow.
- Do not upload CRM IDs unless you understand the integration model. You can break synchronisation.
- Avoid special characters in column headers. Keep naming simple and clean.
- Store every upload file centrally. You will eventually need to audit who uploaded what and when.
- Always associate the upload to a shared list. It is your only reliable way to recall that audience later.
Conclusion
A clean contact upload is one of the simplest technical actions in Eloqua, yet one of the easiest to get wrong. Following the steps in this guide ensures you upload data safely, maintain segment integrity, support CRM synchronisation and prevent your business areas from losing track of their own audiences.
Do this consistently and your Eloqua environment stays clean, traceable and ready to support global-scale campaigns.
Need help training your team on Eloqua best practices?
I deliver structured Eloqua training for teams who want to work confidently, cleanly and without risking their data.