Eloqua Training: 105 Eloqua Segmentation
105 Segmentation Playbook
OVERVIEW
Eloqua segments are used for sending simple emails or pushing contacts into multi-step campaigns. They are groups of contacts that are generated through filters and contact lists.
CREATE A NEW SEGMENT
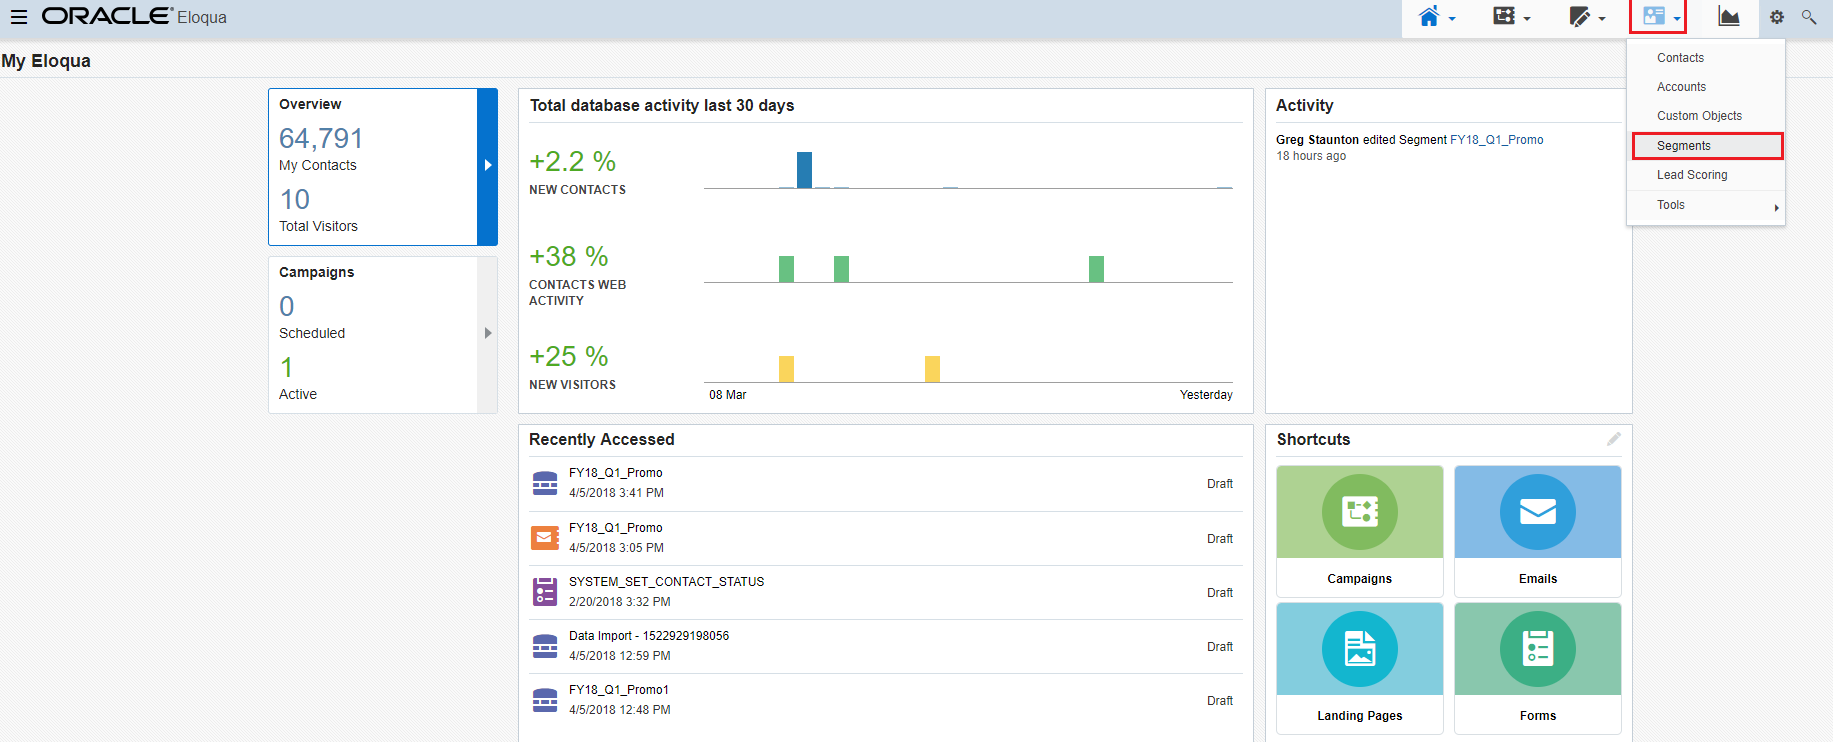
Navigate to Audience, then click Segments.
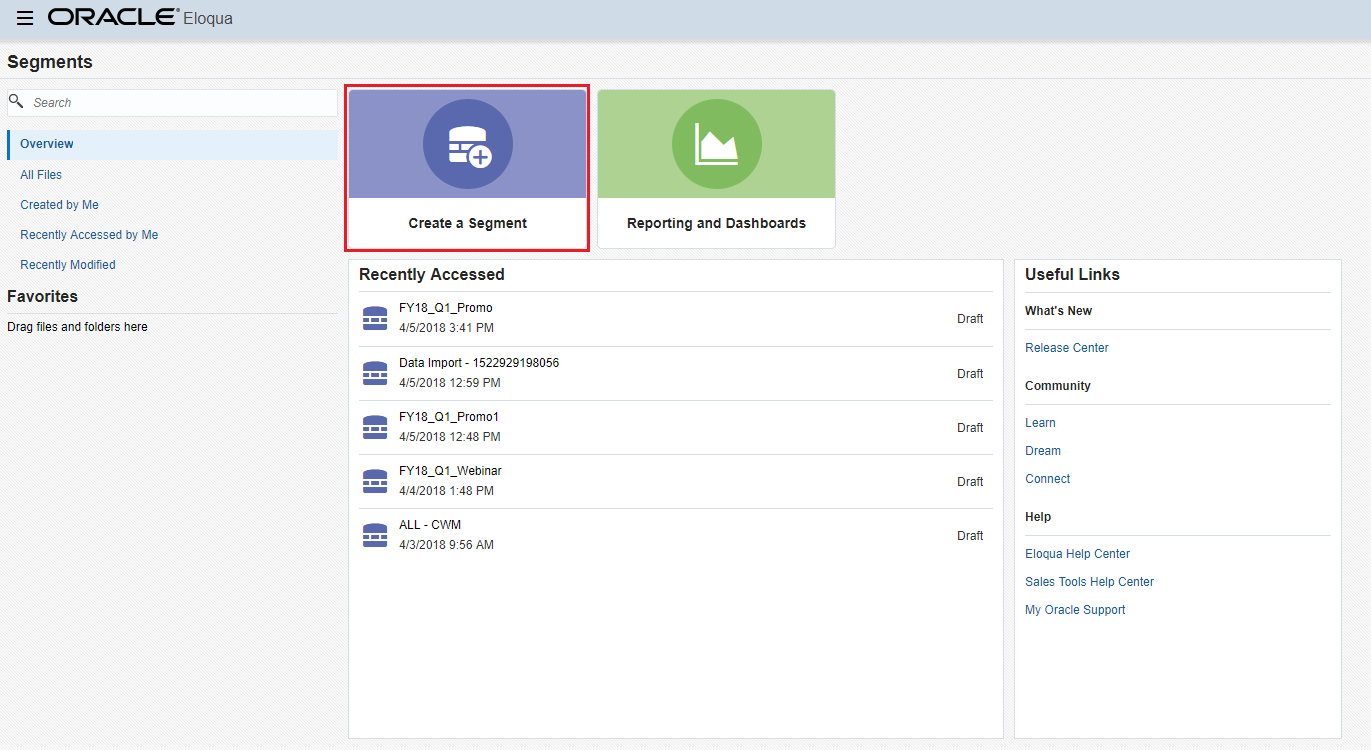
Click Create a Segment.
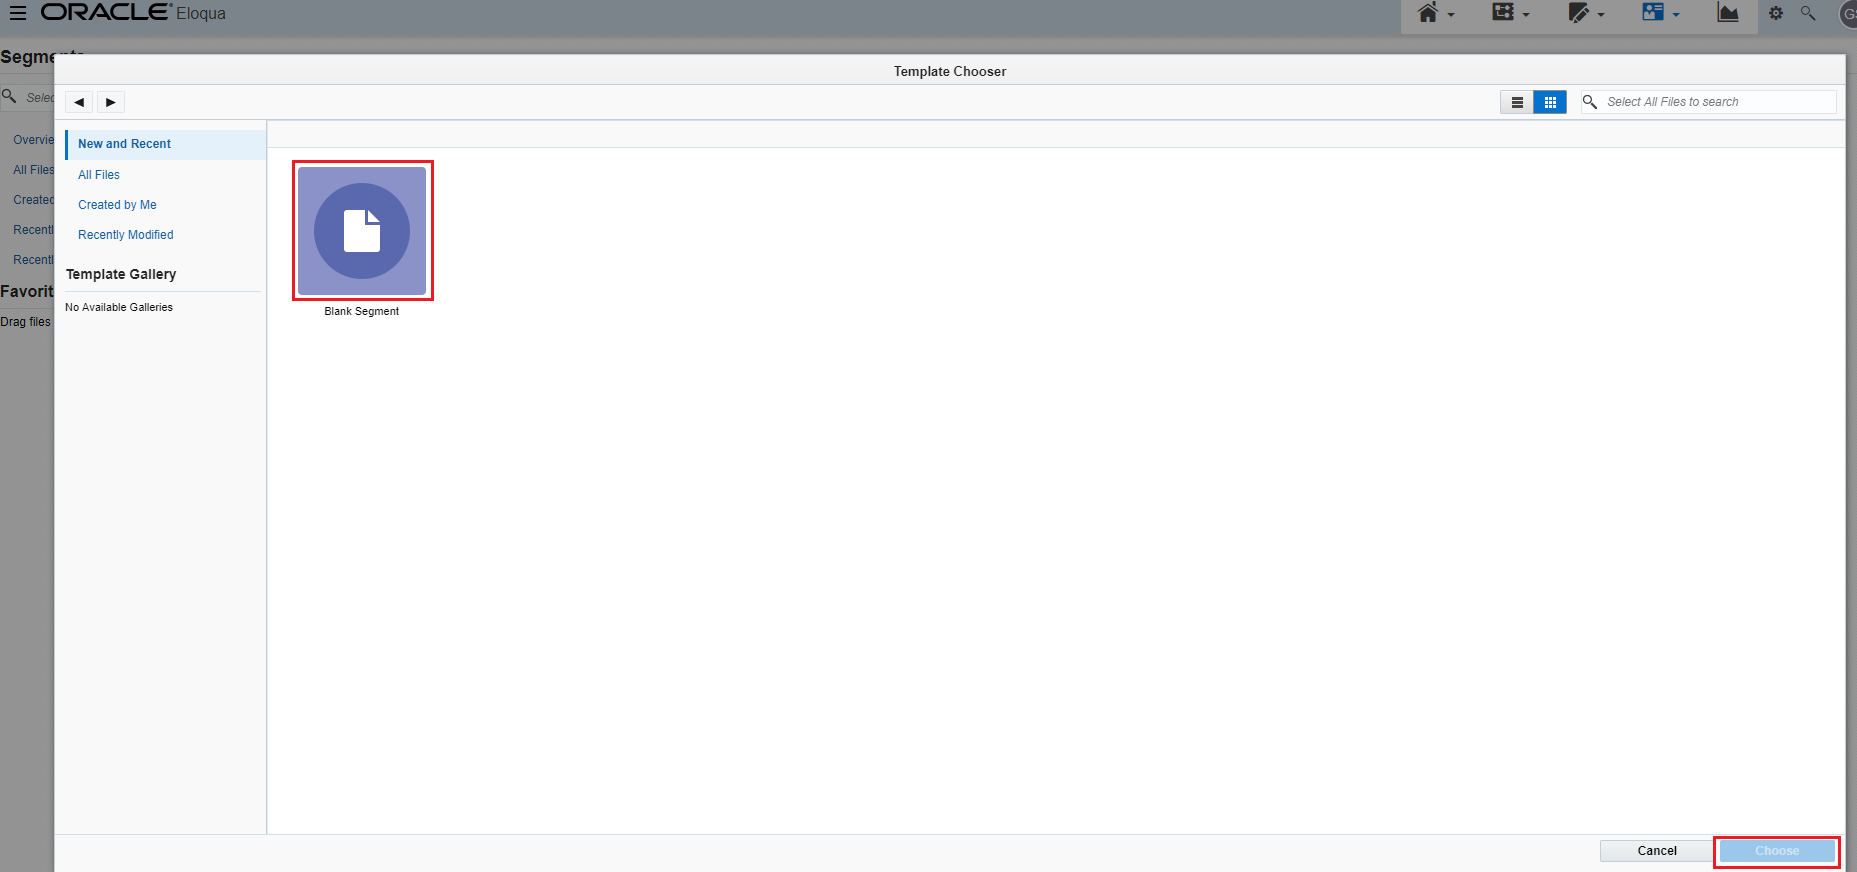
Click Blank Segment or a template, then click Choose.
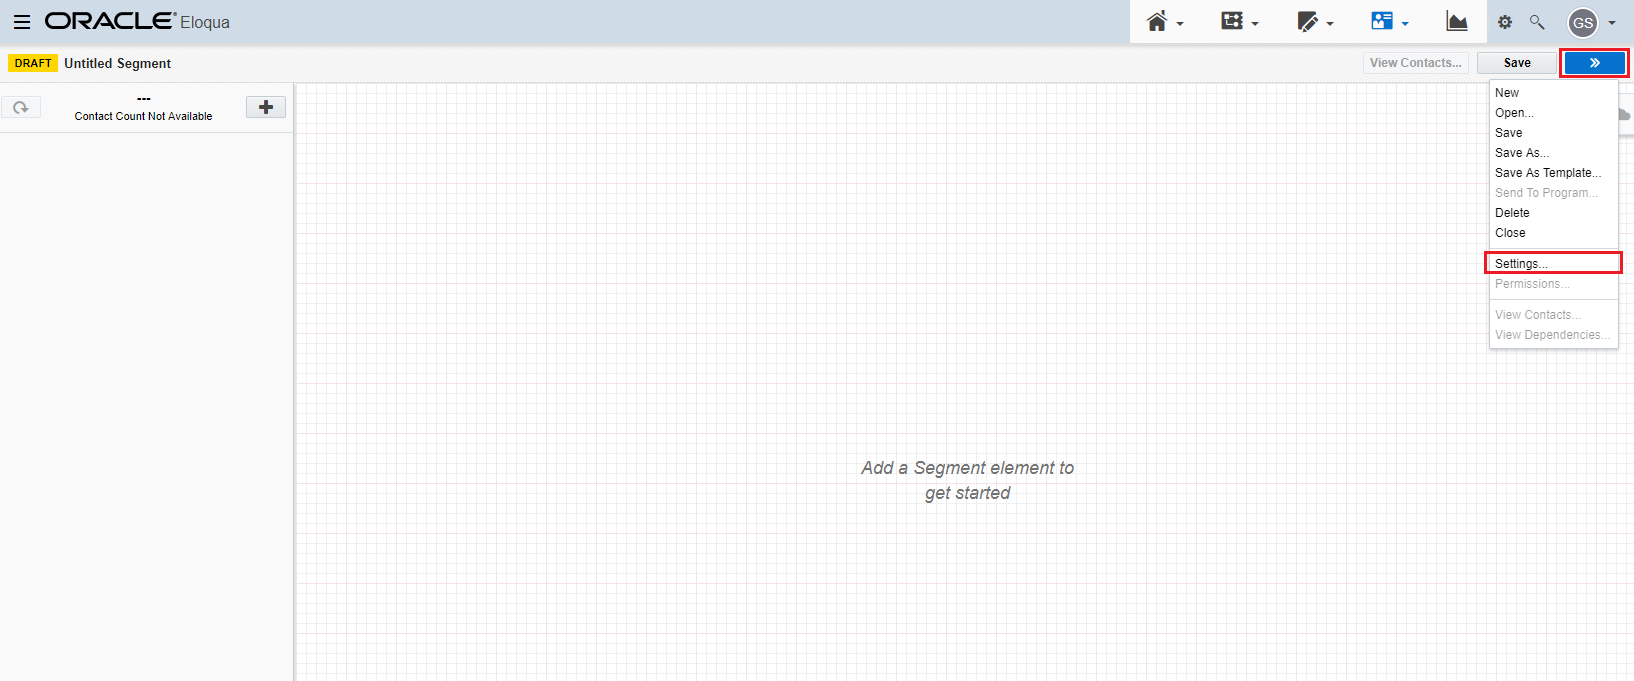
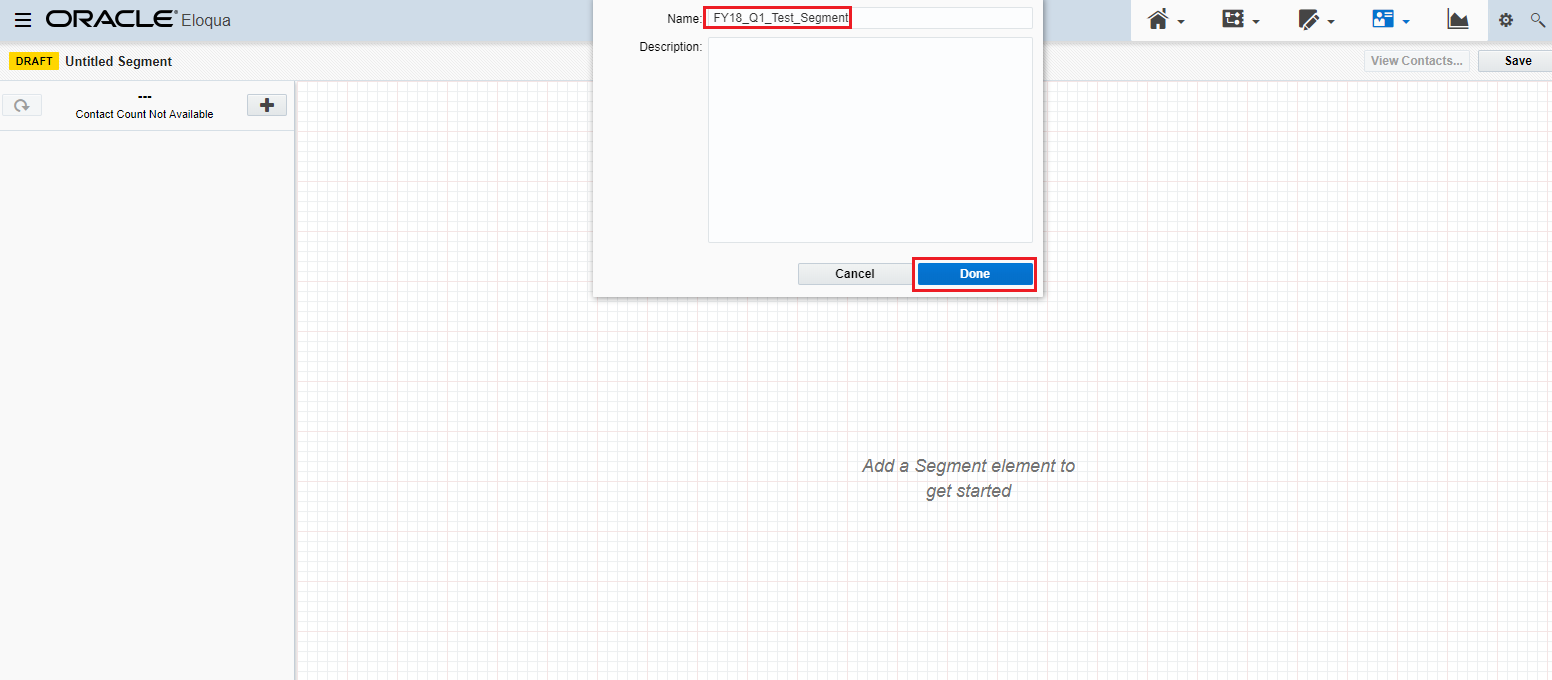
To name the segment, click Actions, then click Settings.
Type a name and description of the segment and click Done.
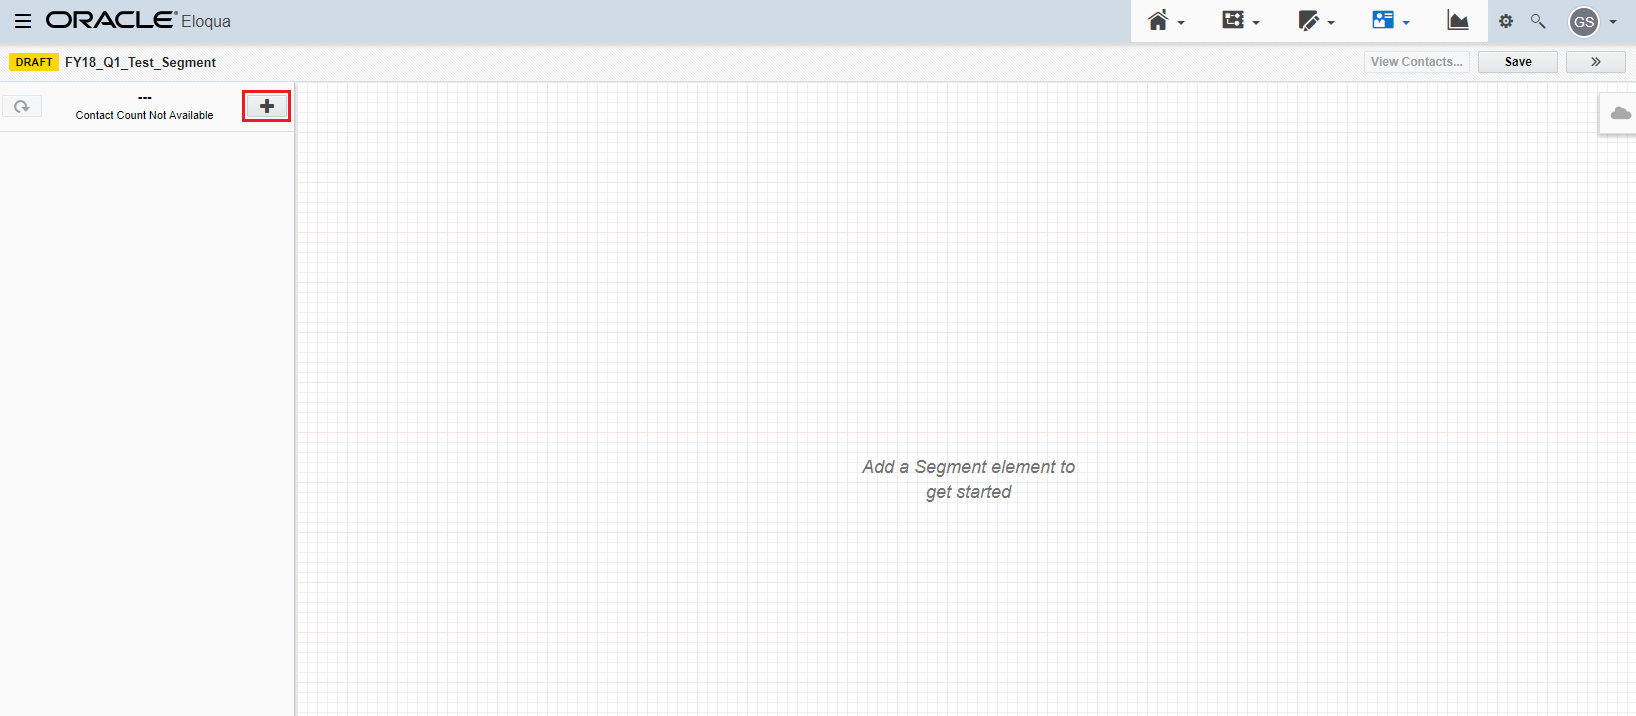
To build your segment, in the left pane, click Add.
Then you may click on one of the following options:
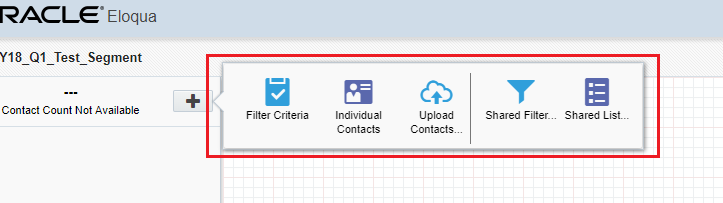
- Filter criteria: Filter contacts based on implicit or explicit data about the contact. For example, filter for a hot lead score or engaged contacts. Or filter based on contact or account fields. Filters are a powerful component of segmentation and you can include multiple filters to make sure you reach your target audience.
- Individual contacts: Add individual contacts from your database.
- Uploading contacts: Upload contacts from an upload file.
- Shared filter or shared list: Use a shared filter or list available to you.
FILTER CRITERIA
You can use filter criteria to dynamically build your segment. For example, you can build a segment based on contact fields, lead score, digital body language, and so on.
Click on Filter Criteria.

You will now see the filter interface.
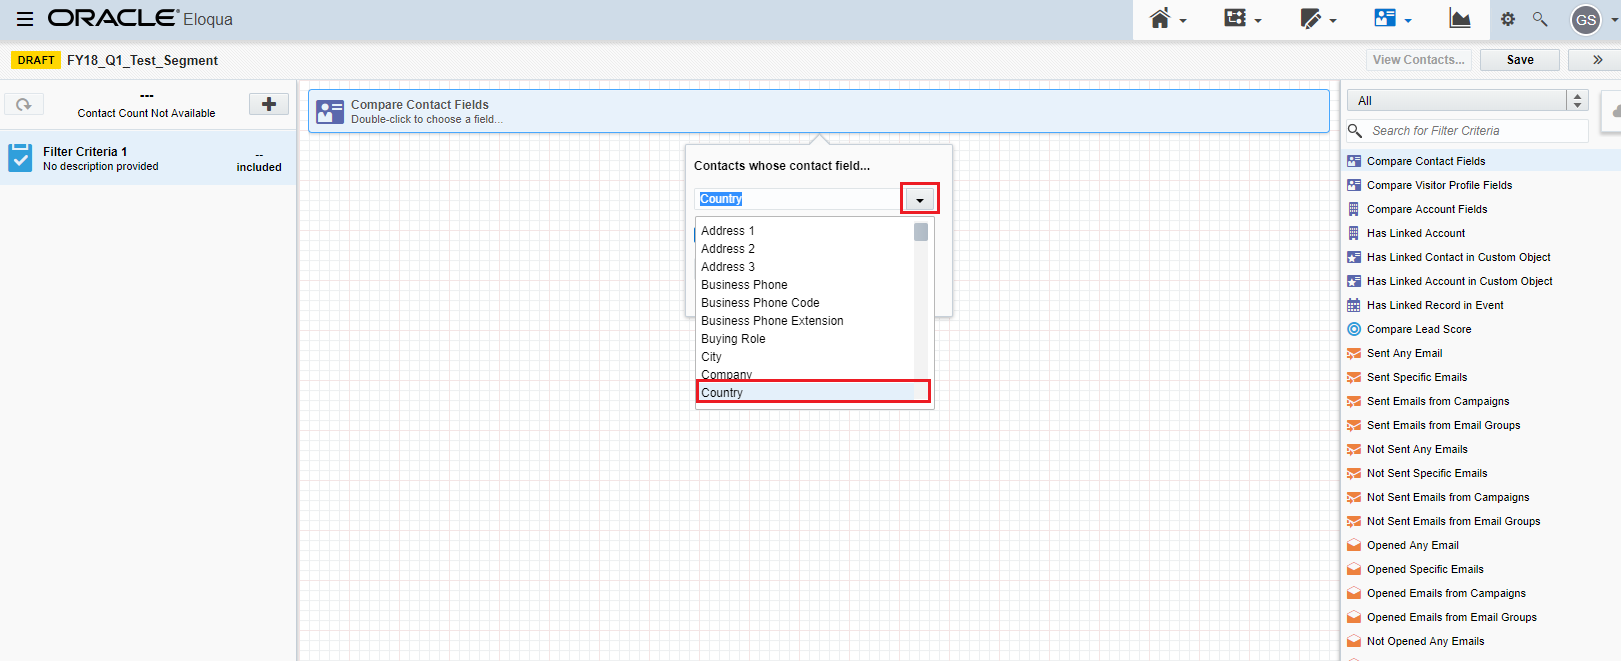
On the right hand side you will have your conditions. You need to drag conditions over from the right hand side onto the Segment Canvas. For this example we will use compare contact fields.
Double click on your condition.
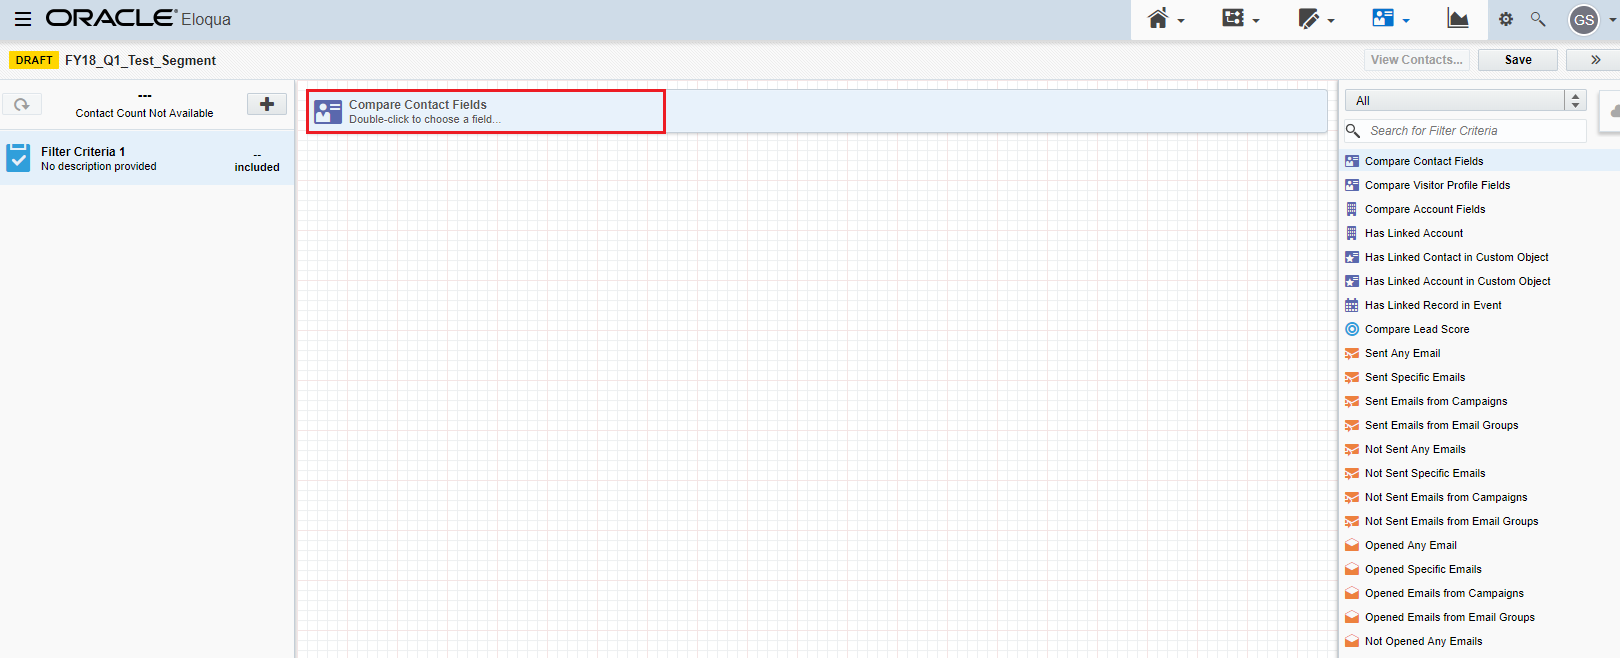
Now set the condition using the instructions on the interface. In this example we will use Country.
Select the contact field “country”
Select the operator.
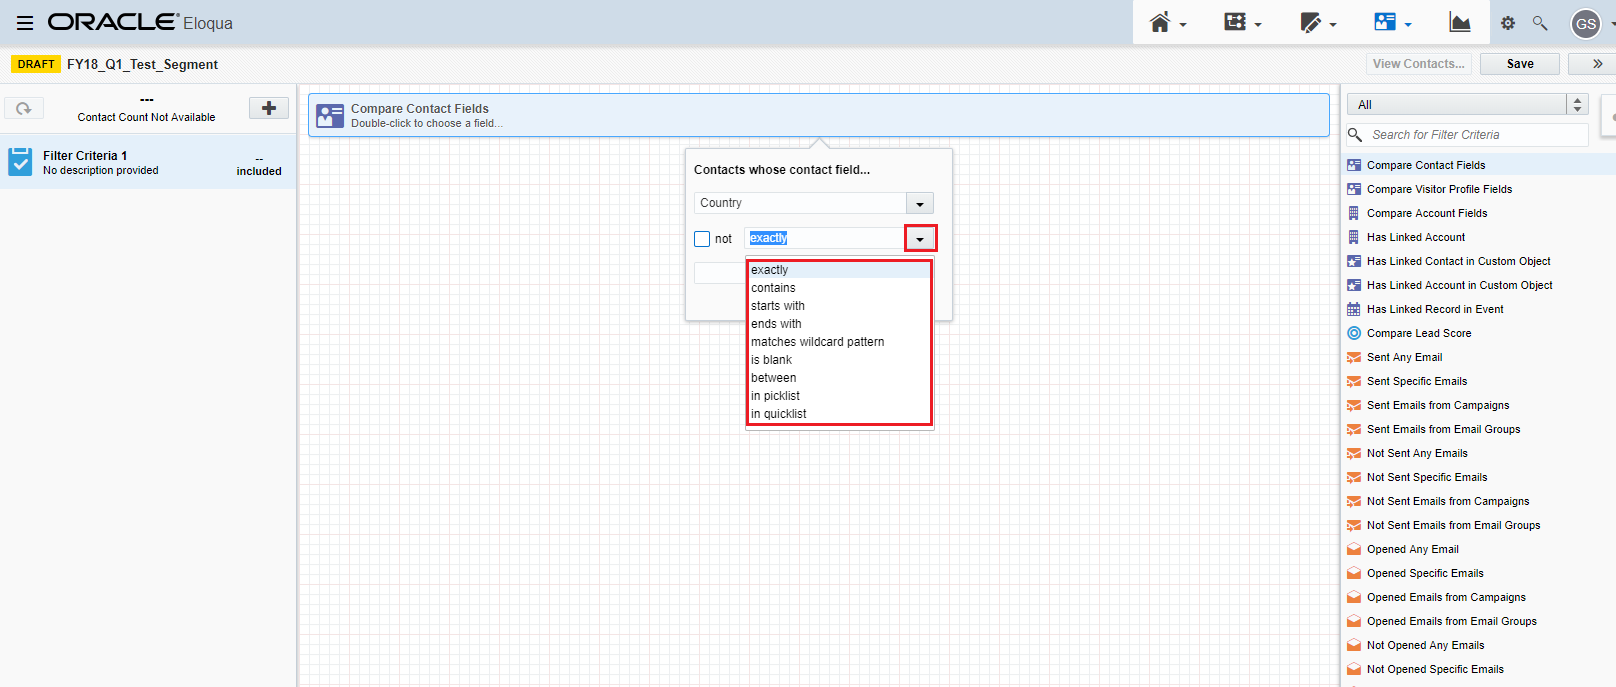
You will have several options:
|
Operator |
Description |
|
Exactly |
Contacts who’s field contains the exact variable e.g. If the contact field selected was Country and the variable was US it would bring you all contacts that are located in the United States |
|
Contains |
Contacts who’s field contains the part of the variable e.g. If the contact field was job title and the variable was marketing it would bring you all contacts that have marketing in their job title |
|
Starts with |
The variable starts with…. e.g. If the contact field was job title and the variable was Chief it would bring you contacts that had job titles such as Chief Executive Officer, Chief Financial Officer, etc. It would not bring you contacts like Operations Chief, etc |
|
Ends with |
The variable ends with….
e.g. If the contact field was job title and the variable was manager it would bring you contacts that had Marketing Manager, Sales Manager, etc. It would not bring you contacts like Manager of Operations |
|
Matches wildcard pattern |
The wildcard pattern can include the characters ‘?’ and ‘*’ ‘?’ – matches any single character ‘*’ – Matches any sequence of characters (including the empty sequence) |
|
Is blank |
The contact has no value in that field |
|
Between |
Usually used on number fields. e.g. If the contact field was company size and the variable was 1000 and 6000 it would bring you those companies between. |
|
In picklist |
The contact has any value contained within a picklist e.g. If the contact field was country it would bring you all contacts that have a value in the country picklist, not contacts with no value or one that isn’t listed. |
|
In quicklist |
The contact has a value contained in a quicklist A quicklist is created using a comma between each value. US,UK would bring you all contacts in Great Britain and the United States. |
You can also use wildcards. In Eloqua a wildcard is *.
You will also notice that you have a No operator. This will bring the opposite values. For example, if you set the filter condition to Country is NOT Exactly UK it will bring you all contacts that are not in the UK.
Finally set the variable.
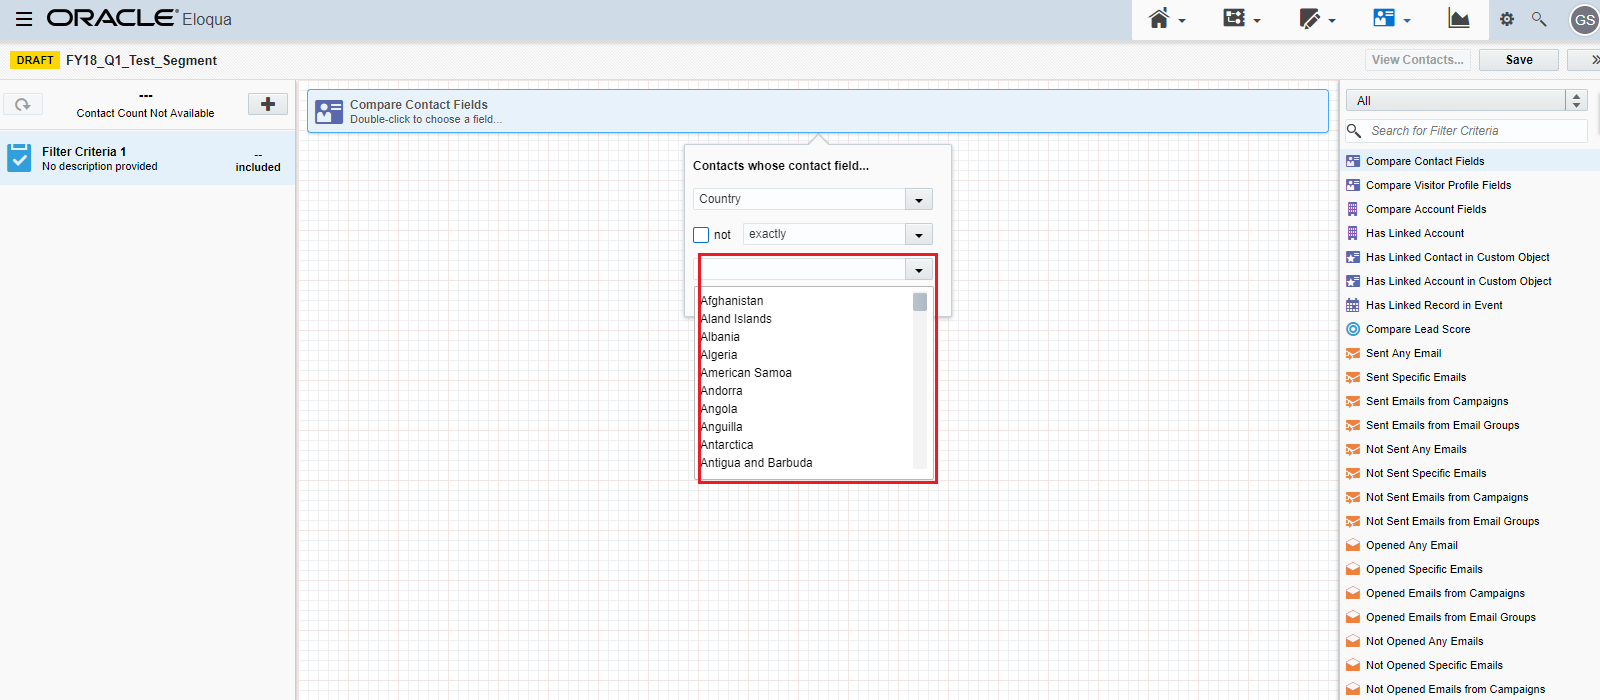
You will notice a number of different options.
There are three different methods of filtering contacts:
- Field Filters
- Activity-Based Filters
- Inactivity-Based Filters
FIELD FILTERS
A field filter is based on the values found in one or more specified fields in the contact record. For example, you may filter to find contacts that are located in a specific city (Detroit), work for a company in a specified revenue range ($10-100 million), and have one of several job titles (VP, CIO, or CMO).
You can use a field filter to carry out a number of different functions, adding the results to a segment or Program. For example, you can filter contacts:
- Geographically – By city or cities, state(s) or provinces, country or countries, region (such as NA, LA, EMEA, or APAC), postal or zip code, or area code.
- By the job title or role of the Contact – Include or exclude specific titles or roles.
- By IP address, email address, or domain – Allows you to create suppression lists for your competitors, exclude Contacts from your company’s domain(s), exclude private email addresses (such as *@yahoo.com or *@gmail.com). In some cases, you can also identify domains in specific countries by the country identifier in the domain (for example, “.de” for Germany or “.ru” for Russia).
- By the company information – The company name, DUNS number, age, size, number of employees, revenue, or industry.
- By agent or salesperson – Define sales territories to create tailored segments and contact lists.
- By product interest or products already installed or used.
- By subscriptions (for example, to subscription groups or newsletters) or consent status for receiving additional emails or other communications.
- By timing – Based on when the contact record was created or last updated.
- By partner status – Whether the contact is a partner or is affiliated with a partner.
- By Lead Score or Lead Rating – Generated by applying lead scoring criteria to contact information in Eloqua.
- By checking for blank – For example, to create a contact list of contacts with information missing from their profile data
- By a combination of these criteria.
ACTIVITY BASED FILTERS
Activity-based filters capture the activities the contact has carried out regarding your marketing collateral and channels. For example, a contact may have been sent at least three emails in the past three months, opened two, and clicked-through on one. The criteria you set may reflect a typical profile for a potential customer.
INACTIVITY BASED FILTERS
Inactivity-based filters capture mostly things that the contact did not do to interact with your marketing collateral or channels. For example, a contact may have been sent at least three emails in the past three months, but did not open any of the emails and did not visit your website. You may use this type of information to target contacts for further lead nurturing activities.
USING LOGIC IN FILTERS
You can use logic to create advanced filters using groups with AND/OR logic.
AND/OR logic can be used simply by selecting the operator you want by clicking on it to change it.
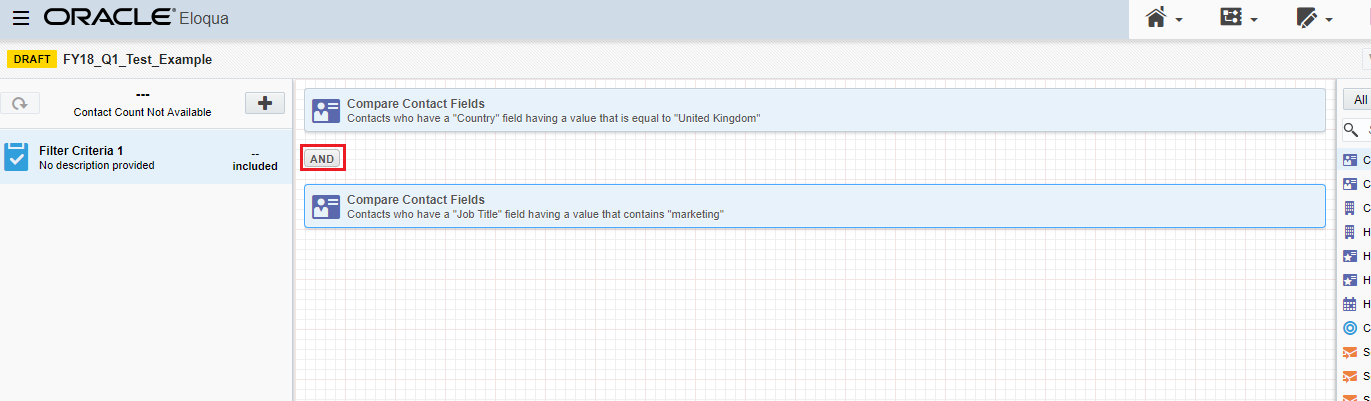
By default, it is set to AND, if you click on It, it will change to OR.
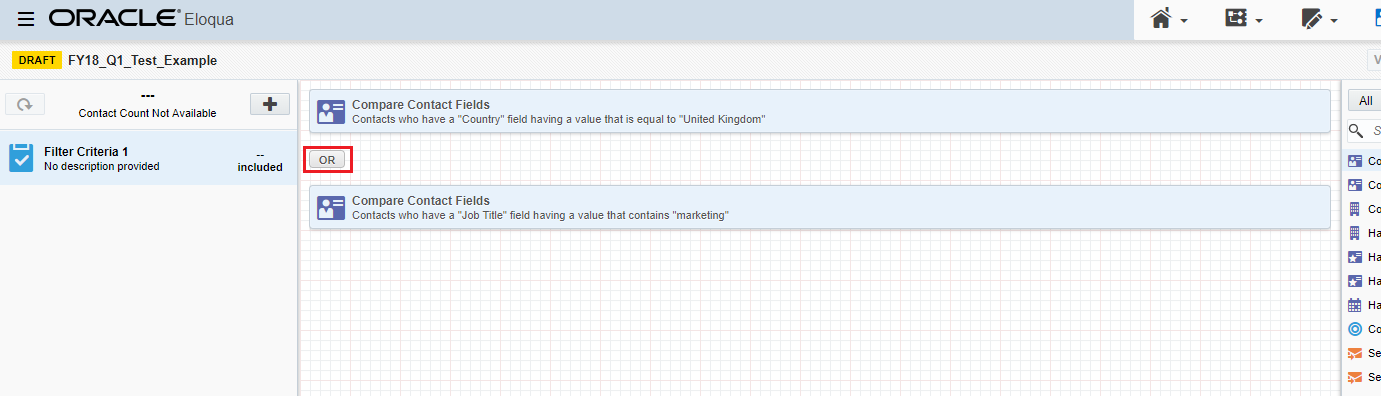
For more advanced filters you can use grouping. Grouping allows you to create filter criteria using AND/OR logic in combinations.
You need to click on the conditions that you wish to group together. Use the shift button to select the first and last condition you wish to group together, you will notice that they will be highlighted in blue, then click on Group.

You will notice now that the criteria that you have now has brackets around it.
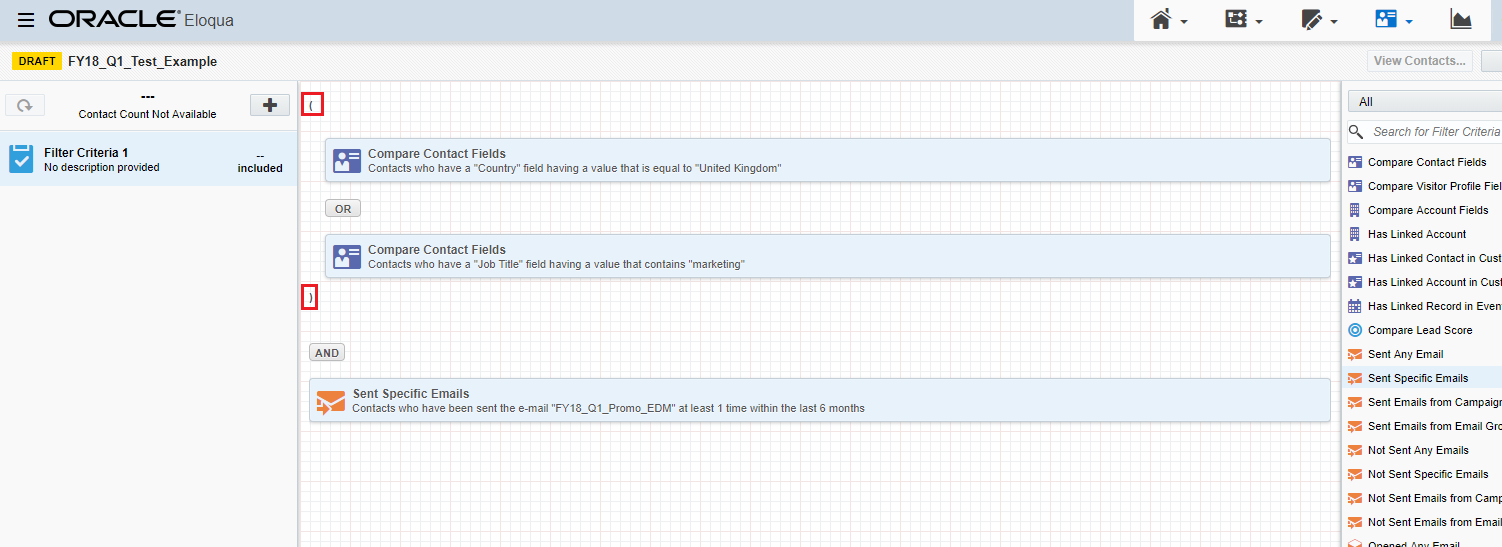
UPLOAD CONTACTS TO SEGMENT
You can also import lists. Once you have created your first filter criteria (you can create multiple filter criteria) click on the Action button (plus sign) and select Upload Contacts.
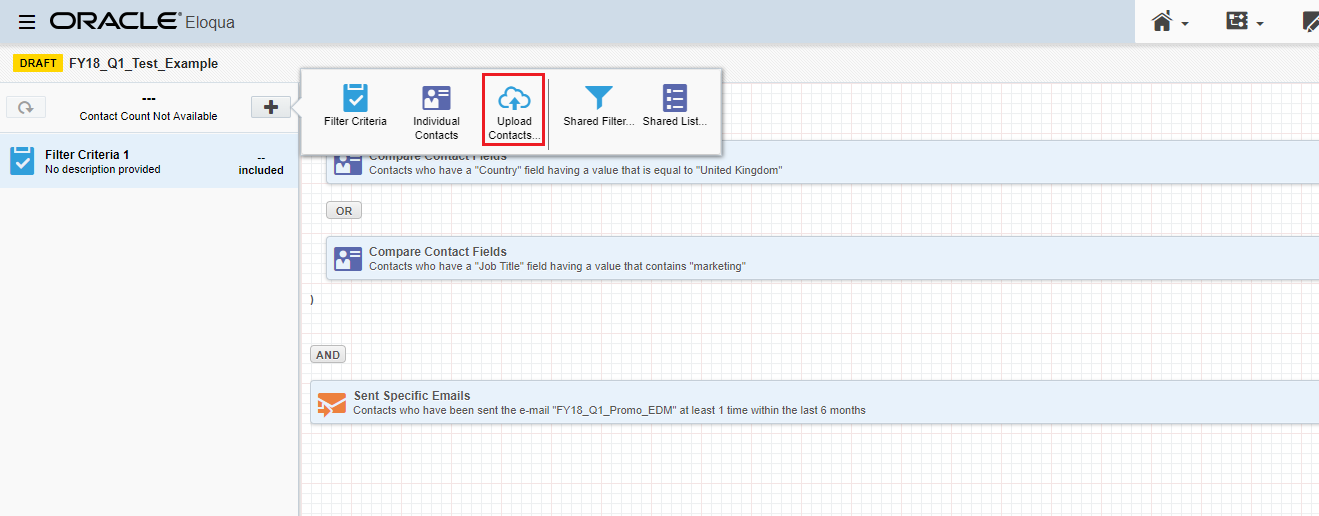
You will need to use the Eloqua upload wizard. Click on the cloud and then select the file that you wish to upload.

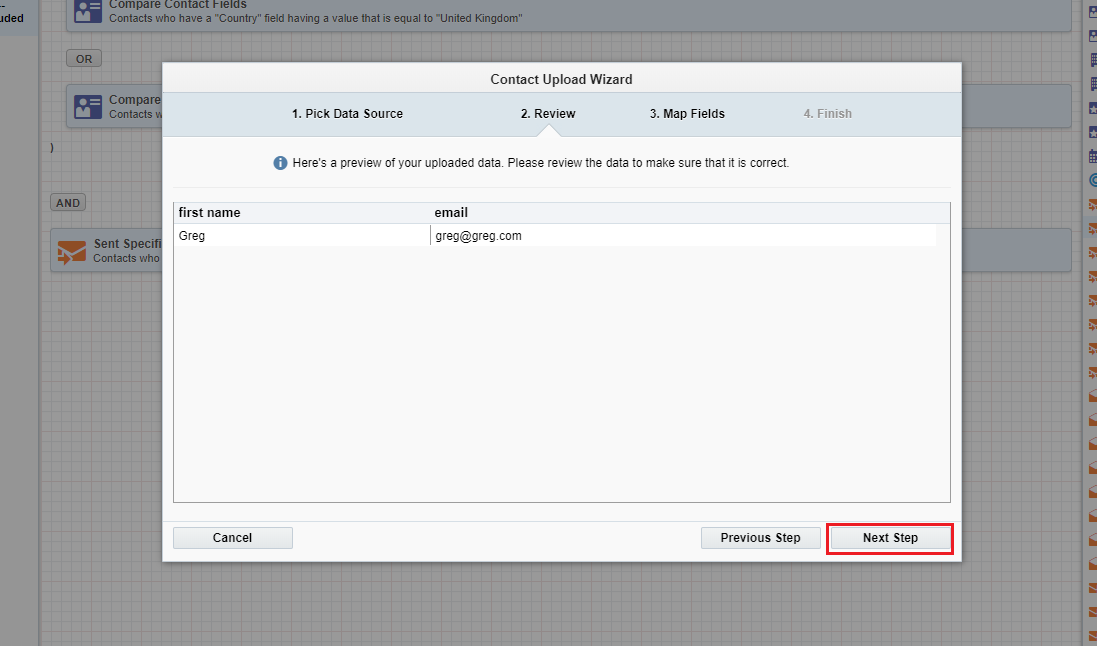
You will now be able to preview the contacts you are uploading. Then click on Next.
Make sure that your upload is set to the correct target fields. If you need to set a field double click over the area you wish to set the source field to.
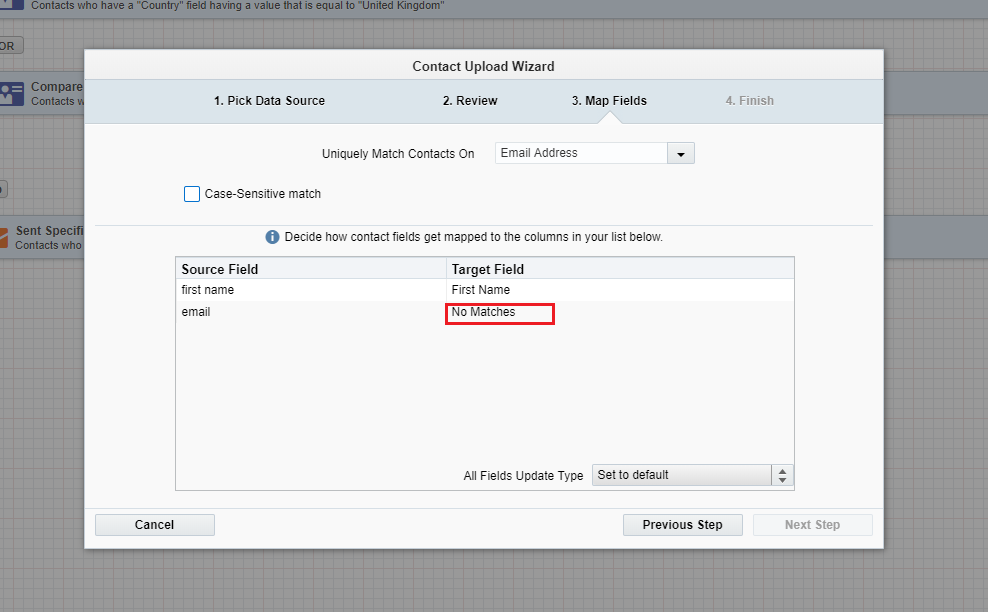
Find the target field you wish to set the source field to by either using the dropdown or the search bar, then set the field and click away.

You will need to ensure that Email Address is set as a minimum. When you have set the target fields you will need to click Next.
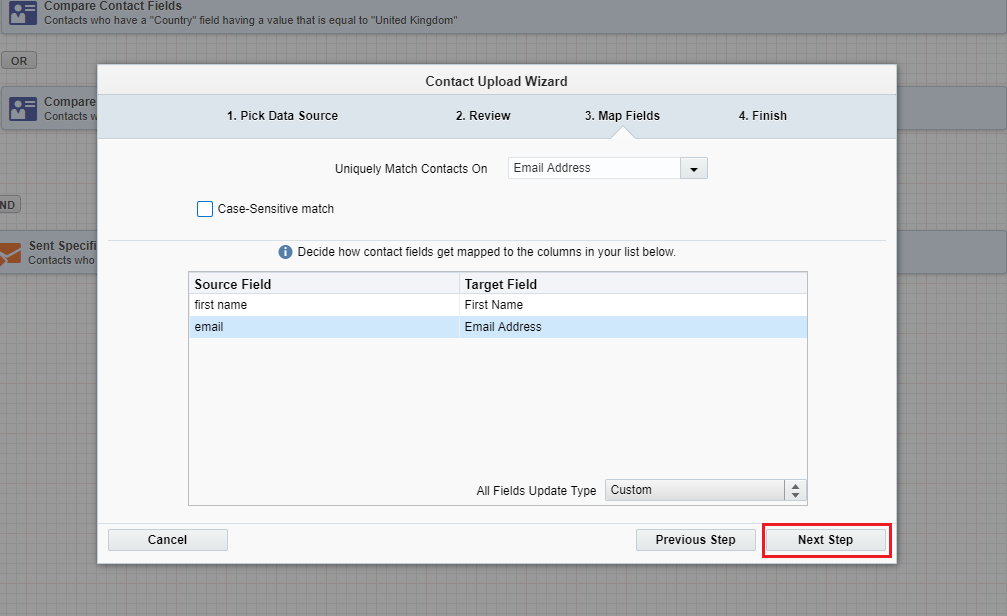
Finally click Finish.

You have now imported a list.

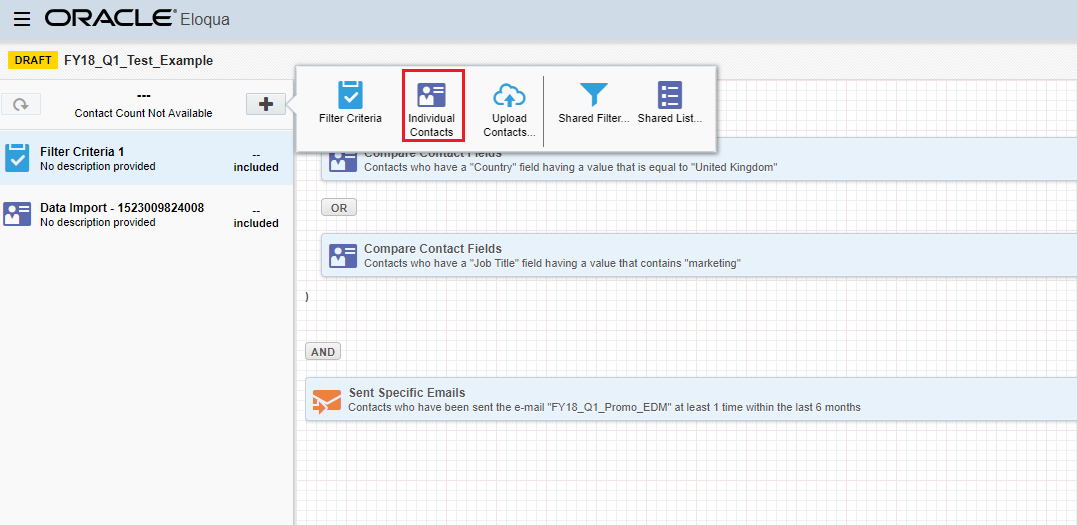
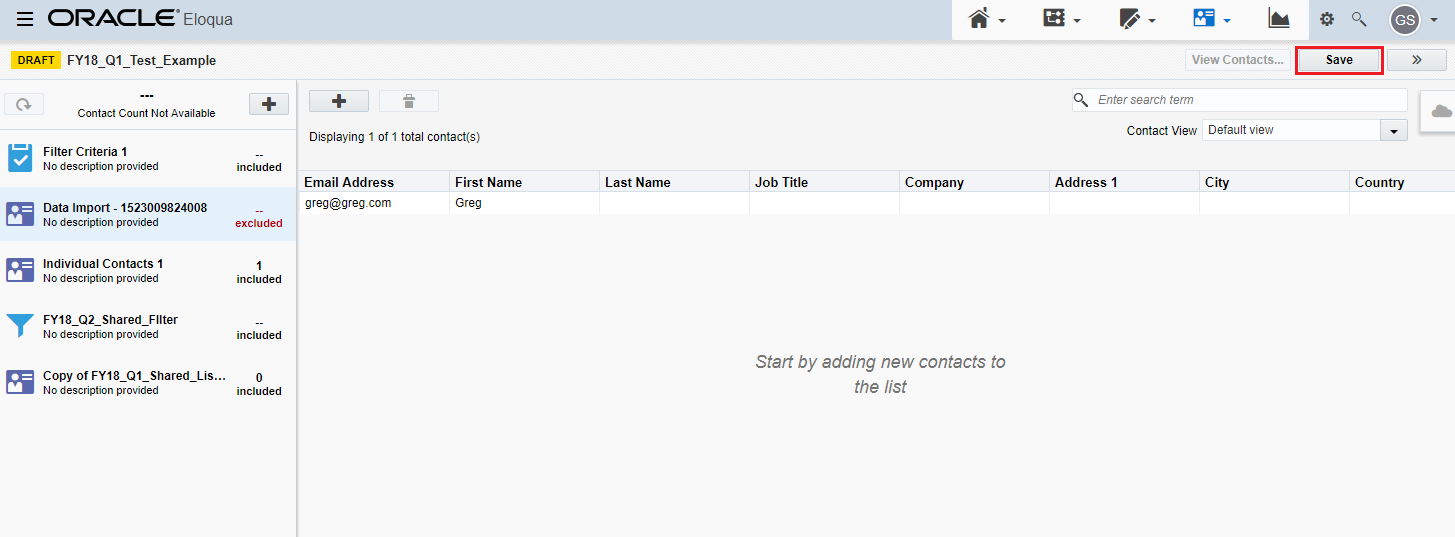
ADDING INDIVIDUAL CONTACTS TO THE SEGMENT
There are a number of other options that you can use. You can also add individual contacts (very rarely used), click on Individual Contacts.
To add an individual contact, click on the plus button.
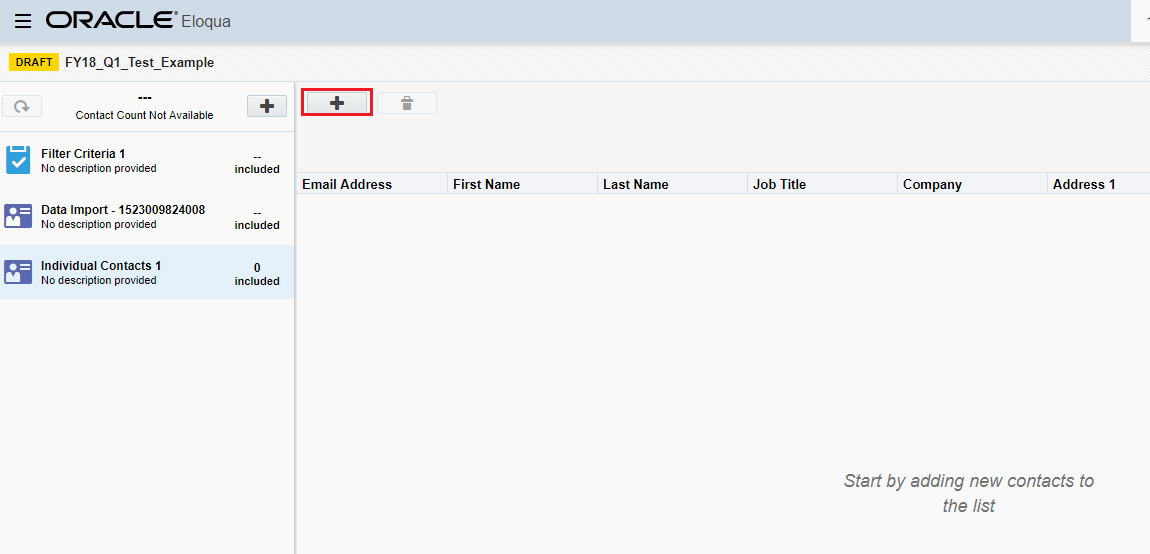
Find the contact you wish to add as an individual. You must search using email address.

Click on the contact that you wish to add by clicking on it.
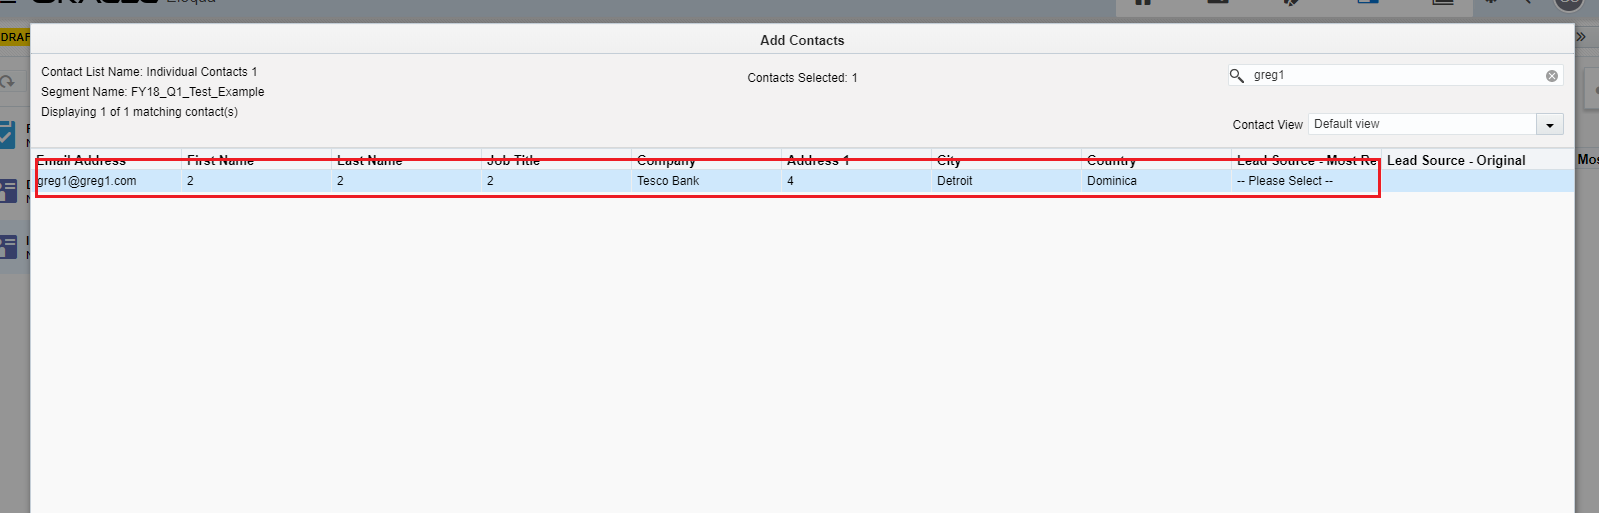
Then click on Add Contacts
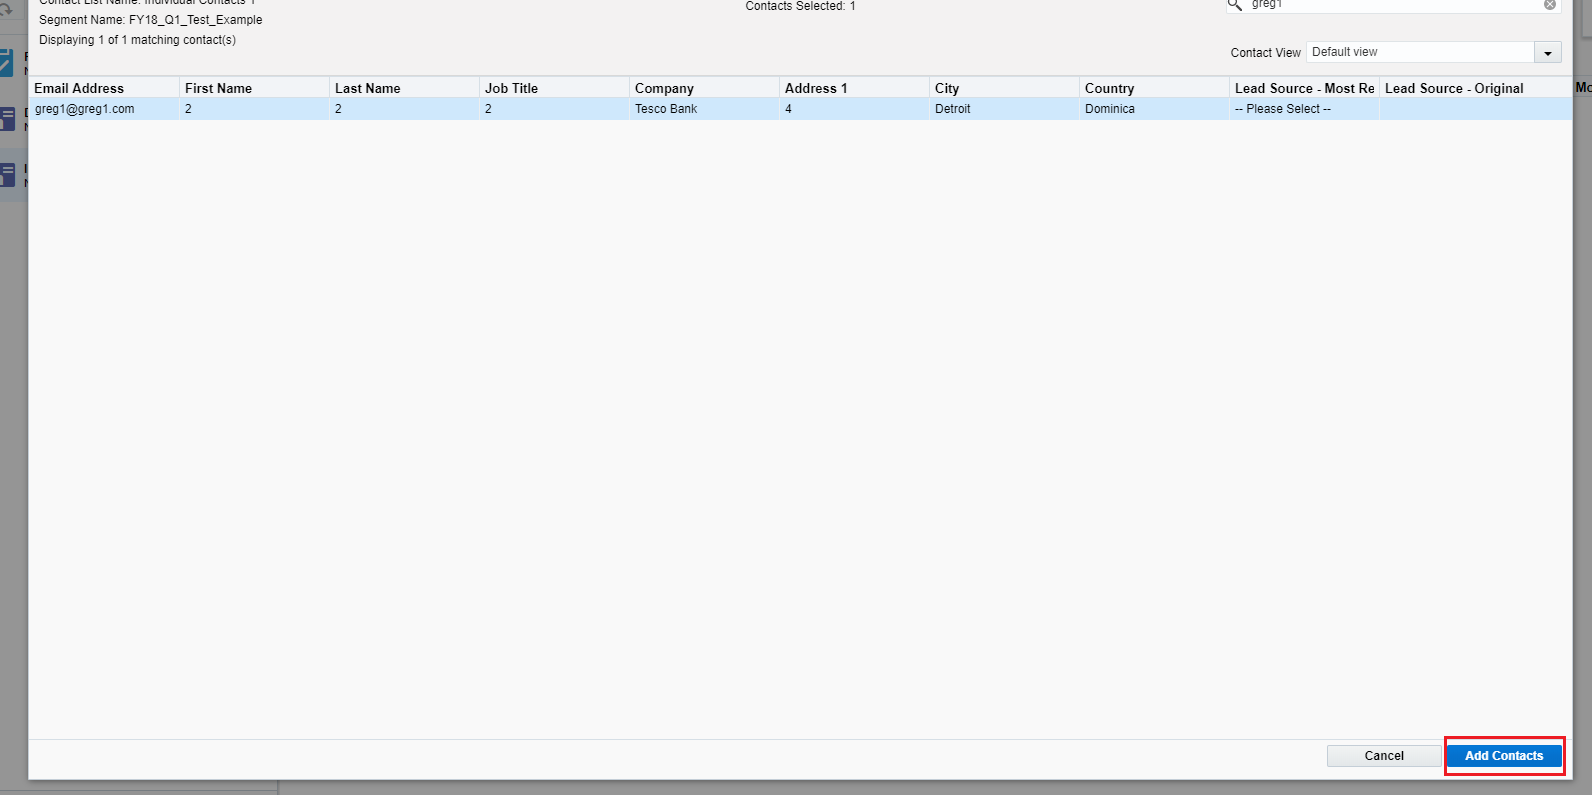
Repeat as need be until you have all the contacts you want to select individually.
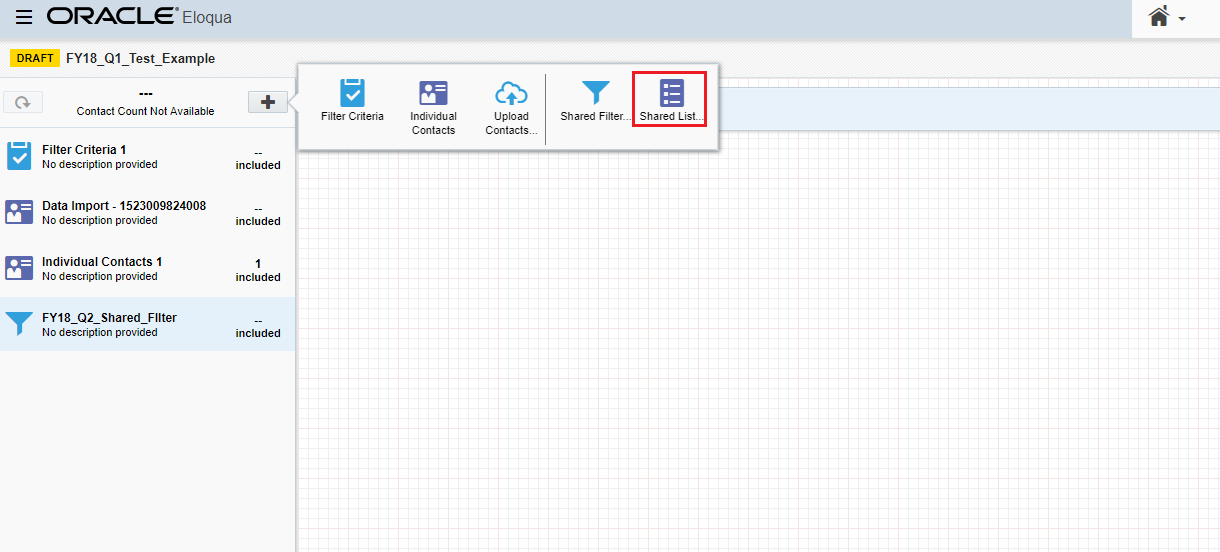
ADDING SHARED FILTERS TO THE SEGMENT
There are two other options available to you. You can use existing Shared Filters, click on the Action (plus sign) and then click on Shared Filter.
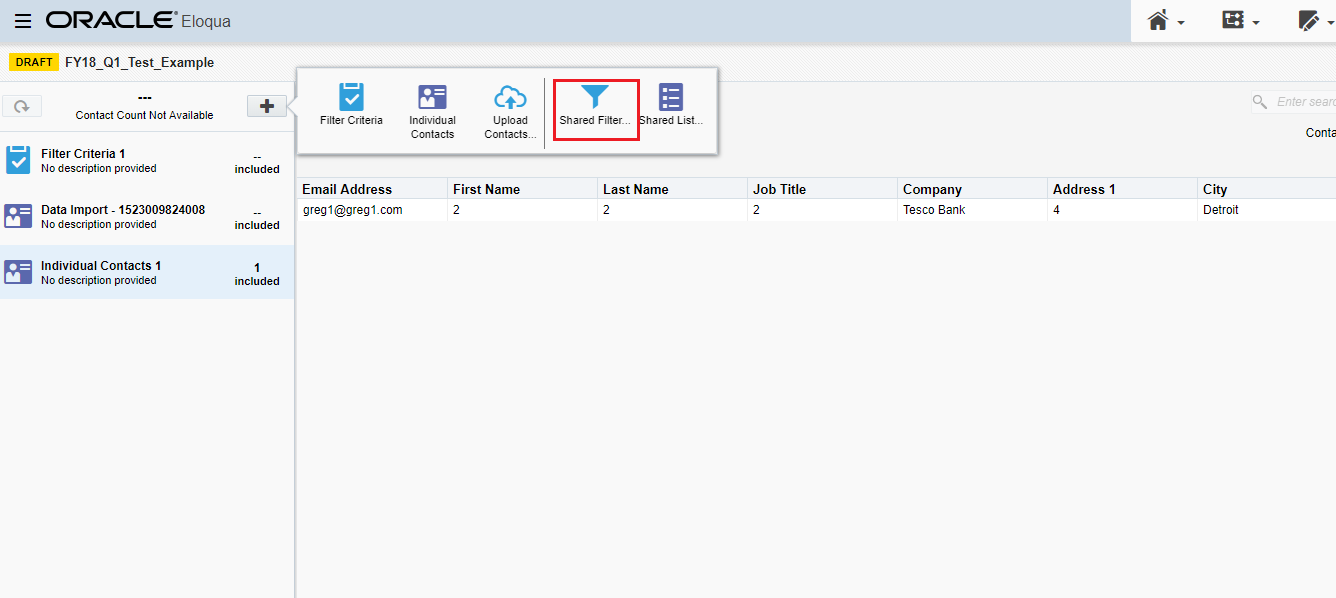
Navigate to the folder that the shared filter you wish to use is held, then click on it and click Choose.

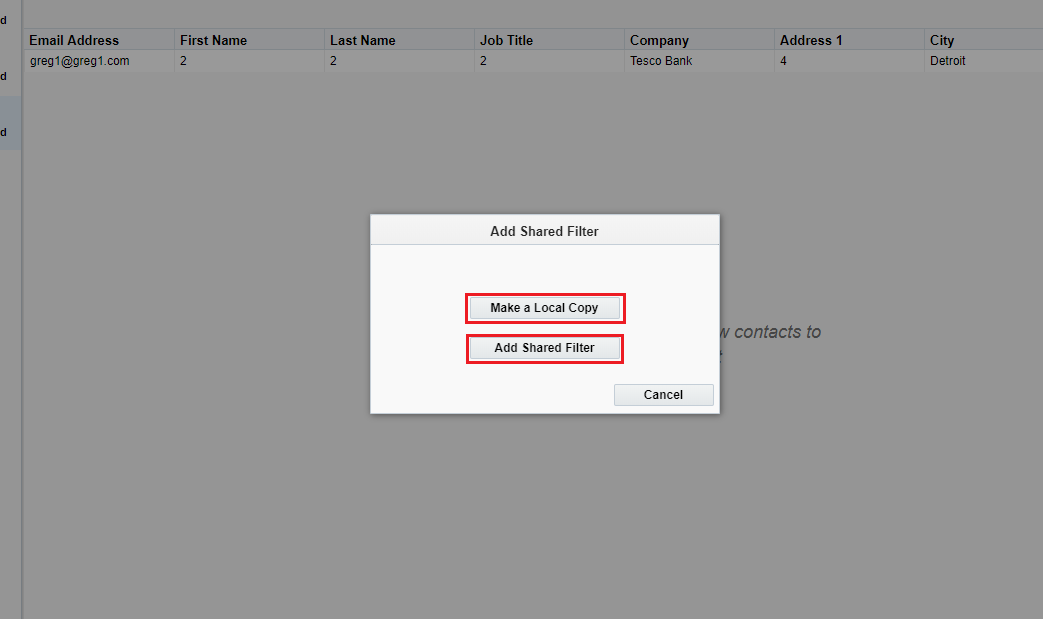
You now have the option to make a local copy or add the shared filter. If you choose to make a local copy then you can update it using the same steps as creating a filter for your segment.
Think of it as a carbon copy of the shared filter which you can then update.
If you choose to add a shared filter then it will just bring in the shared filter.
It is not advisable to update this shared filter otherwise you will update it for all other parts of the platform that use it.
ADDING SHARED LIST TO THE SEGMENT
You also have the option to add a shared list. Click on Action (plus sign) and select Shared List.
Now you need to choose if you wish to create a local shared list or add the existing shared list. The same rules apply as with shared filters.
There is one final thing that you can do with your filters, shared lists and individual contacts. You will notice that what we have done is just use include criteria.
You have the ability to set all the criteria you have created above to an exclude, thus creating even more powerful segmentation.
To switch segmentation criteria to exclude you need to right click on the segmentation criteria and set it to exclude.

When you have created your segment you need to save it.
Drill into the folder that you wish to save your segment in, give it a name and then click Save.


Eloqua Training: 106 Eloqua Simple Email Send Playbook
106 Eloqua Simple Email Send Playbook Introduction A simple email send is a way that you can send out a one-off email without the use of campaign canvas. You can also use A/B split testing as well using this module very easily. A newsletter is a perfect example of why...

Eloqua Training: For beginners
Eloqua training for beginners I had a subscriber reach out to me thanking me for the training articles I have put together so far but they are a little earlier on in their Eloqua career so they asked if I could put together a basic fundamentals training package. ...

Eloqua Training: 103 Form Creation in Eloqua
Creating forms 1 Introduction Forms are an integral part of landing pages, they are the method employed through which users can transmit their data back to Eloqua and ultimately become leads for your sales team to follow up. This user guide has been developed...

Eloqua Training: 102 Email Creation Using the Template Editor
102 Email Creation Using the Template Editor 1 Official Eloqua Documentation For generic Oracle documentation on the Email editor, please see here: https://docs.oracle.com/cloud/latest/marketingcs_gs/OMCAA/index.html#Help/Emails/Emails.htm%3FTocPath%3DEmails%7C_____0 ...